
What you need

This teardown is not a repair guide. To repair your Humax IRHD 5000C, use our service manual.

  1. Humax IRHD 5000C Teardown, open up case: step 1, image 1 of 2 Humax IRHD 5000C Teardown, open up case: step 1, image 2 of 2
    • Unscrew the screws on the outside.

    • Slide the top cover a bit to the back, and lift it from the enclosure.

  2. Humax IRHD 5000C Teardown, remove power supply: step 2, image 1 of 2 Humax IRHD 5000C Teardown, remove power supply: step 2, image 2 of 2
    • Remove the various pieces holding in the power supply.

    • Remove power cable (already cut of in the photo).

    • Unscrew screws.

    • Disconnect mainboard cables.

    • Remove the power supply from the enclosure.

  3. Humax IRHD 5000C Teardown, remove front: step 3, image 1 of 2 Humax IRHD 5000C Teardown, remove front: step 3, image 2 of 2
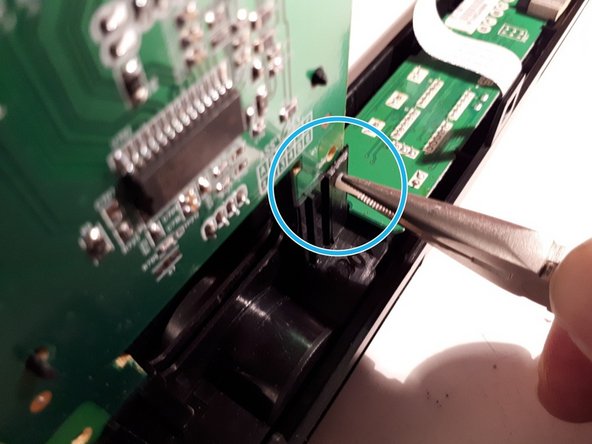
    • Disconnect the cables connecting the mainboard to the front panel.

    • With a flathead screwdriver, unclip the 2 topside clips, and 3 clips on the bottom of the enclosure, and the front will detach.

  4. Humax IRHD 5000C Teardown, disassemble front: step 4, image 1 of 3 Humax IRHD 5000C Teardown, disassemble front: step 4, image 2 of 3 Humax IRHD 5000C Teardown, disassemble front: step 4, image 3 of 3
    • Unclip the 4 clips from left to right, and remove the panel.

    • With the pliers, clamp the white connector and push it through.

  5. Humax IRHD 5000C Teardown, remove mainboard: step 5, image 1 of 2 Humax IRHD 5000C Teardown, remove mainboard: step 5, image 2 of 2
    • Unscrew the screws and remove the mainboard from the case.

knipwim

Member since: 09/01/18

8,517 Reputation

30 Guides authored

2 Comments

What are those unsoldered pad connectors for? A hard drive?

Jessica Parnelli Fawkes - Reply

Don’t know, could be a SCSI drive, there are 68 pins. I included a detail picture in the last step.

knipwim -

Add Comment

View Statistics:

Past 24 Hours: 0

Past 7 Days: 3

Past 30 Days: 6

All Time: 1,425