Introduction
All the steps to get you from top to bottom of the Adventurer 3 case.
What you need
-
-
Clean the tabletop. You're going to be laying your printer on its side to take off the case. So avoid scratching it all to heck, like I did. Take the time now to brush all those little filament bits off the table and maybe even put down a towel as padding, like I didn't.
-
Remove the white filament cover plate on the right side of the printer.
-
Unload your filament using the screen prompts.
-
Turn it off then unplug your printer.
-
-
-
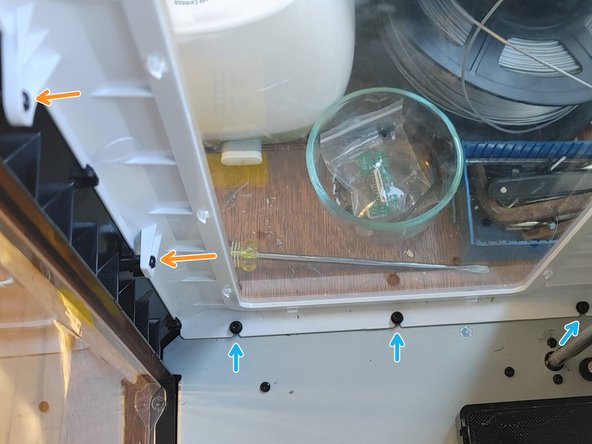
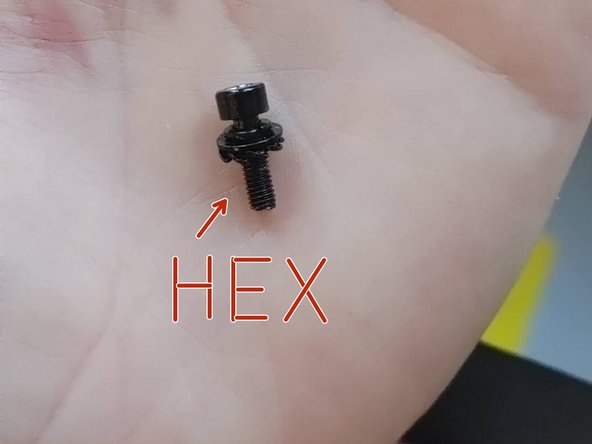
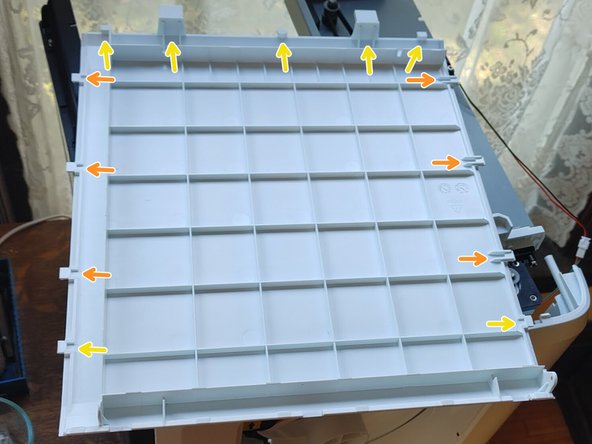
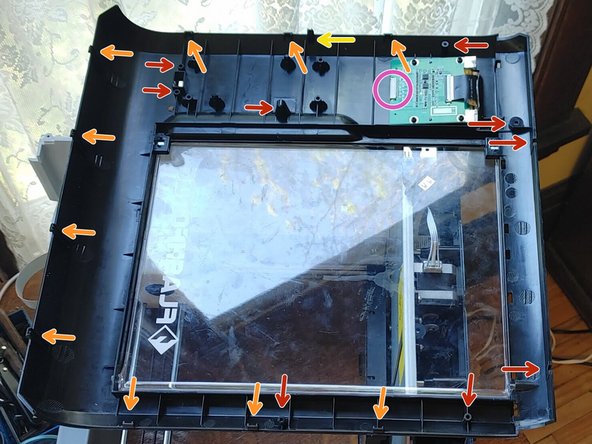
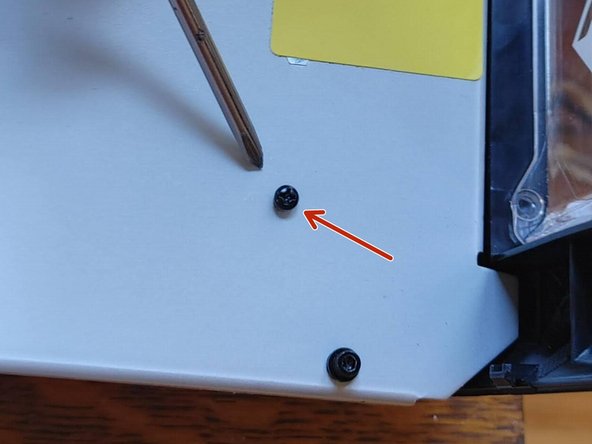
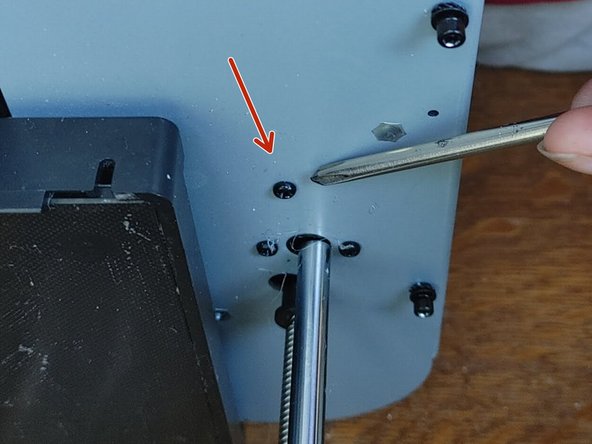
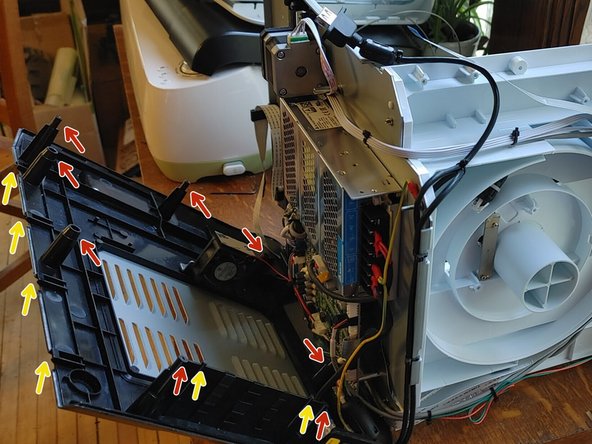
SCREWS: Four long silver hex screws secure the base. Five short black hex screws with washers secure the sides to the inside floor. The rest are short black phillips (+) screws. Two of those are a bit longer for the back's top corners. It's a good idea to put them in a bowl to avoid losing them. Screws are marked with red arrows on photos.
-
TABS: These flat plastic tabs fit into a slot. They can just be pulled straight out with no tools needed, easy peasy. Tabs are marked with yellow arrows.
-
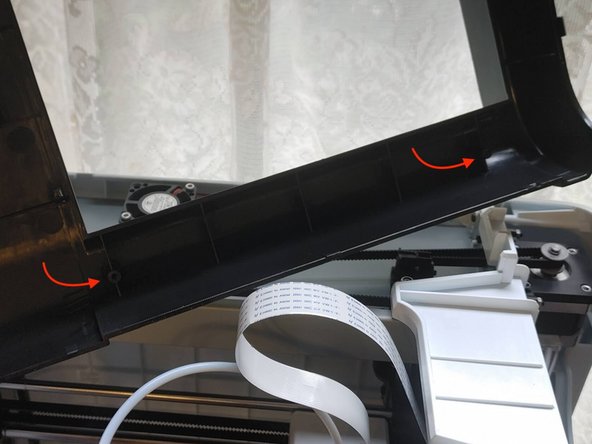
PUSH CLIPS: These look a lot like tabs from the outside of the case, but they have a backward-pointing prong on the tip that hooks into their slot. To release them, use a plastic spudger or flat head screwdriver to press the body of the fastener inward. Push clips are marked with orange arrows.
-
-
-
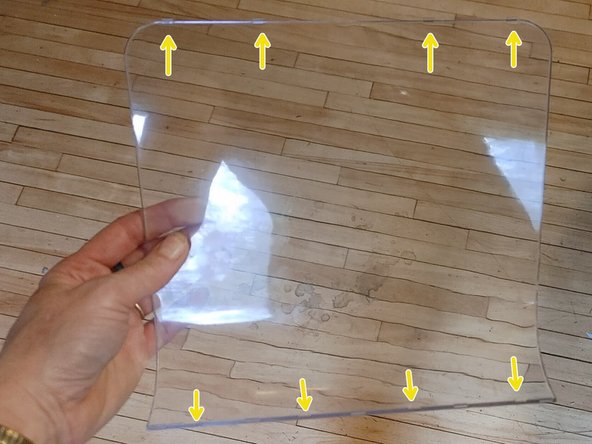
At the top of your printer is a transparent plastic window. It's only held in by flat tabs, no screws or push clips. There are four tabs at the front edge, and four tabs at the back edge. There are no tabs on the sides. So open the front door, hold the window with a hand on each side of the pane, and pop it out.
-
If it's really stuck, you can try prying it out with a plastic spudger or flat head screwdriver, but be very careful of scratching the window pane or the case. Protecting them with masking tape is a good idea.
-
This is optional for a full teardown, since you don't need to remove the window to get the top panel off, but it's handy for accessing your extruder in less dire situations.
-
-
-
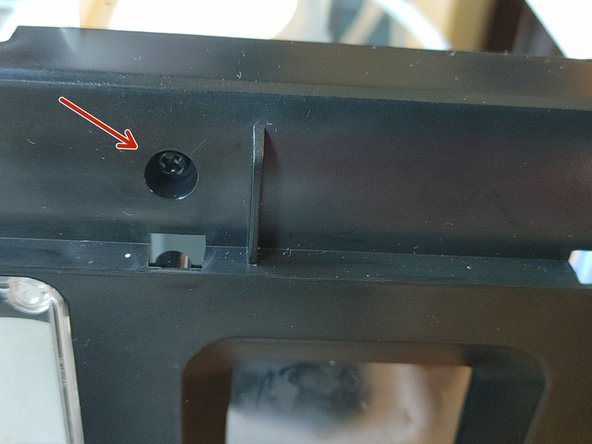
There are two black screws connecting the top panel to the front panel, one at each side of the door (indicated by index fingers). Remove these with your phillips screw driver and put them in your bowl so you don't lose them.
-
The sides and back edge of the top panel each have three push clips. You'll need to take a plastic spudger or flathead screwdriver and push on the base of each to release it.
-
At the front edge of the top panel are four tabs, two over the door and two over the control screen. These don't require any prying, and will just slip out once the push clips release.
-
-
-
You already removed three push clips along the top edge of the left side panel, which secured the top panel.
-
From the top of the machine, remove the three black phillips head screws at the back left corner of the printer. The the corner screw is one of the two longer ones.
-
Inside the printer, to the left of the door, there are two black phillips head screws that attach the left panel to the front panel. Remove these.
-
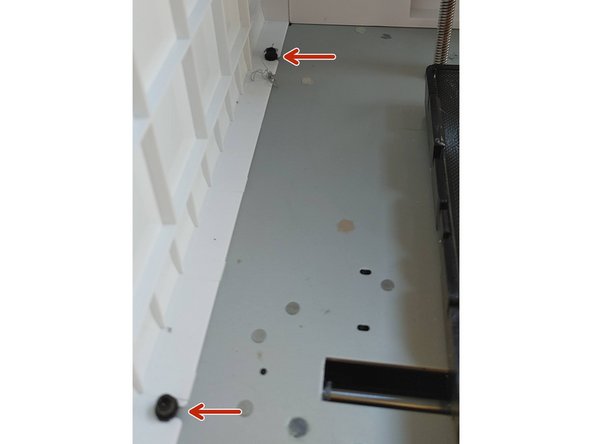
Still inside the printer, you'll see three black screws attaching the left panel to the floor plate, each with a small washer. THESE ARE HEX HEADS, not phillips. But DO NOT REMOVE THESE SCREWS! You can just loosen them, but leave them attached to the floorplate for safe storage.
-
At the bottom outside edge of the left panel, there are six push clips running horizontally that you'll need to release by pressing a plastic spudger or flat head screwdriver against the base of each.
-
Attached to the back panel, at the back left corner of the printer, there are four more push clips running vertically to disengage.
-
The panel should now pull away from the printer.
-
-
-
The order shown next for removing the remaining side panels is back>front>right. It may be easier to go front+right>back.
-
A commenter pointed out that removing the front and right panels together while still joined is better because "the snap-fit joints between the two are easier to pull apart after removing the screws of both panels. If you want to remove the back panel before the right side […] then you have to put stress on some panels and/or joints unnecessarily."
-
If you'd like to try it that way, skip to Step 9 now.
-
-
-
-
You've already removed a black screw in the back left corner at the top of the printer, four push clips along that left edge that secured the back panel to the left panel, and three push clips along the top edge that secured the top panel.
-
From the top of the printer, at the back right corner, remove the black phillips head (+) screw. This is one of the two longer ones. There are two others in front of it, but those aren't attached to the case, so you can leave them in.
-
Inside the printer, there are two black screws attaching the back panel to the floor plate, each with a small washer. THESE ARE HEX HEADS, not phillips. You can loosen the left one without removing it, but I found that I had take out the right one entirely to get the back panel off. Screw it back in loosely for safe storage.
-
-
-
Pull the back panel away from the right side panel to remove it. These are push clips, but they don't have visible release sockets, so to release them you'll need to apply inward pressure to the back panel, while pulling outward on the right side panel, since three of the fasteners are push clips. I found the bottom corner was tricky, here.
-
The five tabs along the bottom edge of the back panel should slip out on their own, but you can use a plastic spudger or flat head screwdriver to help if needed.
-
Screw the right hex washer screw back into the flooring plate just a few turns, to keep it safe.
-
-
-
You've already removed some black phillips head screws from just inside the door, including two above the door and two more to the left of the door. Above the door and screen, on the outside of the case, four tabs also came out when you removed the top panel.
-
There's another black screw just inside the door and to the right of it, about half way up the inside wall. Remove that.
-
Near the input screen, find the black screw located just above its left corner, then remove it.
-
At the top right corner of the printer there's another black screw to remove. But the fastener further down inside the machine is just a tab, so no need to worry about removing it!
-
-
-
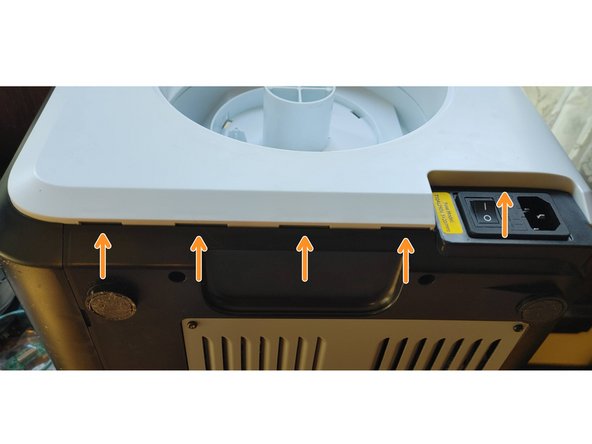
Use a plastic spludger or flat head screwdriver to release the four push clips at the bottom of the panel.
-
Carefully pull the top of the front panel out and away from the printer, BUT ONLY A FEW INCHES!
-
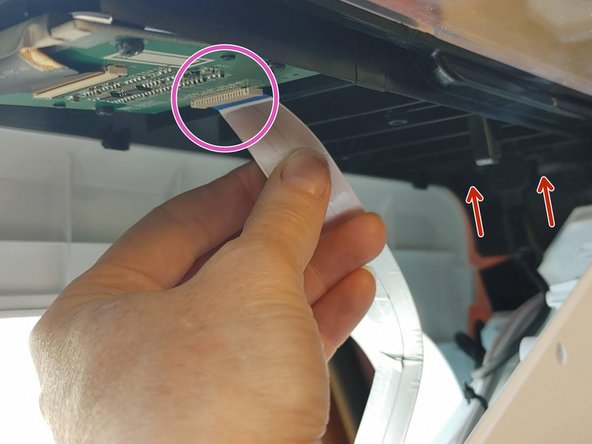
Now that you can access it, gently pull out the wire tape from the input screen.
-
Below the wire tape at the very bottom of the front panel, find and remove the two black phillips screws securing the USB port.
-
Now the front panel can be pulled completely away from the printer.
-
-
-
You've already removed a bunch of this panel's fasteners. On the left edge of of it, there was a black screw at the top corner and a tab half way down from it. On the right edge was a black screw at the top, plus a tab and three push clips running down the right edge. You've also removed the three push clips along the top securing the top panel.
-
Now use your phillips screwdriver to remove the two black screws in the right side panel, one on each upper side of the filament spindle.
-
There's also a tab in between them that will just slide out.
-
-
-
The tab at the top of the filament recess, between the two screws, will slip right out.
-
The five tabs along the bottom of the panel will also slide out.
-
Remove the right side panel.
-
-
-
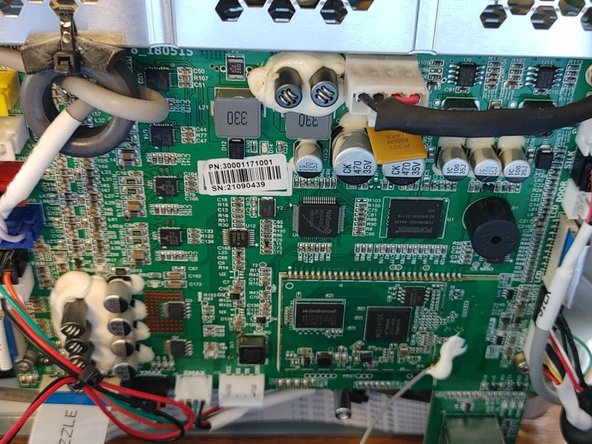
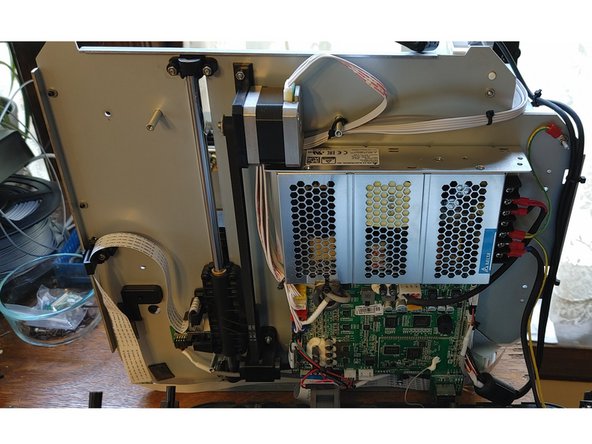
If you want to get straight to the motherboard, there's a handy access plate on the bottom of the printer, with four black screws in the corners to remove.
-
This is optional for a full teardown, though, since it's not necessary in order to get the whole base panel off.
-
-
-
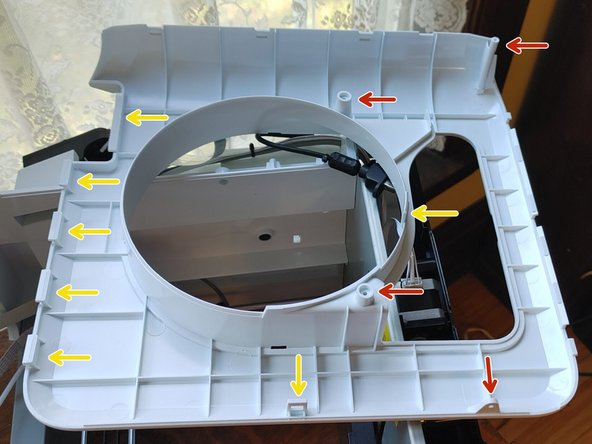
You've already removed all the push clips that attached the four sidewalls to the base panel.
-
Set the printer on its back, with the door side up and the base panel toward you.
-
There are four silver HEX HEAD screws here to remove, from deep inset holes. You'll strip them if you try to use a phillips head screwdriver on them (trust me).
-
Note that there are also three FAKE inset screw holes that are capped with plastic at the bottom of each well. A fourth is under the front left foot. I spent way too much time figuring out there are no actual screws on this side! You get to them from inside the printer, where the screws are set into the floor plate.
-
So, on the left side of the interior floor plate, find the two black screws, front and back, that each attach through the floor and into one of those fake inset screw holes, then remove them.
-
-
-
Two more screws are accessed at the lower edge of the right side, which is standing up vertically right now. Remove them.
-
The base panel is now loose. So pull the front edge of it away from the front door side of the printer (which should be on top), but KEEP THE BOTTOM EDGE OF THE PANEL NEAR THE PRINTER!
-
Inside, you'll find wires attached in three places that need to be disconnected to completely remove the base panel. If you're able to do your fix without actually taking the panel off the rest of the way, you definitely should, because the center wire is a tricky one.
-
On the left, the red and black wires can be pulled out where they connect on the motherboard.
-
On the right is a black casing with a red wire and a blue wire inside, and a separate yellow wire. They can be pulled straight out where they attach to the base panel. Alternatively, you can unscrew them from above the motherboard.
-
The center white wire looks like it's soldered on both ends. Not an easy removal, and beyond the scope of this teardown, so proceed at your own risk.
-
-
-
Reassembling the casing goes faster, but is still tricky. What worked for me was this order:
-
First I attach the base panel. (Easy peasy.)
-
Then I dry-fit (no screws) the back panel.
-
Next I attached the front and side panels together with the single screw at the join between them.
-
Then I started with the front of the combined panels, and angled the bottom edge of the front panel into the base panel.
-
The right back corner is the tough part, again. You need to get the right panel's tabs into the base panel at its bottom edge, at the same time it's lined up with the back panel's tabs. Then you'll have to use a plastic spudger or flat head screwdriver to push in the side panel's flange at the top of the power cord outlet. Good luck.
-
After it was dry-fit, I put in all the screws for those panels. Then I attached the left side panel and the top panel with no trouble.
-


4 Comments
Finding the screws and the correct order to disassemble this monster is a real nightmare. Good job on creating this tutorial.
In my experience the easiest way to remove the panels is going in the following order: top, left, front+right, back, bottom. It's easier to deal with the front and right panels at the same time: the snap-fit joints between the two are easier to pull apart after removing the screws of both panels. If you want to remove the back panel before the right side (as recommended in the guide) then you have to put stress on some panels and/or joints unnecessarily.
I didn't need a flat head screwdriver to deal with the joints but in general it's better to use softer plastic tools for that. Those leave smaller marks or no marks on the plastic case compared to a hard metal flat-head screwdriver. A lot of precision screwdriver sets and mobile phone repair kits come with those plastic tools that look like mini crowbars and guitar picks.
Hey thanks for this great instructions it was very helpful. I have problems to find any information about disassemble the case. Thanks again and take care
Best Regards,
Karol H.