What you need

This teardown is not a repair guide. To repair your Datatronics Discovery 2400CM, use our service manual.

  1. Datatronics Discovery 2400CM Teardown, remove front cover: step 1, image 1 of 3 Datatronics Discovery 2400CM Teardown, remove front cover: step 1, image 2 of 3 Datatronics Discovery 2400CM Teardown, remove front cover: step 1, image 3 of 3
    • The front is attached to the body with 2 latches.

    • Using the spudger, open a latch on one side.

    • Open the latch on the other side next to detach the front.

  2. Datatronics Discovery 2400CM Teardown, remove back cover: step 2, image 1 of 2 Datatronics Discovery 2400CM Teardown, remove back cover: step 2, image 2 of 2
    • The back cover is attached to the body the same way as the front.

    • Open both latches to detach to back cover.

  3. Datatronics Discovery 2400CM Teardown, remove board from housing: step 3, image 1 of 3 Datatronics Discovery 2400CM Teardown, remove board from housing: step 3, image 2 of 3 Datatronics Discovery 2400CM Teardown, remove board from housing: step 3, image 3 of 3
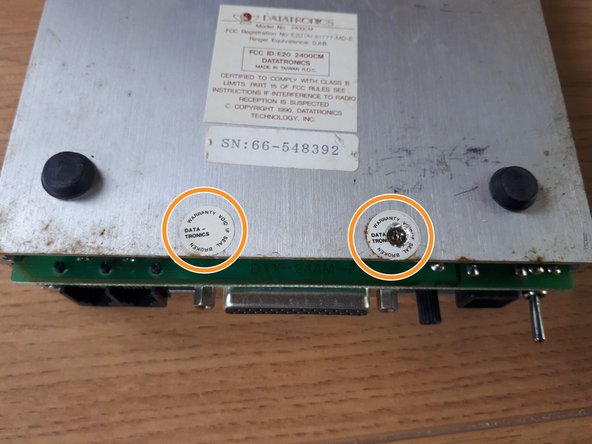
    • The board is attached to the body with 2 screws. The screws are hidden under "warranty voidance" stickers.

    • Remove the stickers so you can unscrew the screws.

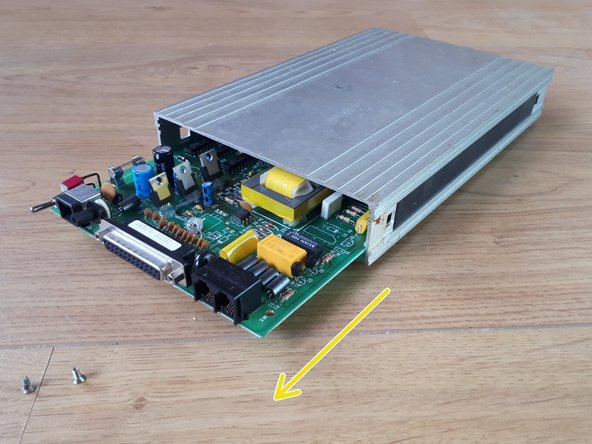
    • Slide the board from the body.

  4. Datatronics Discovery 2400CM Teardown, overview: step 4, image 1 of 3 Datatronics Discovery 2400CM Teardown, overview: step 4, image 2 of 3 Datatronics Discovery 2400CM Teardown, overview: step 4, image 3 of 3
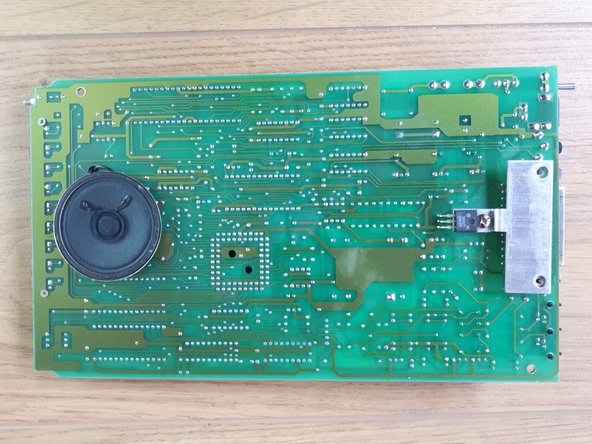
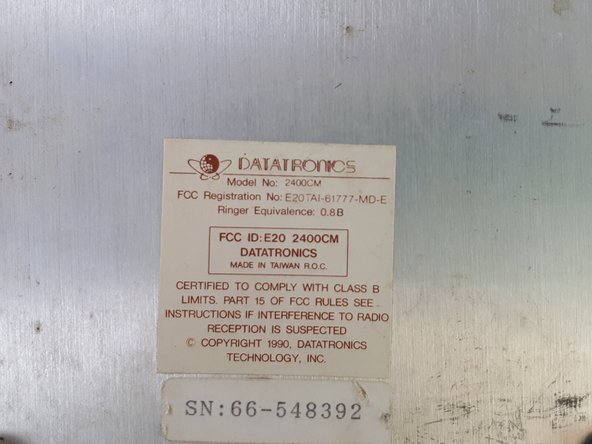
    • Overview of the front and back of the board, as well as a detailed view of the label.

knipwim

Member since: 09/01/18

8,527 Reputation

30 Guides authored

0 Comments

Add Comment

View Statistics:

Past 24 Hours: 0

Past 7 Days: 0

Past 30 Days: 6

All Time: 900