What you need
-
-
BLU Life One 2015 (L5510AEXG) Teardown
-
How to take apart the BLU Life One (2015)
-
-
-
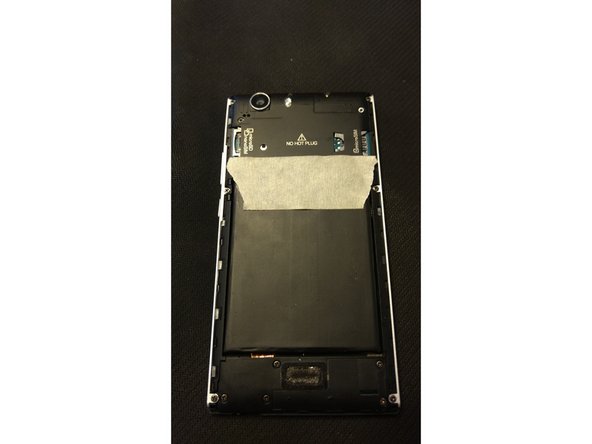
Use nail or prying tool under the charge port area to life off back cover. It will snap a few times. Keep pulling until cover is completely removed.
-
-
-
-
Above the battery there is a sticker that must be removed. Use a screwdriver or pry tool to get under the sticker and peel it off. (I use a piece of tape because mine has been thrown away.)
-
NOTE: Tape does not have to be replaced in order for phone to work.
-
-
-
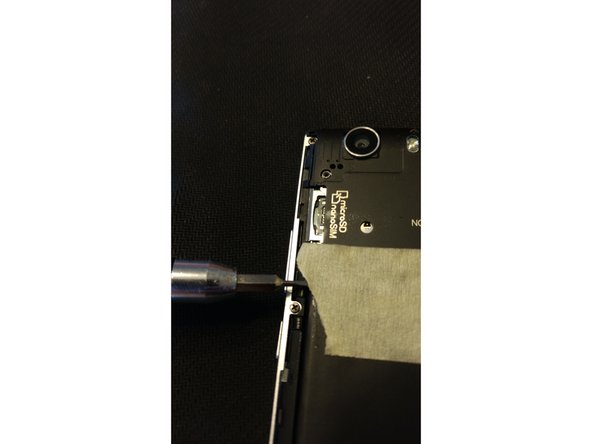
There will be 4 black screws you must remove from the plate that says NO HOT PLUG.
-
There is also 1 white screw. Make sure to only put this screw back in the spot from which it came. (Above the MicroSIM slot)
-
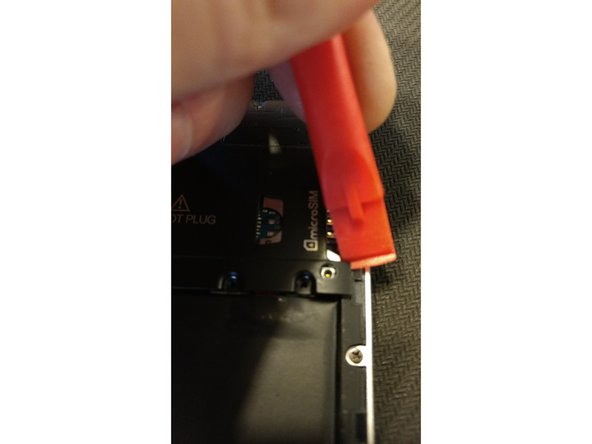
Using a pry tool, pry up from the lower right corner to release the snap connectors.
-
Keep prying the plate up and over the rear camera module to fully remove it.
-
4 Black Philips Screws
-
1 White Philips screw. Do not put this screw anywhere else but here!
-
-
-
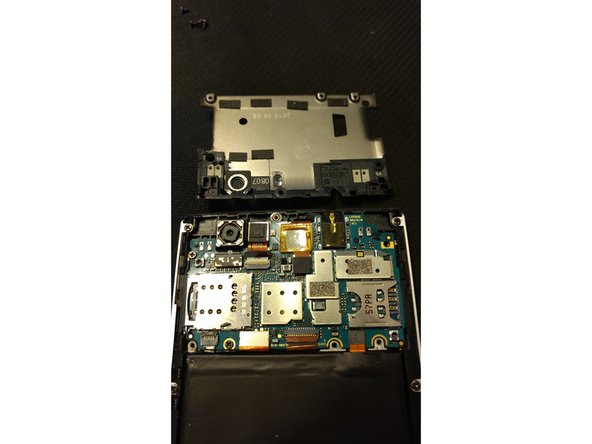
As the guts of the phone are now exposed, the square ribbon connector on the bottom rightmost of the mainboard needs to be pried up. This will remove the battery from the circuit.
-
A few people (Myself Included) have had an issue with this phone where the from notification LED will come on and the screen will stay black. Even if you hold down power for an hour it will still be the same. By fully removing power this way you will solve this problem.
-
Battery Connector
-
-
-
If you guys need me to go further leave a comment here letting me know. To put it back together do all of these steps in reverse!
-


Team

Foothills Electronic Repair Member of Foothills Electronic Repair
Business
1 Member
1 Guide authored
3 Comments
How do you remove the screen for replacement?
what do I look for sim error and network error in a blu life xl android phone? please help
I would also like to replace my screen