What you need

This teardown is not a repair guide. To repair your Apple Lightning to Headphone Jack Adapter, use our service manual.

  1. Apple Lightning to Headphone Jack Adapter Teardown, Apple Lightning to Headphone Jack Adapter Teardown: step 1, image 1 of 3 Apple Lightning to Headphone Jack Adapter Teardown, Apple Lightning to Headphone Jack Adapter Teardown: step 1, image 2 of 3 Apple Lightning to Headphone Jack Adapter Teardown, Apple Lightning to Headphone Jack Adapter Teardown: step 1, image 3 of 3
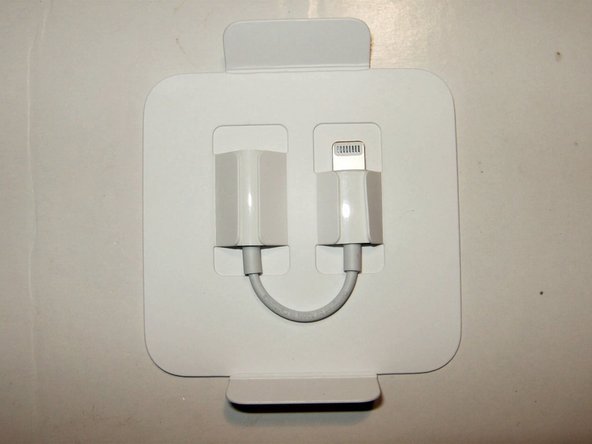
    • Typical Apple product packaging. Simple yet elegant

    • Backside of the package

    • Bottom of the package describes the adapter as a A1749

  2. Apple Lightning to Headphone Jack Adapter Teardown: step 2, image 1 of 3 Apple Lightning to Headphone Jack Adapter Teardown: step 2, image 2 of 3 Apple Lightning to Headphone Jack Adapter Teardown: step 2, image 3 of 3
    • Again, nice packaging for the adapter.

    • The total length of the adapter is 3 1/8 inches or 8cm. One side with the lightning connector and the other end is the 3.5mm headphone jack.

    • Checked to see if there was any way to remove the outside of the adapter by slipping some thin tools in between. No way on that.

  3. Apple Lightning to Headphone Jack Adapter Teardown: step 3, image 1 of 3 Apple Lightning to Headphone Jack Adapter Teardown: step 3, image 2 of 3 Apple Lightning to Headphone Jack Adapter Teardown: step 3, image 3 of 3
    • This is the business end that requires the removal of the covering.

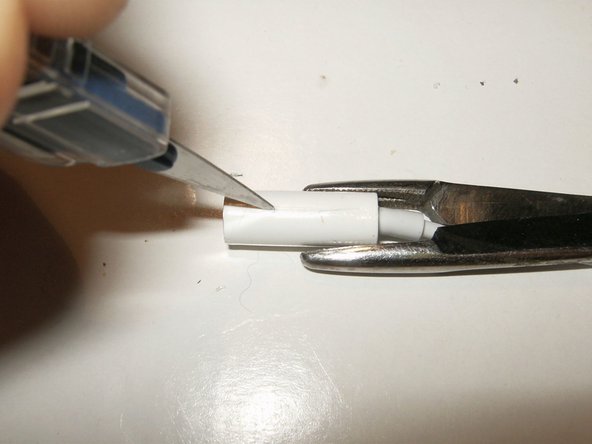
    • The only way to do that is by cutting into it. Using a good scalpel does cut it with relative ease.

    • Careful while using a sharp instrument, not much room to hold onto the connector.

  4. Apple Lightning to Headphone Jack Adapter Teardown, Cutting the lightning connecter open: step 4, image 1 of 3 Apple Lightning to Headphone Jack Adapter Teardown, Cutting the lightning connecter open: step 4, image 2 of 3 Apple Lightning to Headphone Jack Adapter Teardown, Cutting the lightning connecter open: step 4, image 3 of 3
    • Cutting length wise on one side

    • as well as the opposite site

    • Then flipping the two halves that were created by the cuts.

  5. Apple Lightning to Headphone Jack Adapter Teardown: step 5, image 1 of 3 Apple Lightning to Headphone Jack Adapter Teardown: step 5, image 2 of 3 Apple Lightning to Headphone Jack Adapter Teardown: step 5, image 3 of 3
    • This makes for an easy removal.

    • The next thing to be removed is the ground shield.

    • Using a pair of small side cutters that shield is easily removed as well.

  6. Apple Lightning to Headphone Jack Adapter Teardown: step 6, image 1 of 3 Apple Lightning to Headphone Jack Adapter Teardown: step 6, image 2 of 3 Apple Lightning to Headphone Jack Adapter Teardown: step 6, image 3 of 3
    • Just a matter of using the cutters on one end

    • and rolling it around the connector.

    • This shows the destructive nature of this teardown

  7. Apple Lightning to Headphone Jack Adapter Teardown: step 7, image 1 of 3 Apple Lightning to Headphone Jack Adapter Teardown: step 7, image 2 of 3 Apple Lightning to Headphone Jack Adapter Teardown: step 7, image 3 of 3
    • The connector is now left with another plastic covering.

    • Luckily the removal of the ground shield seems to have open slots lengthwise in the plastic covering.

    • Using these slots, the plastic needs to be carefully pulled away from the circuit board.

  8. Apple Lightning to Headphone Jack Adapter Teardown: step 8, image 1 of 3 Apple Lightning to Headphone Jack Adapter Teardown: step 8, image 2 of 3 Apple Lightning to Headphone Jack Adapter Teardown: step 8, image 3 of 3
    • Here is the business end with the cover removed.

    • This side shows what appears to be the DAC inside this adapter

    • Close-up of the circuit board shows Apple's fascination with adhesive and other sticky substances. Both sides of the circuit board are covered with it.

  9. Apple Lightning to Headphone Jack Adapter Teardown: step 9, image 1 of 3 Apple Lightning to Headphone Jack Adapter Teardown: step 9, image 2 of 3 Apple Lightning to Headphone Jack Adapter Teardown: step 9, image 3 of 3
    • A bit more of a close up of one side

    • as well as the other. As more information becomes available about the DAC this teardown will be edited to reflect those.

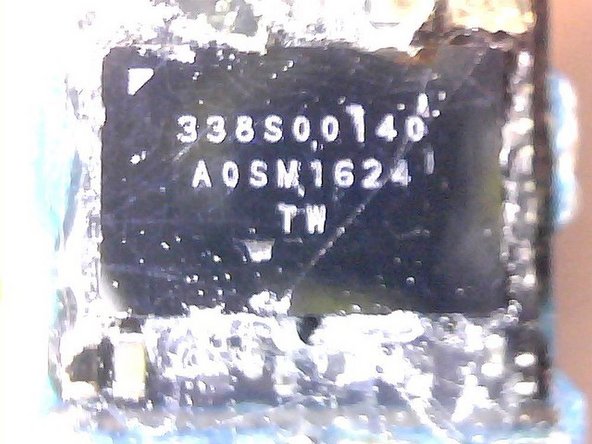
    • Here are the markings on the DAC 338S00140 A0SM1624 TW

  10. Apple Lightning to Headphone Jack Adapter Teardown, Cutting the headphone jack open: step 10, image 1 of 3 Apple Lightning to Headphone Jack Adapter Teardown, Cutting the headphone jack open: step 10, image 2 of 3 Apple Lightning to Headphone Jack Adapter Teardown, Cutting the headphone jack open: step 10, image 3 of 3
    • Carefully slice down the headphone jack connector with a sharp knife, being careful to not cut yourself.

  11. Apple Lightning to Headphone Jack Adapter Teardown: step 11, image 1 of 2 Apple Lightning to Headphone Jack Adapter Teardown: step 11, image 2 of 2
    • Insert wisdom here.

    • Repairability score: 0 out of 10

    • The device is clearly not meant to be opened or repaired in any way.

    • It is impossible to open the adapter without destroying it.

oldturkey03

Member since: 09/29/10

782,145 Reputation

119 Guides authored

Team

Global Fixers Member of Global Fixers

Community

33 Members

537 Guides authored

View Statistics:

Past 24 Hours: 21

Past 7 Days: 132

Past 30 Days: 576

All Time: 107,585