
What you need

This teardown is not a repair guide. To repair your Apple 5W USB Power Adapter (Folding Pins - UK plug), use our service manual.

  1. Apple 5W USB Power Adapter (Folding Pins - UK plug) Teardown, Apple 5W USB Power Adapter (Folding Pins - UK plug) Teardown: step 1, image 1 of 2 Apple 5W USB Power Adapter (Folding Pins - UK plug) Teardown, Apple 5W USB Power Adapter (Folding Pins - UK plug) Teardown: step 1, image 2 of 2
    • Released with the Apple Watch in the UK / HK, the new folding plug has pins that fold completely flush for travel.

    • Matches the older style plug with a 5W / 1A specification.

    • AC 100 - 240V input.

    • This product uses and can store high voltage electricity - it is dangerous and could potentially kill you.

  2. Apple 5W USB Power Adapter (Folding Pins - UK plug) Teardown: step 2, image 1 of 1
    • Becoming more common on mains chargers, most of the design is fastened together during the moulding process. There is only a single screw (Torx T9 M2.5 x 2.75mm) in the entire product.

    • You could possibly pry this open, but you would likely make a big mess. Instead this has been cut in two using a fine bladed coping saw.

    • This was cut 1mm behind the USB port entrance.

    • Inside we can see the design has been split into two halves.

    • All of the electronics are on a single PCB on the left.

    • All of the mechanism and high voltage contacts are on the right hidden under plastic hood.

  3. Apple 5W USB Power Adapter (Folding Pins - UK plug) Teardown: step 3, image 1 of 3 Apple 5W USB Power Adapter (Folding Pins - UK plug) Teardown: step 3, image 2 of 3 Apple 5W USB Power Adapter (Folding Pins - UK plug) Teardown: step 3, image 3 of 3
    • A break down of the top side of the PCB:

    • Rubycon 4.7µF 400V electrolytic capacitor 400AX4.7M8X9

    • Fairchild bridge rectifier MB10S

    • Everlight optoisolator EL3H7-G

    • Transformer markings 157-00003 / HIG J 1503

    • There's copper shielding to meet EMC requirements on the rear of the housing.

  4. Apple 5W USB Power Adapter (Folding Pins - UK plug) Teardown: step 4, image 1 of 2 Apple 5W USB Power Adapter (Folding Pins - UK plug) Teardown: step 4, image 2 of 2
    • On the reverse side:

    • Fairchild PWM Controller FAN301

    • Fairchild N-Channel MOSFET STD7NM64N

    • Recessed inductor markings T00405 SP451

    • KEMET Tantalum Polymer Capacitor T520M157M006ATE035

    • Diode SBR8U60P5

    • There's a blob of resin over R9 - a mistake?

    • FAN301 currently has an injunction against it due to patent infringement. Perhaps this doesn't affect European sales?

  5. Apple 5W USB Power Adapter (Folding Pins - UK plug) Teardown: step 5, image 1 of 3 Apple 5W USB Power Adapter (Folding Pins - UK plug) Teardown: step 5, image 2 of 3 Apple 5W USB Power Adapter (Folding Pins - UK plug) Teardown: step 5, image 3 of 3
    • Most of the mechanism is covered with a hood, fixed at points using thermoplastic staking during production.

    • The only way to remove the cover is to cut the tops off these.

  6. Apple 5W USB Power Adapter (Folding Pins - UK plug) Teardown: step 6, image 1 of 3 Apple 5W USB Power Adapter (Folding Pins - UK plug) Teardown: step 6, image 2 of 3 Apple 5W USB Power Adapter (Folding Pins - UK plug) Teardown: step 6, image 3 of 3
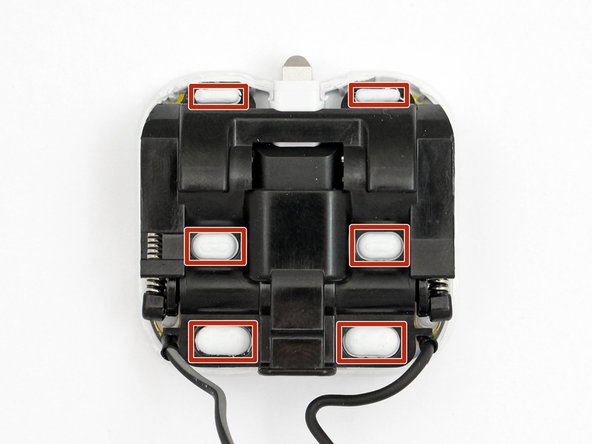
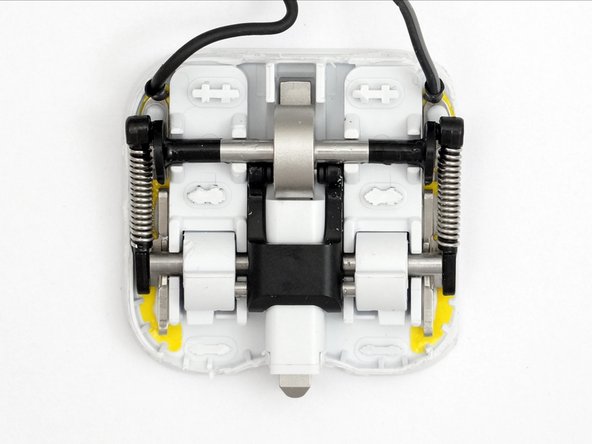
    • Finally we can see how the mechanism works!

    • The yellow tape is Polyimide high temperature film.

    • The cover is needed for the mechanism to work properly - the central black plastic piece will lift otherwise.

  7. Apple 5W USB Power Adapter (Folding Pins - UK plug) Teardown: step 7, image 1 of 3 Apple 5W USB Power Adapter (Folding Pins - UK plug) Teardown: step 7, image 2 of 3 Apple 5W USB Power Adapter (Folding Pins - UK plug) Teardown: step 7, image 3 of 3
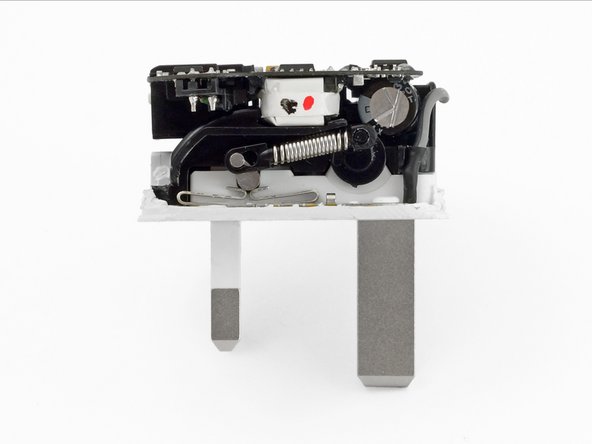
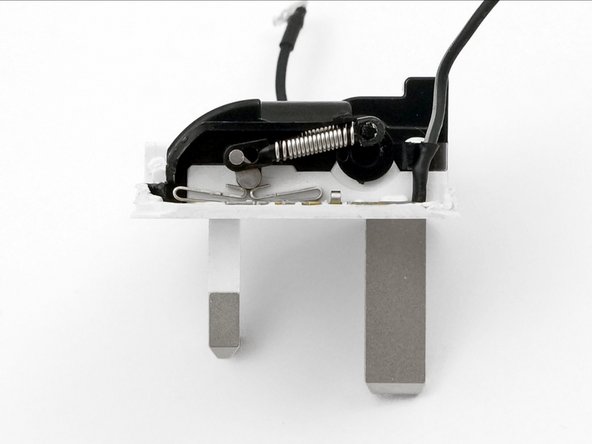
    • With the side of the bottom section filed away, you can see the stackup of the PCB, mechanism and contacts exposed.

    • The Apple folding charger repairability Score: 1 out of 10 (10 is easiest to repair)

    • Almost everything is moulded together during manufacture, making it impossible to take apart without damage.

    • Trying to reassemble this and use it would not be safe!

Oliver

Member since: 04/30/15

253 Reputation

1 Guide authored

One Comment

Fantastic, thanks for this great article.

James Campbell - Reply

Add Comment

View Statistics:

Past 24 Hours: 4

Past 7 Days: 19

Past 30 Days: 125

All Time: 25,952