My Problem
I found out that the HDD on my 2012 Mac Mini is mounted in the upper bay.
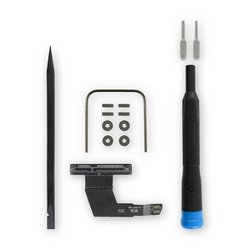
The problem is that the iFixit kit comes with the SATA cable for the upper bay. All tutorials you can find on the internet show the HDD in lower bay with SSD mounted in upper bay. I really don't know why my mac mini had this the opposite way.
To fix the issue I had to mount the SSD in the lower bay then twist and bend the SATA cable to fit. Make sure to bend the cable properly so that when you mount the WiFi back it goes around the screws. Just leave the SATA cable lose, mount the WiFI, then connect the SATA cable to the motherboard.
Looking at the bright side, I only needed to remove the fan, wifi and replace the mounting gromments to make the upgrade.
My Fix
It took around 30 min. The Mac Mini is really fast with the SSD.
My Advice
Before doing the upgrade, check the position of your HDD (upper or lower bay) and buy the corresponding SATA cable for the position where the SSD will be installed.

0 Comments