
My Problem
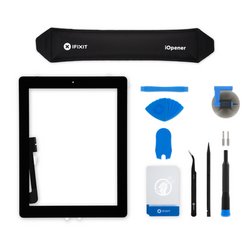
I bought the iPad 3 on the day it came out back in 2012. Despite never protecting it with a case or screen protector, the iPad had survived multiple drops and mishandling from my two young kids. As they enjoy educational and other games, it basically became their iPad. One day, it slipped off the couch and shattered the screen. The kids were devastated, but being an engineer and always fixing my own gear, I ordered a replacement screen and tooling through iFixit.
My Fix
Quite challenging even for a seasoned technical person. The adhesive used on this glass is strong, I underestimated it. The sub-miniature connections are difficult to see and work with.
The glass was already shattered, so removing it as shown in the videos was tough. Pieces flying everywhere, luckily I had my safety glasses on (as they are also my reading glasses). Even with clear tape trying to contain the shattered glass, small bits still managed to fly off as I tried to pry it open. Once that was off, I removed the LCD and broken glass ribbon cables. OOPS, I popped the tiny little plastic clasp off of the LCD ribbon connector on the board - I put that to the side and proceeded to clean up the many bits of glass. Surely it can't be an important piece if it came off that easily (WRONG). Once I got everything cleaned up and back together, I tried to power it on (didn't lift the adhesive tape on the glass screen just yet) and no response. The LCD ribbon cable needed that tiny plastic clasp (glad I kept it) to make good contact, but it is impossible to see and work with unless you have magnifying glasses and tiny tweezers. Spent several hours trying to get this piece back on to no avail. Set it all aside thinking it was now iTrash. A few days went by and after talking to an electrical engineer friend, he provided me with nice strong tiny tweezers and magnifying glasses to attempt another go at fixing the connector. It took a while, but I managed to get this piece back on and the LCD lit up like nothing was ever wrong. Carefully cleaned the LCD, remounted it and then reinstalled the glass. It now looks and operates as if it were brand new. It is also now well protected in a nice waterproof and shockproof case.
My Advice
Be careful when lifting the glass. Recommend safety glasses to protect your eyes from small bits of glass that may pop away from a shattered screen as you try to pry it away.
Be very cautious with the tiny little plastic clasp on the ribbon cable connectors. I am very lucky that I didn't lose this piece and even luckier to have been able to reinstall it. The video didn't explain in detail how to properly lift the clasp and pull the cable, at least the video I viewed. It could have saved me a lot of time and frustration.
I am happy that I was able to repair this iPad and that iFixit provided excellent replacement parts and overall good instructions.
0 Comments