
iPod 4th generation or Photo hard drive replacement by micro SD card

What you need

  1. iPod 4th generation or Photo hard drive replacement by micro SD card, Rear Panel: step 1, image 1 of 1
    • Before opening your iPod, ensure that the hold switch is in the locked position. The orange bar should be visible, indicating hold is active.

  2. iPod 4th generation or Photo hard drive replacement by micro SD card: step 2, image 1 of 3 iPod 4th generation or Photo hard drive replacement by micro SD card: step 2, image 2 of 3 iPod 4th generation or Photo hard drive replacement by micro SD card: step 2, image 3 of 3
    • Insert an opening pick as far as possible into the seam between the plastic front and the metal rear panel, on the right edge of the iPod.

    • You may need to rock the pick back and forth to slide it in farther.

    • Use the opening pick to pry up against the plastic front panel and release five retaining tabs (seen in the third photo).

    • Slide the pick along the edge of the iPod and continue prying to release the rest of the retaining tabs.

    • After all five tabs along the right side are free, the case should easily open.

  3. iPod 4th generation or Photo hard drive replacement by micro SD card: step 3, image 1 of 1
    • The iPod case is now open, but don't separate the two halves just yet. There is still an orange ribbon cable connecting the headphone jack to the logic board.

    • Open the case like a book with the dock connector edge at the top, and lay the rear panel next to the front half of the iPod.

  4. iPod 4th generation or Photo hard drive replacement by micro SD card: step 4, image 1 of 1
    • Use a plastic tool or your fingernails to carefully disconnect the orange headphone jack cable. Be sure to pull straight up on the connector, not the cable itself.

    • This ribbon cable is very fragile. If you are replacing the battery, you can choose to skip this step and keep the headphone jack connected to the motherboard. Prop and tape the rear case against a box to keep it in place. Be very careful not to strain the fragile headphone jack cable as you work.

  5. iPod 4th generation or Photo hard drive replacement by micro SD card, Removing the hard drive disk: step 5, image 1 of 2 iPod 4th generation or Photo hard drive replacement by micro SD card, Removing the hard drive disk: step 5, image 2 of 2
    • Remove the hard drive with your hand, by holding both the iPod and hard drive connector (hold tight in order to not broke the connector).

  6. iPod 4th generation or Photo hard drive replacement by micro SD card, Assemble the storage unit: step 6, image 1 of 3 iPod 4th generation or Photo hard drive replacement by micro SD card, Assemble the storage unit: step 6, image 2 of 3 iPod 4th generation or Photo hard drive replacement by micro SD card, Assemble the storage unit: step 6, image 3 of 3
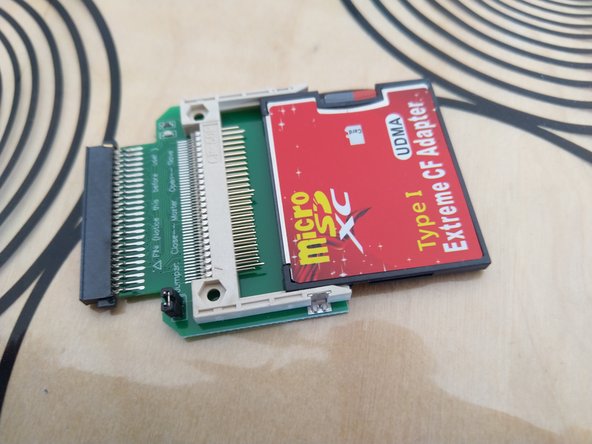
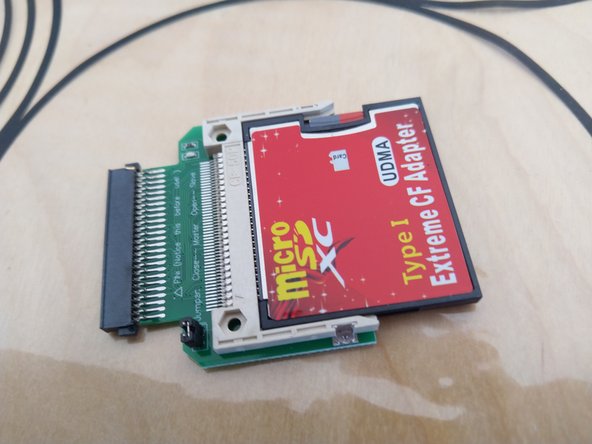
    • Put the micro sd card into the CF adapter.

    • Then put the CF adapter into the CE to CF 1.8" adapter.

  7. iPod 4th generation or Photo hard drive replacement by micro SD card, (optional) Remove the hard drive disk connector stopper: step 7, image 1 of 1
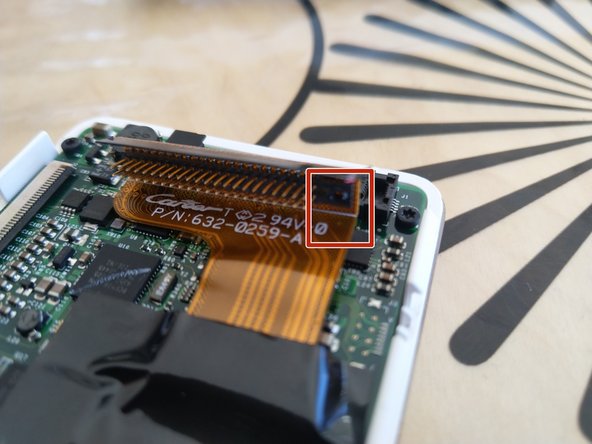
    • Depending on the CE adapter you have, you may need to remove the stopper on the hard drive disk connector on the iPod. Use tweezers to do so.

    • If you notice that you can't fully plug your new memory unit without this step do this, else your memory unit may not be recognized.

  8. iPod 4th generation or Photo hard drive replacement by micro SD card, Plug your storage unit: step 8, image 1 of 2 iPod 4th generation or Photo hard drive replacement by micro SD card, Plug your storage unit: step 8, image 2 of 2
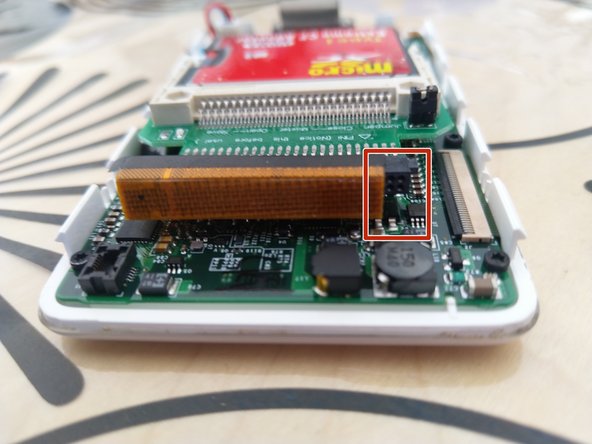
    • Plug your memory unit in place of the old hard drive.

    • It's normal that to have 4 free slots on the memory unit. Be sure to position the memory unit as on the photo.

    • It may be usefull to use double face tape on the battery to ensure the storage unit won't move.

    • Storage unit being thicker than an hard drive, adding a card board on it may help keeping everythin in place while reassembling.

  9. iPod 4th generation or Photo hard drive replacement by micro SD card, Reconnect bottom case connector: step 9, image 1 of 1
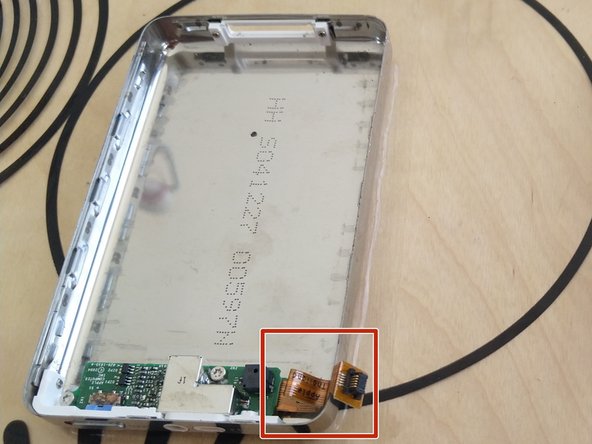
    • Reconnect the bottom case connector. Before reassembling the iPod.

  10. iPod 4th generation or Photo hard drive replacement by micro SD card, Connect your iPod to your PC: step 10, image 1 of 1
    • Don't reassemble your iPod before connecting it to your PC. The opening step is the hardest part, in case of mistake you won't have to reopen it.

    • Just put the top case on the bottom one without pushing.

  11. iPod 4th generation or Photo hard drive replacement by micro SD card, (optional) Install iPod support on your computer: step 11, image 1 of 1
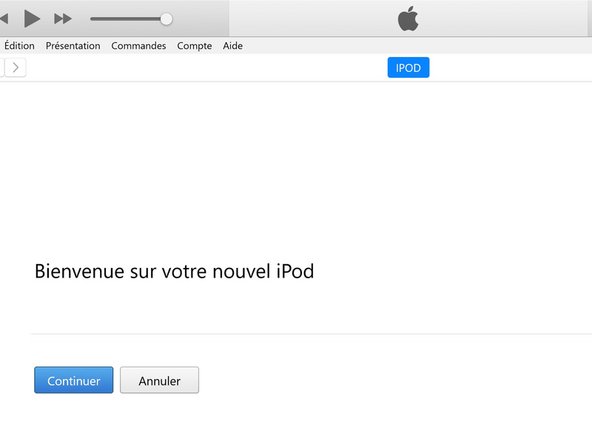
    • After connecting the iPod to the PC you may need to install iPod support. Follow iTunes instructions. Unplug the iPod, Restart iTunes, Restart your PC. Replug the iPod.

  12. iPod 4th generation or Photo hard drive replacement by micro SD card, Restore the iPod (software): step 12, image 1 of 1
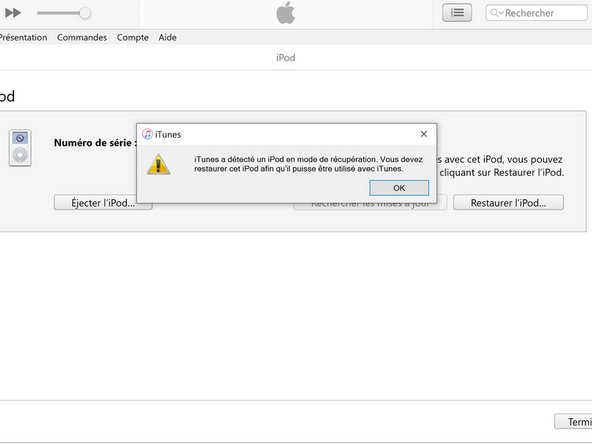
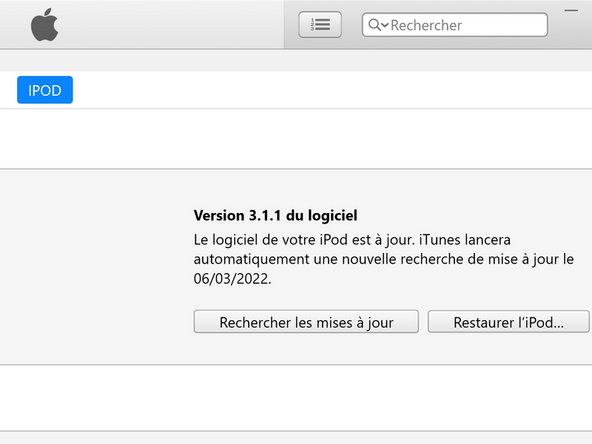
    • Once connected to your computer, iTunes will tell you that the iPod needs to be restored. Follow iTunes instructions to restore the software.

  13. iPod 4th generation or Photo hard drive replacement by micro SD card, Plug your iPod to a wall plug: step 13, image 1 of 2 iPod 4th generation or Photo hard drive replacement by micro SD card, Plug your iPod to a wall plug: step 13, image 2 of 2
    • The iPod will prompt you to plug it to a wall plug. While this screen is displayed you can't continue.

    • Pluging the iPod to the computer is not enough. If it doesn't work check the power adapter or the iPod cable. iPhone wall adapter (1A) is sufficient for this task.

    • If it reboots to the iPod menu (language settings) you have finished.

  14. iPod 4th generation or Photo hard drive replacement by micro SD card, Finalize the software restoration process: step 14, image 1 of 3 iPod 4th generation or Photo hard drive replacement by micro SD card, Finalize the software restoration process: step 14, image 2 of 3 iPod 4th generation or Photo hard drive replacement by micro SD card, Finalize the software restoration process: step 14, image 3 of 3
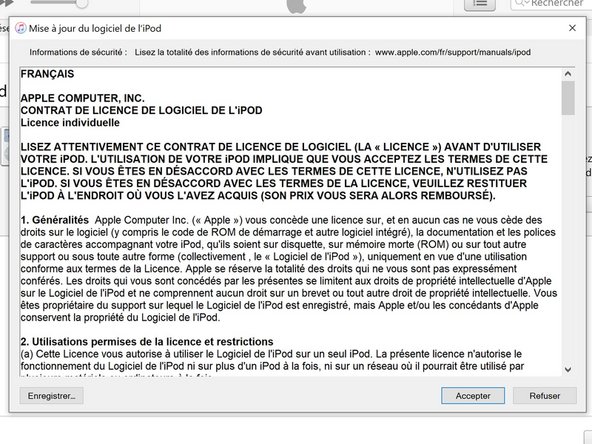
    • Finalize the software restoration process by accepting the Apple license.

  15. iPod 4th generation or Photo hard drive replacement by micro SD card, Test iPod before reassembling: step 15, image 1 of 2 iPod 4th generation or Photo hard drive replacement by micro SD card, Test iPod before reassembling: step 15, image 2 of 2
    • It's important that you check everything, from charging to synchronizing and listenning to music before reassembling the iPod.

    • If something is not functionning properly, double check each steps.

Conclusion

To reassamble your iPod follow the steps in reverse order.

5 other people completed this guide.

Special thanks to these translators:

fr en

100%

These translators are helping us fix the world! Want to contribute?
Start translating ›

Marc_Alx

Member since: 02/27/22

439 Reputation

1 Guide authored

0 Comments

Add Comment

View Statistics:

Past 24 Hours: 25

Past 7 Days: 114

Past 30 Days: 542

All Time: 11,017