
iPad 7 Cracked Digitizer Replacement

Archived Guide
This guide is retained solely for historical purposes. Use the updated version of the guide to perform your repair.

What you need

  1. iPad 7 Cracked Digitizer Replacement, Front Panel: step 1, image 1 of 1
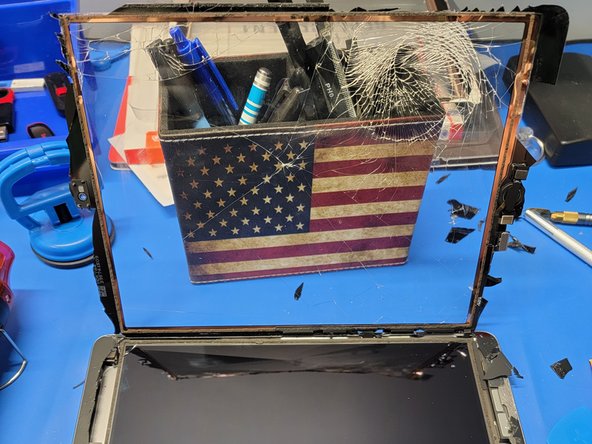
    • If your display glass is cracked, keep further breakage contained and prevent bodily harm during your repair by taping the glass.

    • Lay overlapping strips of clear packing tape over the iPad's display until the whole face is covered.

    • This will keep glass shards contained and provide structural integrity when prying and lifting the display.

    • Do your best to follow the rest of the guide as described. However, once the glass is broken, it will likely continue to crack as you work, and you may need to use a metal prying tool to scoop the glass out.

    • If tape isn't working, it is okay. Tape doesn't always work for us either. Instead, you will need some patience, and knowledge of where cables are. You will need to crack the glass yourself and essentially tear the digitizer apart. BE VERY CAREFUL NOT TO DAMAGE THE HOME BUTTON, HOME BUTTON CABLES, LCD PANEL, OR DIGITIZER CABLES.

    • Wear safety glasses to protect your eyes, and be careful not to damage the LCD screen or any flex cables.

  2. iPad 7 Cracked Digitizer Replacement: step 2, image 1 of 1
    • While the iPad looks uniform from the outside, there are delicate components, such as flex cables, under the front glass. To avoid damage, only heat and pry in the areas described in each step.

    • As you follow the directions, take special care to avoid prying in the following areas:

    • Front-facing camera

    • Antennas

    • Display Cables

  3. iPad 7 Cracked Digitizer Replacement: step 3, image 1 of 1
    • After heating up the left side of the digitizer, take a suction cup and GENTLY press against the digitizer.

    • This will create a small gap in-between the digitizer and the frame.

    • Be careful not to push too hard or to crack the LCD screen.

    • Insert a halberd spudger into the small gap. Gently pull down on the spudger to slide it along the edge of the digitizer and frame.

    • If you can see the tip of the opening pick through the front glass, don't panic—just pull the pick out a little bit. Most likely, everything will be fine, but try to avoid this as it may deposit adhesive on the front of the LCD that is difficult to clean off.

    • With a cracked digitizer, this may be hard to do. You may need to crack the digitizer away from the adhesive. Be careful doing this, as cracking the digitizer more can cause shards of glass to fling unexpectedly.

    • When cracking the digitizer and seperating it from the adhesive, make sure NOT to rip the home button flex cable or digitizer flex cables.

    • When you are ready to remove the digitizer from the frame near the home button, make sure to drag the halberd spudger towards the RIGHT of the iPad. This will help avoid irreparable damage to the home button flex cable.

  4. iPad 7 Cracked Digitizer Replacement: step 4, image 1 of 2 iPad 7 Cracked Digitizer Replacement: step 4, image 2 of 2
    • Repeat Step 3 until the digitizer is free from the frame.

    • Don't attempt to remove the digitizer just yet. It is still connected to the main board with 3 different flex cables

    • Lift the left side of the digitizer towards the right side and lean it against something to keep it upright.

    • This will allow you to get to the LCD screen and proceed with the repair.

  5. iPad 7 Cracked Digitizer Replacement, LCD Screen: step 5, image 1 of 3 iPad 7 Cracked Digitizer Replacement, LCD Screen: step 5, image 2 of 3 iPad 7 Cracked Digitizer Replacement, LCD Screen: step 5, image 3 of 3
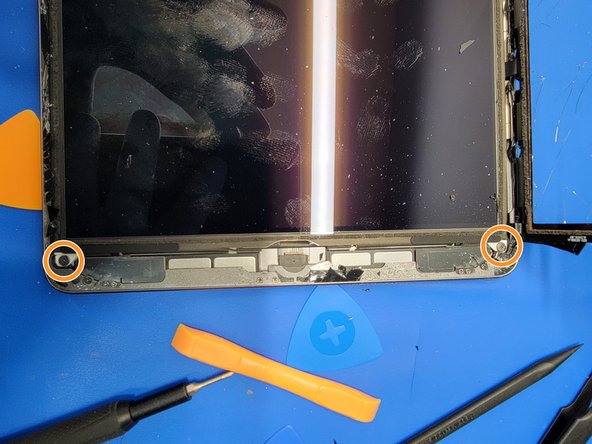
    • Locate the four screws holding down the LCD screen. These will be locate on all four corners of the LCD screen

    • Two screws are under a little piece of adhesive. Just lift the adhesive used ESD safe tweezers.

    • The other two screws are not covered

    • Don't remove that adhesive as it may cause damage to the LCD screen

    • Make sure to carefully clear any remaining digitizer glass away from the LCD screen to allow for it to lift without scratching

  6. iPad 7 Cracked Digitizer Replacement: step 6, image 1 of 1
    • Gently lift the LCD screen from the top of the iPad to the bottom of the iPad

    • Don't attempt to remove the LCD screen just yet as it is still connected to the main board via one flex cable

    • When lifting the LCD screen, be careful to not pull against the home button flex cable that is hidden towards the bottom right of the iPad

  7. iPad 7 Cracked Digitizer Replacement, Battery Isolation: step 7, image 1 of 2 iPad 7 Cracked Digitizer Replacement, Battery Isolation: step 7, image 2 of 2
    Tool used on this step:
    Battery Blocker
    $3.99
    Buy
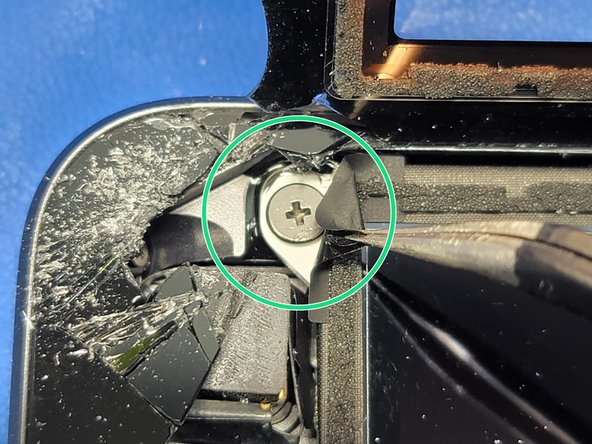
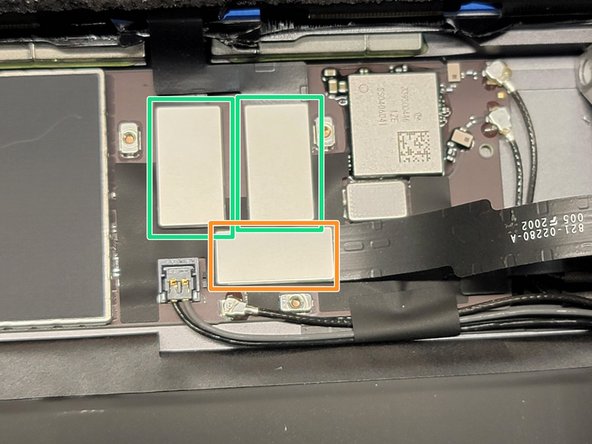
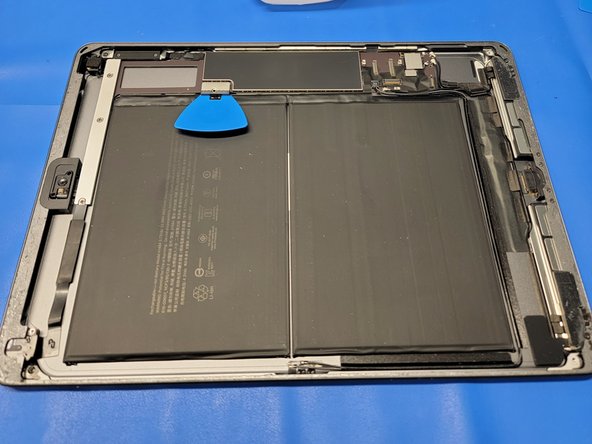
    • Locate the battery connector

    • Remove the 2.4mm screw securing the battery connector down to the mainboard

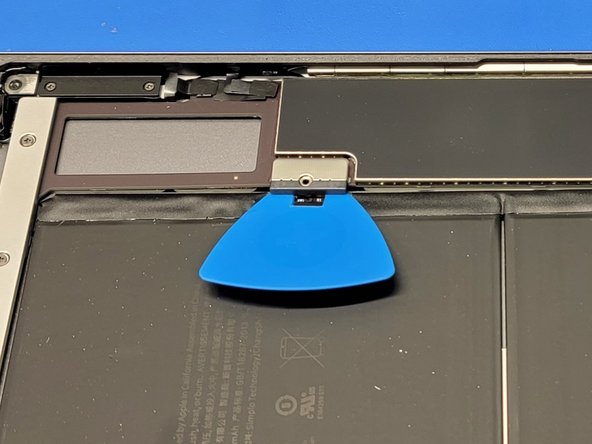
    • Insert the battery blocker STRAIGHT IN to lift the FPC connector from the battery.

    • Make sure to insert the battery blocker STRAIGHT IN. When removing, make sure the pull the battery blocker STRAIGHT OUT.

    • If you decide to not use the battery blocker, make sure to wear ESD gloves, and to use ESD safe tools. Only use metal tools when absolutely required (ex: screwdriver for screws)

  8. iPad 7 Cracked Digitizer Replacement: step 8, image 1 of 1
    • Locate this metal bracket that holds down the digitizer and LCD panel flex cables

    • Remove all three 1.4mm screws and remove bracket using ESD safe tweezers

    • Make sure to use ESD rated tools even if you use the battery blocker. This way you limit your chance of shorting out the board.

    • Before securing this bracket onto the main board, make sure to test all functionality of the iPad. This will allow for faster disconnecting and reconnecting of flex cables if troubleshooting is required.

  9. iPad 7 Cracked Digitizer Replacement: step 9, image 1 of 1
    Tool used on this step:
    Spudger
    $3.99
    Buy
    • Once you remove the bracket, you will notice 3 different connectors.

    • Two digitizer flex cables

    • One LCD panel flex cable

    • Use the flat end of an ESD safe spudger to gently pry off the LCD panel flex cable, by pulling up on the short side of the connector

    • After disconnecting the LCD flex cable, gently remove the LCD panel and place it in a safe location that is ESD free.

    • Be sure NOT to pry off the FPC connector on the main board. This is sorta difficult to do, but be careful nonetheless.

    • When you are ready to reattach the flex cable connectors, make sure to line up the connector to the port and press on one end of the connector into the port. Then press the other end in, and secure it by pressing on the middle of the connector. Verifying that is is secure

  10. iPad 7 Cracked Digitizer Replacement: step 10, image 1 of 2 iPad 7 Cracked Digitizer Replacement: step 10, image 2 of 2
    Tool used on this step:
    Halberd Spudger
    $2.99
    Buy
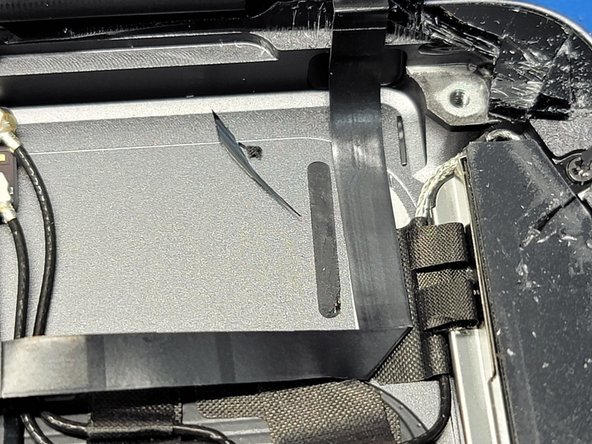
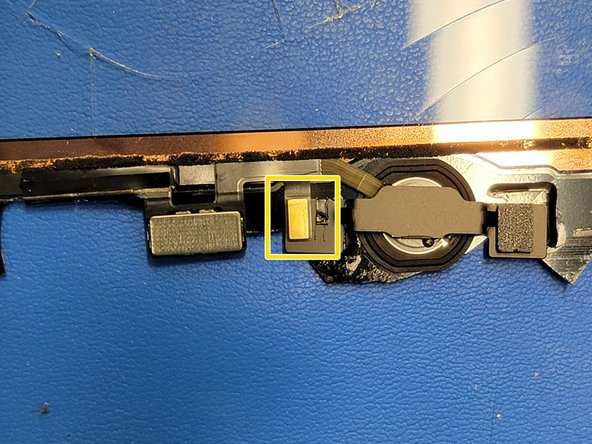
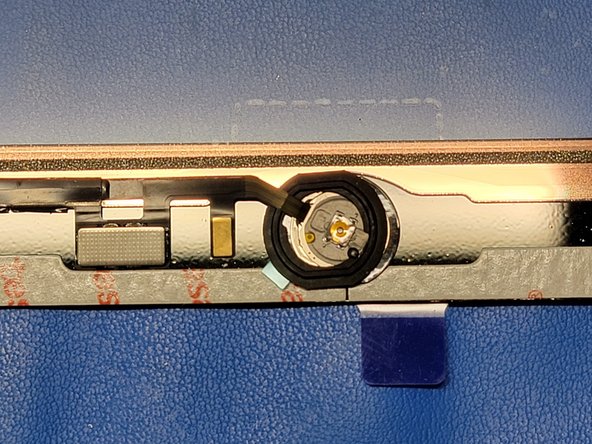
    • Locate the noise bumper that helps secure the home button flex cable to the frame

    • Use the Halberd Spudger to gently lift the bumper off the cable and frame

    • No heat should be necessary. But if you feel safer applying heat, only apply a small amount, as there is only a small amount of adhesive

    • Be sure NOT to rip the flex cable. This can cause irreparable damage to the home button and cause TOUCH ID to not work

  11. iPad 7 Cracked Digitizer Replacement: step 11, image 1 of 2 iPad 7 Cracked Digitizer Replacement: step 11, image 2 of 2
    • Locate the home button flex cable and follow it to its connector

    • You will notice there is a bit of tape covering this connector

    • Gently remove this adhesive using ESD safe tweezers

    • Make sure to ONLY grab the adhesive and not the cable, connector, port, or main board

  12. iPad 7 Cracked Digitizer Replacement: step 12, image 1 of 2 iPad 7 Cracked Digitizer Replacement: step 12, image 2 of 2
    Tool used on this step:
    Halberd Spudger
    $2.99
    Buy
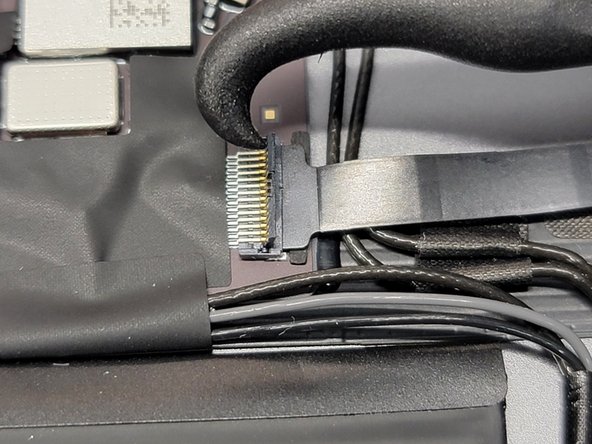
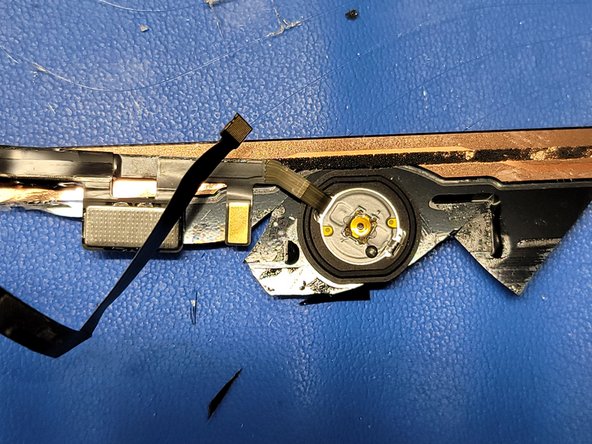
    • Take the hook end of the Halberd Spudger and place right in between the black flap and the metal connectors

    • Gently pull up and down towards the bottom of the iPad (right in the picture), making sure not to use much force

    • Use ESD safe tweezers to gently grab and pull out the cable towards the bottom of the iPad (right of the picture)

    • THIS DOES NOT REQUIRE MUCH FORCE. Make sure to not grab, bend, or pull the metal connectors as this may cause more damage and would require microsoldering.

  13. iPad 7 Cracked Digitizer Replacement: step 13, image 1 of 1
    Tool used on this step:
    Spudger
    $3.99
    Buy
    • Locate the two digitizer flex cables

    • Gently pry both cables up by using the flat end of an ESD safe spudger along the short end of the connectors

    • Make sure not to pull, pry, bend the sockets as this could damage them and would require microsoldering to repair

  14. iPad 7 Cracked Digitizer Replacement: step 14, image 1 of 1
    Tool used on this step:
    Halberd Spudger
    $2.99
    Buy
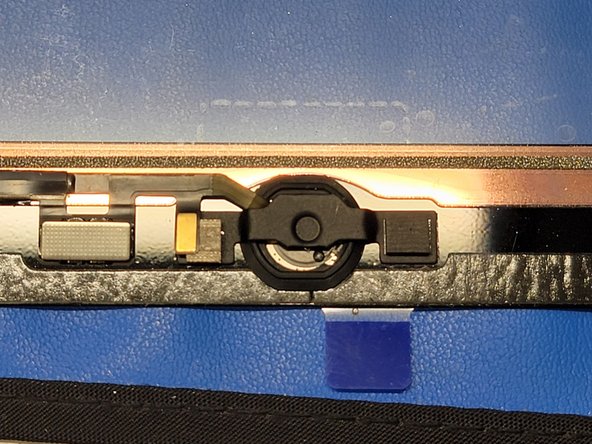
    • Locate the freed home button Flex cable and use a Halberd Spudger to gently separate the cable from the frame

    • This should require little to no force and no heat. However, if you would feel more comfortable using heat, use a small amount of heat by using a heat gun about 3-5in away from the cable

    • Once this is done, you may now remove the digitizer from the frame and place it to the side. We will be needing it for the next step.

    • Be careful as shards of glass could fall or fling when removing the digitizer

  15. iPad 7 Cracked Digitizer Replacement: step 15, image 1 of 1
    • On the digitizer, locate the home button on the bottom of the iPad.

    • You will notice a few things we will be detaching from the digitizer

    • Home button bracket and gasket

    • Flex cable

  16. iPad 7 Cracked Digitizer Replacement: step 16, image 1 of 2 iPad 7 Cracked Digitizer Replacement: step 16, image 2 of 2
    Tool used on this step:
    Halberd Spudger
    $2.99
    Buy
    • On the left side of the home button bracket you will notice a cushion that is on the top of part of the flex cable. We will be removing that

    • Apply a little heat (about 3-7 seconds worth of a hot air blower) to the front of the digitizer where this cushion is located.

    • Use the cutting side of the Halberd Spudger and gently seperate the cushion from the cable and bracket

    • Be careful as the flex cable in in-between the bracket and cushion. Don't lift the flex cable off the bracket just yet

  17. iPad 7 Cracked Digitizer Replacement: step 17, image 1 of 2 iPad 7 Cracked Digitizer Replacement: step 17, image 2 of 2
    Tool used on this step:
    Halberd Spudger
    $2.99
    Buy
    • Take the cutting side of the Halberd Spudger and place it in-between the flex cable and digitizer.

    • Gently separate the flex cable from the digitizer by bringing the spudger towards the home button

    • Heat shouldn't be required but may help loosen the adhesive if you are finding it a bit difficult to separate the flex cable from the digitizer

    • Once the spudger is near the part of the cable that rested on the bracket, pause. Adjust the spudger so that way you can now separate the flex cable from the bracket without damaging the flex cable

    • Be careful not to tug, twist, tear, or otherwise break the flex cable to the home button. Again, this will cause irreparable damage to the touch ID and home button.

  18. iPad 7 Cracked Digitizer Replacement: step 18, image 1 of 2 iPad 7 Cracked Digitizer Replacement: step 18, image 2 of 2
    Tool used on this step:
    Halberd Spudger
    $2.99
    Buy
    • Once the flex cable is free from the bracket, you may now remove the metal bracket.

    • This may require a bit of force and heat. Apply about 3-6 seconds worth of heat to the front of the digitizer about 3-5 in away from the digitizer.

    • Take the cutting end of the Halberd Spudger and separate the bracket from the digitizer

    • Again, be careful not to rip, tear, or otherwise break the home button flex cable. This will cause irreparable damage to the touch ID function and home button.

    • Once the bracket is removed, either throw it away or keep it for the new digitizer.

    • Depending where you get the new digitizer will determine if it comes with a new bracket and gasket. If your new digitizer doesn't, simply apply some Tesa tape or glue to the bottom of the bracket, and apply it to the new digitizer after installing the home button. Make sure it is not loose as this could cause home button clicking issues.

  19. iPad 7 Cracked Digitizer Replacement: step 19, image 1 of 1
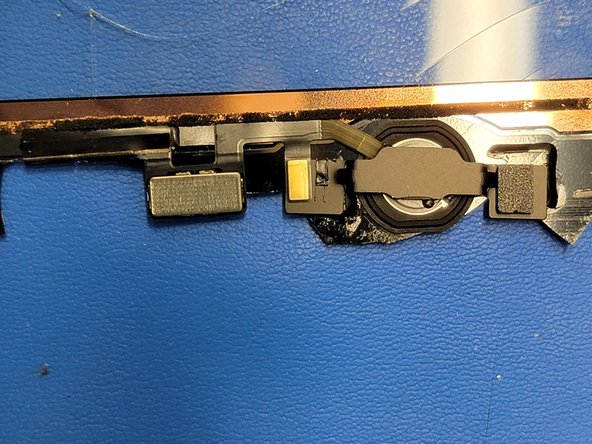
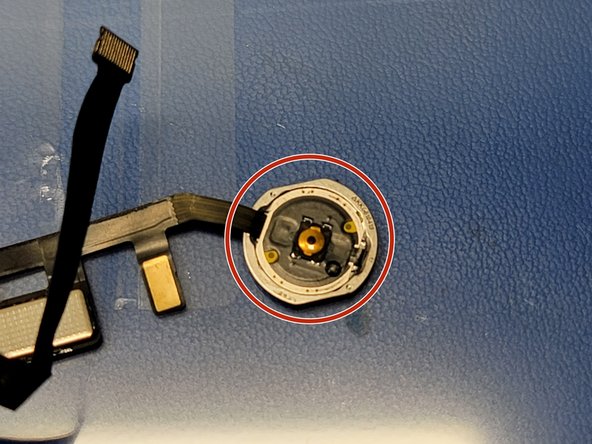
    • Time to remove the home button entirely from the digitizer

    • Apply about 4-7 seconds worth of heat to the front of the digitizer where the home button gasket is.

    • Gently press the home button from the front if the digitizer. With the adhesive being softened by the adhesive, you should be able to gently press the home button off from the digitizer.

    • If you need to reuse the gasket, make sure to be extra gentle and be generous with the heat as the gasket can easily be torn.

  20. iPad 7 Cracked Digitizer Replacement: step 20, image 1 of 1
    • If you haven't done so yet, this will be a good time to clear away any glass shards from the work area.

    • Use a combination of microfiber clothes and tape to get rid of as much as as possible

    • We want to make sure our work area is clean from any glass shards as to avoid scratches and scuffs to the frame of the iPad and other components.

  21. iPad 7 Cracked Digitizer Replacement: step 21, image 1 of 2 iPad 7 Cracked Digitizer Replacement: step 21, image 2 of 2
    • Use either ESD safe tweezers, or a side-glue cleaner to remove whats left of the glass shards and adhesive on the frame.

    • Using the either one or both of the tools above, gently but firmly scrape underneath the adhesive and glass around the frame. Use heat if you would like (only blowing heated air for about 3-5 seconds at a time)

    • Be careful not to overheat the battery as this can cause the battery to explode, or catch fire.

    • Be careful as glass shards can still fly up at you, and around you, causing possible injury.

  22. iPad 7 Cracked Digitizer Replacement, New Digitizer: step 22, image 1 of 3 iPad 7 Cracked Digitizer Replacement, New Digitizer: step 22, image 2 of 3 iPad 7 Cracked Digitizer Replacement, New Digitizer: step 22, image 3 of 3
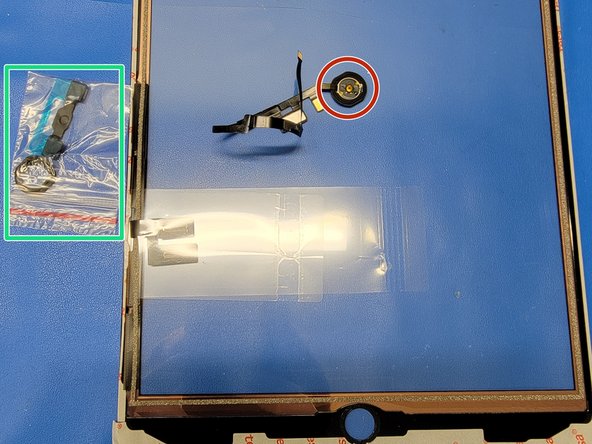
    • Gather your new home button bracket, gasket

    • VERY CAREFULLY remove old gasket from home button. We use ESD tweezers to do this very slowly and accurately as to not break the home button

    • If you don't have a replacement gasket, don't worry. Don't remove gasket from home button. Instead you will use new tesa tape or a bit of glue to adhere the gasket to the new digitizer

    • While doing this, make sure to not rip, tear, or otherwise break the home button flex cable. This will cause irreparable damage to the touch ID and home button

  23. iPad 7 Cracked Digitizer Replacement: step 23, image 1 of 2 iPad 7 Cracked Digitizer Replacement: step 23, image 2 of 2
    • Take the new gasket and look at it closely. There should be 2 rings of adhesive on it being covered up by blue strips of plastic. You will also notice there are 2 notches on thw inner portion of the gasket. This will help guide you with installing the new gasket

    • Insert the home button perpendicular to the gasket making sure to have it go through the 2 inner notches of the gasket and having the blue adhesives strips towards the part of the button where your finger clicks.

    • Once the gasket is on the home button but not applied, we need to apply the gasket.

    • One notch of the inner part of the gasket will go where the flex cable meets the home button.

    • When you remove the inside ring blue plastic, that adhesive is suppose to adhere to the home button.

    • Remove the inner most blue plastic by using ESD safe tweezers and an xacto knife. You will use the xacto knife to CAREFULLY cut a notch on the blue plastic so that way you can remove it easily from the home button.

    • Lift the home button up and use ESD safe tweezers remove the outermost blue plastic. Since the gasket is applied to the home button now, the outer blue plastic should come right off without the need to cut. Place the home button inside the hole of the digitizer. Once you are confident it is in the right position, firmly press down on the gasket.

    • Place the home button in the hole of the digitizer, and angle the flex cable towards the left of the digitizer (the side where the digitizer flex cables are).

  24. iPad 7 Cracked Digitizer Replacement: step 24, image 1 of 3 iPad 7 Cracked Digitizer Replacement: step 24, image 2 of 3 iPad 7 Cracked Digitizer Replacement: step 24, image 3 of 3
    • Take the metal bracket and remove the white paper covering the adhesive on the cushion

    • Take the blue plastic off the metal bracket

    • If reusing old bracket, take tesa tape or glue and apply a little amount to both ends where the bracket will adhere to the digitizer

    • Align the bracket with the cushion to the left and the indent on the bracket in the center of the home button.

    • Make sure to lift the flex cable gently over the metal bracket before pressing down

    • Once aligned, and flex cable is placed in the correct position over the bracket, firmly but gently press the 2 sides of the bracket onto the digitizer.

  25. iPad 7 Cracked Digitizer Replacement: step 25, image 1 of 1
    • Locate the LCD screen and use a screen cleaner and microfiber cloth to clean any smudges on the LCD panel.

    • Make sure there is no glass on the LCD panel while cleaning as this can cause scratches into the LCD panel.

    • Use an alcohol free screen cleaner like Distek Screen Cleaner to clean the LCD panel

Conclusion

To reassemble your device, follow these instructions in reverse order.

Notes:

  • Make sure to clean the edge of the frame from any broken pieces of digitizer. If this isn't done, your new digitizer might not sit properly within the frame
  • Be careful cleaning the LCD screen as little shards of glass can scratch the LCD screen permanently. You can use a piece of packaging tape to pick up as many shards as possible
  • Make sure to test all components prior to closing the digitizer with adhesive

We here at Smart Cloud hope your project goes smoothly and without a hitch. However, things happen and we want to make sure you know we are here to help if needed. You may contact us if needed as we can provide support or repair options per request. Good luck and have fun.

10 other people completed this guide.

Thomas Kirschbaum

Member since: 03/26/20

1,721 Reputation

3 Guides authored

Team

Smart Cloud LLC Member of Smart Cloud LLC

Business

1 Member

9 Guides authored

0 Comments

Add Comment

View Statistics:

Past 24 Hours: 2

Past 7 Days: 3

Past 30 Days: 3

All Time: 7,030