Introduction
このガイドの手順を使って、iMac Intel 21.5" Retina 4K Display (2017)のSATAハードドライブをアップグレードもしくは交換しましょう。ドライブをアップグレードする場合は、このアップグレードを始める前に、ファイルやシステムを保存するため現存のハードドライブを複製する ガイドを参照して作業を進めてください。
このガイドのある画像は2015年モデルのiMacのものが使用されています。わずかな見た目の違いがありますが、これらは、修理方法に影響を与えません。
What you need
-
-
iFixitの梱包用ボックスを使ってウェッジ用サポートを作ることができます。こちらから組み立てガイドを参照してください。
-
iMacの作業を始める前に、コンピューターの電源を外して電源のキャパシタを放電するため約10秒間電源を押し続けてください。
-
-
-
-
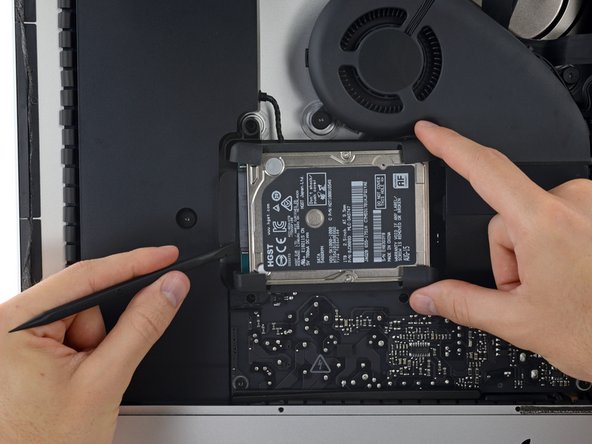
iMacにハードドライブブラケットを固定しているT10トルクスネジを外します。
-
21 mm ネジー2本
-
9 mmネジー1本
-
27 mmネジー1本
-


デバイスを再組み立てする際は、これらの手順を逆の順番に従って作業を進めてください。
デバイスを再組み立てする際は、これらの手順を逆の順番に従って作業を進めてください。
Cancel: I did not complete this guide.
82 other people completed this guide.
Special thanks to these translators:
100%

Midori Doi is helping us fix the world! Want to contribute?
Start translating ›

35 Comments
What type of SATA SSDs are compatible with iMac? I don't want to buy the kit because I have the necessary tools, but I'd like to know which brand of SSDs work the best.
>Will take any SATA SSD.
>On a mac with a fusion drive, it just removes the spinning drive from the mix, leaving you with a separate 28gig or 128 gig SSD drive that will appear on your desktop along with the newly installed SATA SSD.
>NO TEMPERATURE monitor is needed. This generation of iMacs has done away with the propietary temp sensor. It just relies on S.M.A.R.T. tech now.
Does the screen stick back on with the same adhesive or do you have to reapply new adhesive? If yes, does it come in the kit?
You have to apply new adhesive. Go slow and careful, it’s really not hard at all.