
iMac Intel 20" EMC 2105 and 2118 Power Supply - short cut method avoids removing logic board Replacement

What you need

  1. iMac Intel 20" EMC 2105 and 2118 Power Supply - short cut method avoids removing logic board Replacement, Access Door: step 1, image 1 of 2 iMac Intel 20" EMC 2105 and 2118 Power Supply - short cut method avoids removing logic board Replacement, Access Door: step 1, image 2 of 2
    • Loosen the two Phillips screws securing the access door to your iMac.

    • Both screws remain captive within the access door.

    • Remove the access door.

    • Before beginning the repair, unplug the computer and press and hold the power switch for 20-30 seconds, to discharge internal capacitors.

  2. iMac Intel 20" EMC 2105 and 2118 Power Supply - short cut method avoids removing logic board Replacement, Front Bezel: step 2, image 1 of 1
    • Remove the following screws along the lower edge of your iMac:

    • Three 6 mm T8 Torx screws

    • One 8 mm T8 Torx screw (Right side of the RAM slot on 2105)

  3. iMac Intel 20" EMC 2105 and 2118 Power Supply - short cut method avoids removing logic board Replacement: step 3, image 1 of 3 iMac Intel 20" EMC 2105 and 2118 Power Supply - short cut method avoids removing logic board Replacement: step 3, image 2 of 3 iMac Intel 20" EMC 2105 and 2118 Power Supply - short cut method avoids removing logic board Replacement: step 3, image 3 of 3
    Tool used on this step:
    Plastic Cards
    $2.99
    Buy
    • Re-orient your iMac so it sits upright on the stand.

    • Insert a plastic card up into the corner of the air vent slot near the top of the rear case.

    • Push the card toward the top of the iMac to release the front bezel latch.

    • Pull the front bezel away from the rear case.

    • Repeat this process for the other side of the front bezel.

    • It may be necessary to apply several layers of duct tape to the top of the access card to aid in releasing the latches. Or use two cards for the additional thickness.

    • If the bezel refuses to release, try lifting the lower edge of the front bezel slightly away from the rear case (detailed in the next few steps) and repeat the latch release process.

  4. iMac Intel 20" EMC 2105 and 2118 Power Supply - short cut method avoids removing logic board Replacement: step 4, image 1 of 2 iMac Intel 20" EMC 2105 and 2118 Power Supply - short cut method avoids removing logic board Replacement: step 4, image 2 of 2
    • Lay your iMac stand-side down on a flat surface.

    • To lift the front bezel off the iMac, simultaneously:

    • Use your thumbs to press in the RAM arms and hold the iMac down.

    • Use your index fingers to pull the small bridge of material on the front bezel toward yourself.

    • Pull the front bezel up with your index fingers.

    • Once the small bridge of material has cleared the RAM arms, lift the front bezel by its lower edge just enough to clear the bottom edge of the rear case.

  5. iMac Intel 20" EMC 2105 and 2118 Power Supply - short cut method avoids removing logic board Replacement: step 5, image 1 of 2 iMac Intel 20" EMC 2105 and 2118 Power Supply - short cut method avoids removing logic board Replacement: step 5, image 2 of 2
    • Lift the front bezel off the rear case and rotate it away from the bottom edge of the iMac, minding the camera and microphone cables still attached to its upper edge.

  6. iMac Intel 20" EMC 2105 and 2118 Power Supply - short cut method avoids removing logic board Replacement: step 6, image 1 of 1
    • If necessary, remove the strip of tape covering the microphone cable connector.

    • The microphone connector is located near the inside of top edge of your iMac.

  7. iMac Intel 20" EMC 2105 and 2118 Power Supply - short cut method avoids removing logic board Replacement: step 7, image 1 of 3 iMac Intel 20" EMC 2105 and 2118 Power Supply - short cut method avoids removing logic board Replacement: step 7, image 2 of 3 iMac Intel 20" EMC 2105 and 2118 Power Supply - short cut method avoids removing logic board Replacement: step 7, image 3 of 3
    • Disconnect the microphone cable.

    • Disconnect the camera cable by pulling its connector away from the socket on the camera board.

    • The camera cable connector and socket are delicate and easily bent. Remove with caution.

  8. iMac Intel 20" EMC 2105 and 2118 Power Supply - short cut method avoids removing logic board Replacement, Lower EMI Shield: step 8, image 1 of 1
    • Peel up the lower EMI shield from the rear case.

    • It is only necessary to peel the shield up from three sides. Leave it attached to the display.

    • If you happen to rip the EMI shield, use a piece of foil tape to cover the tear.

  9. iMac Intel 20" EMC 2105 and 2118 Power Supply - short cut method avoids removing logic board Replacement: step 9, image 1 of 1
    • Tape the EMI shield to the face of the display to keep it out of the way.

  10. iMac Intel 20" EMC 2105 and 2118 Power Supply - short cut method avoids removing logic board Replacement, Display: step 10, image 1 of 2 iMac Intel 20" EMC 2105 and 2118 Power Supply - short cut method avoids removing logic board Replacement, Display: step 10, image 2 of 2
    • Remove the two 5 mm T6 Torx screws securing the display data cable connector to the logic board.

    • Pull the display data cable connector up off the logic board by its black pull tab.

  11. iMac Intel 20" EMC 2105 and 2118 Power Supply - short cut method avoids removing logic board Replacement: step 11, image 1 of 1
    • Peel back the EMI tape from the two vertical edges of the display.

    • During reassembly, it is helpful to use several small strips of tape to hold the EMI shielding along the left and right edges of the display footprint out of the way before lowering the display into the rear case of your iMac.

  12. iMac Intel 20" EMC 2105 and 2118 Power Supply - short cut method avoids removing logic board Replacement: step 12, image 1 of 2 iMac Intel 20" EMC 2105 and 2118 Power Supply - short cut method avoids removing logic board Replacement: step 12, image 2 of 2
    • Allow the lower EMI shield to hang down from the display.

    • Remove the four 7.5 mm T10 Torx screws securing the display to the rear case.

    • The screws are recessed, so a thin magnetic screwdriver aids in removal. Most bit drivers are too short to reach these screws.

  13. iMac Intel 20" EMC 2105 and 2118 Power Supply - short cut method avoids removing logic board Replacement: step 13, image 1 of 1
    • Lift the lower edge of the display and rotate it toward the top edge of your iMac.

    • Do not lift it too much, as the inverter cables are still attached.

  14. iMac Intel 20" EMC 2105 and 2118 Power Supply - short cut method avoids removing logic board Replacement: step 14, image 1 of 2 iMac Intel 20" EMC 2105 and 2118 Power Supply - short cut method avoids removing logic board Replacement: step 14, image 2 of 2
    • Disconnect both inverter cables from the inverter board.

    • These connectors are seated very tightly in their sockets. It is helpful to use your fingernails or the tip of a spudger to push the ears on either side of the connectors to dislodge them from their sockets. A small pair of hemostats helps a lot.

  15. iMac Intel 20" EMC 2105 and 2118 Power Supply - short cut method avoids removing logic board Replacement: step 15, image 1 of 1
    • Disconnect the two inverter cables at the top edge of the inverter using the method explained in the previous step.

  16. iMac Intel 20" EMC 2105 and 2118 Power Supply - short cut method avoids removing logic board Replacement: step 16, image 1 of 1
    • Rotate the display until it is nearly perpendicular to the rear case and lift it up to peel it off the EMI shield stuck to its top edge.

  17. iMac Intel 20" EMC 2105 and 2118 Power Supply - short cut method avoids removing logic board Replacement, Hard Drive: step 17, image 1 of 1
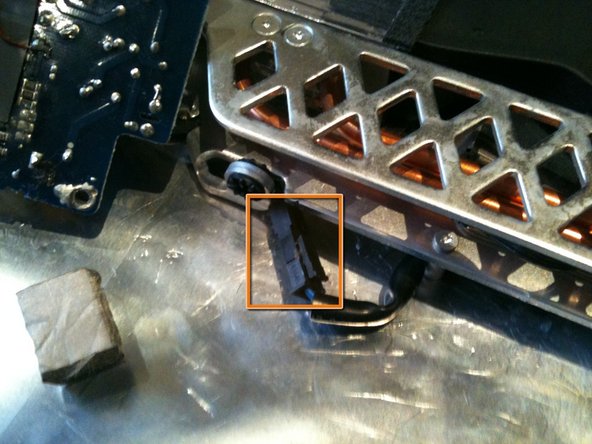
    • Disconnect the hard drive thermal sensor from the top edge of the logic board.

    • Pull the connector parallel to the face of the logic board.

  18. iMac Intel 20" EMC 2105 and 2118 Power Supply - short cut method avoids removing logic board Replacement: step 18, image 1 of 1
    • Remove the two 9.2 mm T10 Torx screws securing the hard drive bracket to the rear case.

  19. iMac Intel 20" EMC 2105 and 2118 Power Supply - short cut method avoids removing logic board Replacement: step 19, image 1 of 1
    • Lift the hard drive from its left edge enough to clear the inverter and pull it toward the left edge of your iMac to unseat the mounting pins from the chassis.

    • During installation, do not push the rubber grommets through the chassis with the hard drive mounting pins as retrieving them will require removing the logic board.

  20. iMac Intel 20" EMC 2105 and 2118 Power Supply - short cut method avoids removing logic board Replacement: step 20, image 1 of 2 iMac Intel 20" EMC 2105 and 2118 Power Supply - short cut method avoids removing logic board Replacement: step 20, image 2 of 2
    • Pull both the SATA power and data cable connectors away from the hard drive.

    • Be careful when de-routing the hard drive thermal sensor cable from under the heat sink framework.

  21. iMac Intel 20" EMC 2105 and 2118 Power Supply - short cut method avoids removing logic board Replacement, Power Supply - short cut method avoids removing logic board: step 21, image 1 of 1
    • Order your replacement PSU from iFixit - great prices and FAST delivery

  22. iMac Intel 20" EMC 2105 and 2118 Power Supply - short cut method avoids removing logic board Replacement: step 22, image 1 of 2 iMac Intel 20" EMC 2105 and 2118 Power Supply - short cut method avoids removing logic board Replacement: step 22, image 2 of 2
    • Remove the 4 Torx T10 screws and gently lift the lefts side up and angle the power supply as shown in the second photo.

    • The bottom right screw is a metal thread screw, all the others are a coarse thread self tapper

  23. iMac Intel 20" EMC 2105 and 2118 Power Supply - short cut method avoids removing logic board Replacement: step 23, image 1 of 1
    • Disconnect the left side connector (the output) on the power supply

    • This connector may be tucked under the circuit board to the left of the power supply. If so, GENTLY pull the connector out from under the circuit board

  24. iMac Intel 20" EMC 2105 and 2118 Power Supply - short cut method avoids removing logic board Replacement: step 24, image 1 of 1
    • Locate the black cable that runs from the right side (input) of the powers supply under the metal frame. Using a rounded (not sharp) tool gently bring the cable out from under the metal frame

  25. iMac Intel 20" EMC 2105 and 2118 Power Supply - short cut method avoids removing logic board Replacement: step 25, image 1 of 2 iMac Intel 20" EMC 2105 and 2118 Power Supply - short cut method avoids removing logic board Replacement: step 25, image 2 of 2
    • You should now remove the metalised foam block located under the metal frame near the top HDD mount. Then GENTLY pull the wires out from under the metal frame to expose the connector

    • I used an Allen key as a hook to do this. The wires may be secured with tape. If so use a spudger or other non sharp tool to lift or break the tape to free the wires

    • The wires from the power supply to the connector are JUST long enough to allow disconnecting the connector. REMEMBER this when you install new Power supply to avoid damaging it

  26. iMac Intel 20" EMC 2105 and 2118 Power Supply - short cut method avoids removing logic board Replacement: step 26, image 1 of 2 iMac Intel 20" EMC 2105 and 2118 Power Supply - short cut method avoids removing logic board Replacement: step 26, image 2 of 2
    • Disconnect the right side connector (output) on the power supply and Gently pull the power supply out while feeding the connector under the metal bracket

    • The wires from the power supply to the connector are JUST long enough to allow disconnecting the connector. REMEMBER this when you install new Power supply to avoid damaging it

Conclusion

To reassemble your device, follow these instructions in reverse order noting the correct placement of the power supply mounting screws.

39 other people completed this guide.

Richdave

Member since: 04/09/10

32,006 Reputation

30 Guides authored

Team

Master Techs Member of Master Techs

Community

322 Members

2,495 Guides authored

3 Comments

Hi everyone,

My iMac Intel 20" died on Christmas 2012. I never had time to repair it until today. I bought the power supply on ebay (a bit cheaper).

I took me one hour to follow all de instructions. A bit of a headache trying to attach the screen again, a bit tricky if your screw driver is not magnet (I used blue-tac in the end).

Now my iMac is alive, the power supply was different to the original one but same power and especifications.

The only thing is my screen have some issues with lines and color, I might not plug in the cable totally. One day if I am bored I´ll check it out.

Thanks ifixit!

Pedro - Reply

Personally, I just could NOT wiggle the Power Supply's connector out in such a way I could safely disconnect it, so this "shortcut" guide didn't help all that much.

As it was, I went the traditional route, using the guide that details removal of the Logic Board. Having said that, Don't Panic: there is an intermediate route, because you don't need to remove the Logic Board! You just need to be able to (safely) lift it at the top a few inches to get access to the Power Supply's connectors. I saved 10-15 steps by not removing all the various connectors on the Logic Board that other guide directed you to do.

Followed that guide, I had a working iMac back up and running for $55.00. My old PSU was Apple P/N 614-0378. The replacement via Amazon seems to be a OEM: SADP-185AF. Had the same form factor and input/output voltage parameters though.

iMac Intel 20" EMC 2218: Model A1207

skat1140 - Reply

I need the source schematic of the source iMac 24 Inch 2006 2.16 / 2.33 or at least the output voltages of it to check if it is in trouble will be able to pass these voltages

Decio - Reply

Add Comment

View Statistics:

Past 24 Hours: 0

Past 7 Days: 5

Past 30 Days: 21

All Time: 23,198