Introduction
The iMac G3 Uses a 3.5" IDE Hard Drive. It supports data partitions no larger then 128GB and boot partitions no larger then 8GB (The 8GB limit only applies to iMac G3 tray loaders).
What you need
-
-
The iMac G3. This was a great computer for the time, and had plenty of features.
-
-
-
-
Remove the two phillips #00 screws.
-
Then remove the board. This will reveal that it is a standard PATA drive.
-
Congrats, the drive is free! You can use any PATA-tray loading drive in the iMac G3 which means you can install a CDRW to burn CDs in OS9 or X(if using OSX,install that DVD writer) but, of course only original drives will match the great look of the iMac).
-
-
-
Start by removing these Phillips screws:
-
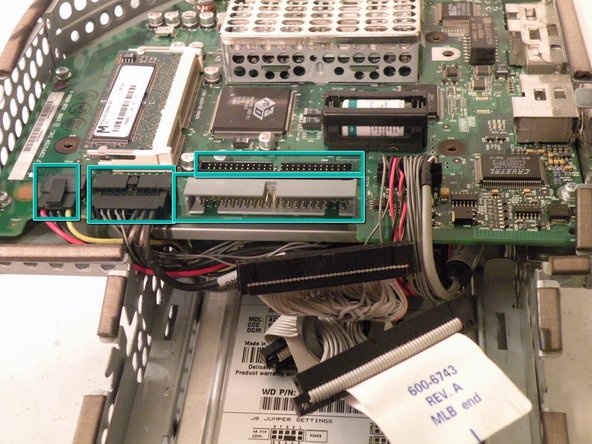
Now, remove all of these cables:
At this step, the right screw refused to budge. I managed to strip the you-know-what out of it trying to extract it. Every tool I tried, it only got worse. I put it aside for the night and resigned myself to buying some stubborn/rusted-screw-extracting tool the next day. One of the lessons here is rest and walk away if you get frustrated because after a moment of clarity I had a crazy idea. What if I left the screw there and tried to remove the 4 HDD screws THROUGH the holes in the drive cage?! IT WORKED!
I carefully got to all the screws, simply lifted the HDD out of the still-attached bracket, unplugged the connectors and replaced it with a spanking new 120 GB IDE drive by sticking the screwdriver head into the small holes a la the kid’s game Operation! There is NO WAY I could have done this if 1) I didn’t have a magnetic-head screwdriver (thanks iFixit!) and 2) if there wasn’t an opening at the head of the drive cage on both sides for when the screws fell loose.
Hope this helps someone. Aloha!
-
-
-
Now, remove the optical drive retention spring.
-
Push in on both sides, and pull towards you releasing the retention spring.
Note the orientation of the retention spring. The end towards the back should be pointing upwards.
-
-
-
Now lift the drive up, and pull it out.
If you have trouble getting the drive out, note that there are two small hooks on the underside of the drive cage keeping it in place. Get the hooks out of the holes and the drive will be freed. It can be a bit fiddly.
-


To reassemble your device, follow these instructions in reverse order.
To reassemble your device, follow these instructions in reverse order.
Cancel: I did not complete this guide.
39 other people completed this guide.

Team

8 Comments
great description, great photos
Many thanks. Worked perfectly.
is the hard disk on a mac interchangeable to iMac 4984 from iMac M5521? Power supply failed on M5521. thx
Çok güzel. Makul bir para ödemesi yapabilirim.
Thank you so much! My grandmother finally decided to throw hers away but she wanted the hard drive and I got it for her with your help!!!
Oh thats so sad. She threw away a piece of apple history :(
Any idea if I would be able to put a modern 1tb HDD into my iMac G3?
Unfortunately not. The largest drive these machines support is 128GB total but you must partition the drive so that the OS / boot partition is 8GB or smaller. If you want the machine to be faster and more reliable, you can install a 120-128GB solid state drive with an IDE-to-SATA adapter.