
Xbox One S Case Replacement

What you need

  1. Xbox One S Case Replacement, Case: step 1, image 1 of 1
    • Flip the Xbox One S so that the bottom of the case is facing upward.

  2. Xbox One S Case Replacement: step 2, image 1 of 1
    • Insert the plastic opening tool into the gap between the bottom of the case and the grated top side. Then find the clips in between that hold the case in place.

    • Use the opening tool to pop the clips out. The best method is to pry the black case away from the bottom.

    • You will hear clicking sounds when you are prying the case open. It may be fairly difficult to remove the bottom.

    • It's possible that the clips may break when you remove the bottom from the case.

    • We recommend starting at one corner and sliding the prying tool along the edges of the Xbox One S. Once the first few clips are opened you can lift the cover up to find the remaining clips.

  3. Xbox One S Case Replacement: step 3, image 1 of 1
    • Once all of the clips are opened, remove the bottom part of the case.

  4. Xbox One S Case Replacement: step 4, image 1 of 2 Xbox One S Case Replacement: step 4, image 2 of 2
    • Use a T10 Torx screwdriver to remove the six green 50 mm long screws from the metal case labeled F1 through F6.

  5. Xbox One S Case Replacement: step 5, image 1 of 3 Xbox One S Case Replacement: step 5, image 2 of 3 Xbox One S Case Replacement: step 5, image 3 of 3
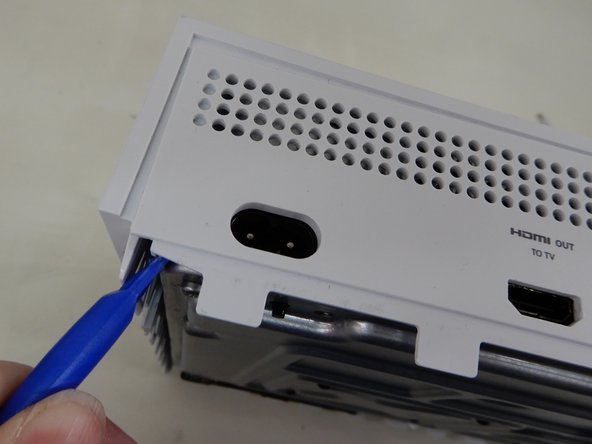
    • Insert an opening tool gently between the top cover and metal casing on both sides to prepare the cover for removal.

    • This step is necessary because you need to pry interior rivets away from the exterior case. The interior rivets that hold the case in place are circled in the last image. After you gently pry in the areas demonstrated, the side panel of the exterior case will be able to come off of the rest of the casing.

    • Look at the image in Step 7 for clarification on how the exterior case disassembles.

  6. Xbox One S Case Replacement: step 6, image 1 of 2 Xbox One S Case Replacement: step 6, image 2 of 2
    • Gently separate the interior case from the white exterior case using the appropriate method.

Christopher Chen

Member since: 04/26/17

621 Reputation

2 Guides authored

Team

Cal Poly, Team S22-G3, Livingston Spring 2017 Member of Cal Poly, Team S22-G3, Livingston Spring 2017

CPSU-LIVINGSTON-S17S22G3

4 Members

56 Guides authored

View Statistics:

Past 24 Hours: 39

Past 7 Days: 204

Past 30 Days: 773

All Time: 63,072