Introduction
Exercise caution when lifting the LCD screen, as any excessive pulling can damage the motherboard. Otherwise, the LCD screen is one of the easiest parts of the device to replace and only requires a small amount of unscrewing, prying and gluing.
What you need
-
-
-
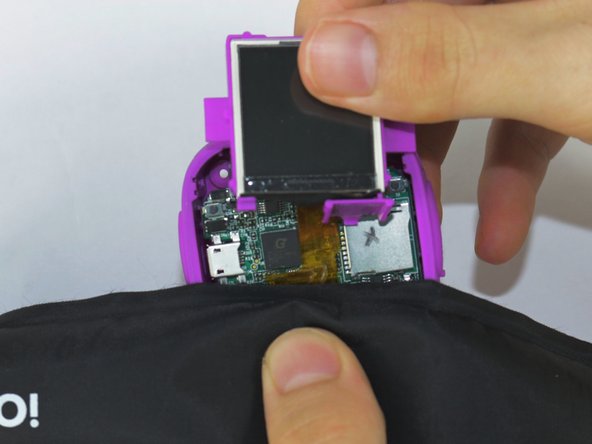
Use the plastic opening tool to lift the LCD screen, including the purple casing and set it aside, revealing the motherboard and connector ribbon.
Step 7 should read: Unsecure camera lens from front of device using plastic lifting tool by gently separating adhesive. Remove LCD screen and mother board assembly by gently lifting mother board out with plastic lifting tool. Adhesive on speaker may need to be loosened to allow mother board assembly to lift easily out. Use caution not to damage camera ribbon cable as it feeds through slot in front of device. Battery is located on rear of mother board.
-
-
-
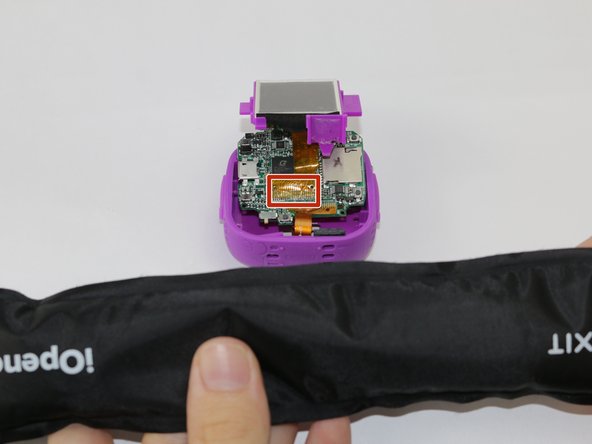
Heat the iOpener tool, then press the iOpener tool onto the connectors to heat the glue on the connector ribbon.
-


To reassemble your device, follow these instructions in reverse order.
To reassemble your device, follow these instructions in reverse order.
Cancel: I did not complete this guide.
4 other people completed this guide.
Team

USF Tampa, Team 3-5, Sullivan Spring 2016 Member of USF Tampa, Team 3-5, Sullivan Spring 2016
USFT-SULLIVAN-S16S3G5
3 Members
6 Guides authored