
ThinkPad Yoga 12 SSD Replacement

What you need

  1. ThinkPad Yoga 12 SSD Replacement, Screws: step 1, image 1 of 3 ThinkPad Yoga 12 SSD Replacement, Screws: step 1, image 2 of 3 ThinkPad Yoga 12 SSD Replacement, Screws: step 1, image 3 of 3
    • Remove the ten Phillips screws using a Philips 00 screwdriver

  2. ThinkPad Yoga 12 SSD Replacement, Prying: step 2, image 1 of 2 ThinkPad Yoga 12 SSD Replacement, Prying: step 2, image 2 of 2
    • Pry up the case carefully using a spudger.

    • Make sure to not push the spudger in too far, as this could result in internal damage

  3. ThinkPad Yoga 12 SSD Replacement, Lift off cover: step 3, image 1 of 1
    • Lift off the cover, and you're done!

  4. ThinkPad Yoga 12 SSD Replacement, Remove SSD from the laptop: step 4, image 1 of 2 ThinkPad Yoga 12 SSD Replacement, Remove SSD from the laptop: step 4, image 2 of 2
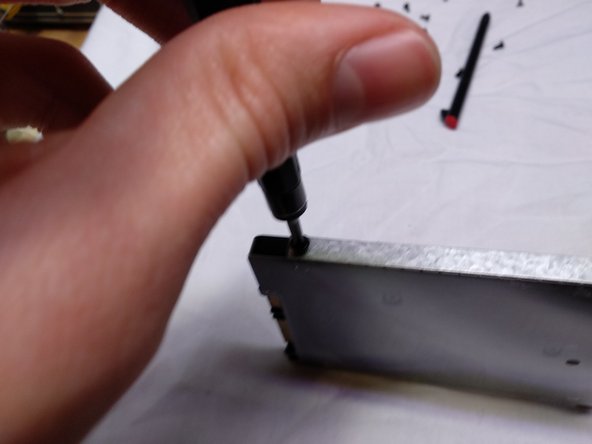
    • Carefully remove two Phillips screws with a Phillips 0 screwdriver

    • Static sensitive components!

  5. ThinkPad Yoga 12 SSD Replacement: step 5, image 1 of 2 ThinkPad Yoga 12 SSD Replacement: step 5, image 2 of 2
    • Gently grab the plastic tab. Lift and pull the SSD assembly out of the computer

  6. ThinkPad Yoga 12 SSD Replacement, Remove enclosure: step 6, image 1 of 2 ThinkPad Yoga 12 SSD Replacement, Remove enclosure: step 6, image 2 of 2
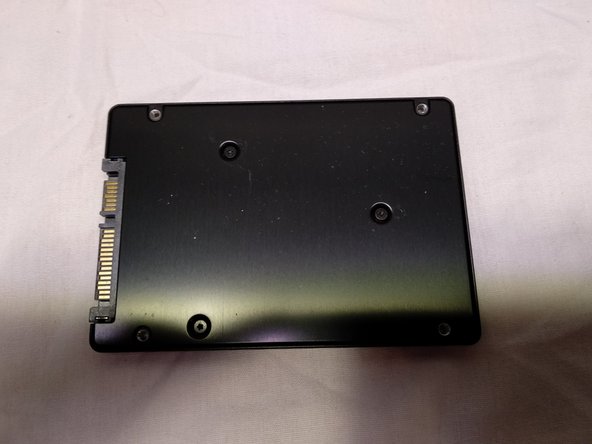
    • Remove the 4 identical Phillips screws with a Phillips 00 screw driver (they are on both sides).

  7. ThinkPad Yoga 12 SSD Replacement, Done!: step 7, image 1 of 2 ThinkPad Yoga 12 SSD Replacement, Done!: step 7, image 2 of 2
    • Carefully remove the SSD enclosure.

    • Note: The SSD enclosure is made of thin metal. It can be easily deformed. Be careful when removing from the SSD.

[deleted]

Member since: 03/18/18

1,324 Reputation

3 Guides authored

View Statistics:

Past 24 Hours: 0

Past 7 Days: 1

Past 30 Days: 19

All Time: 4,865