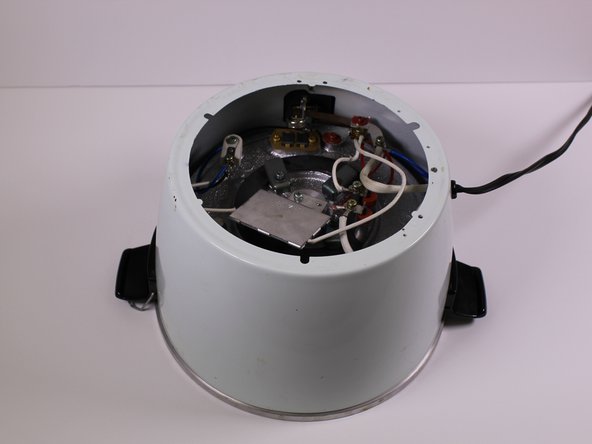
Free Shipping on Domestic Orders $75+

Tatung TAC-6G Light Element Replacement

What you need

  1. Tatung TAC-6G Light Element Replacement, Light Element: step 1, image 1 of 1
    • Start with the device standing upright.

    Ask FixBot
  2. Tatung TAC-6G Light Element Replacement: step 2, image 1 of 1
    • Remove the 11mm Phillips screw from below the power component panel.

    Ask FixBot
  3. Tatung TAC-6G Light Element Replacement: step 3, image 1 of 1
    • Pull the panel away from the rice cooker.

    • Remove the 9mm Phillips screw from behind the power component dashboard that is connected to the light plate.

    Ask FixBot
  4. Tatung TAC-6G Light Element Replacement: step 4, image 1 of 1
    • Pull the light plate from the power component panel.

    Ask FixBot
  5. Tatung TAC-6G Light Element Replacement: step 5, image 1 of 1
    • Flip the rice cooker device upside down.

    Ask FixBot
  6. Tatung TAC-6G Light Element Replacement: step 6, image 1 of 2 Tatung TAC-6G Light Element Replacement: step 6, image 2 of 2
    • Remove the one 7mm Phillips screw from the side of the brass panel

    • Lift the brass plate off of the device and set it aside.

    Ask FixBot
  7. Tatung TAC-6G Light Element Replacement: step 7, image 1 of 1
    • Remove the 7mm Phillips screw holding the white and maroon colored wires that are connected to the heating element.

    Ask FixBot
  8. Tatung TAC-6G Light Element Replacement: step 8, image 1 of 1
    • Remove the 10mm Phillips screw that connects the white, blue and black wires to the white plastic piece in the corner of the device.

    Ask FixBot
  9. Tatung TAC-6G Light Element Replacement: step 9, image 1 of 1
    • Remove the 7mm Phillips screw that connects two white wires and one red wire to the heating "warm" switch.

    Ask FixBot
  10. Tatung TAC-6G Light Element Replacement: step 10, image 1 of 1
    • Using your hand, pull out the light plate with the maroon red and black wires.

    Ask FixBot
  11. Tatung TAC-6G Light Element Replacement: step 11, image 1 of 1
    • Replace the light plate dashboard.

    Ask FixBot
Conclusion

To reassemble your device, follow these instructions in reverse order.

1 Guide Comment

Reverse the steps for reassembly.

Tom Anderson - Reply Share

Add Comment

View Statistics:

Past 24 Hours: 3

Past 7 Days: 11

Past 30 Days: 44

All Time: 1,028