Introduction
The headband arch is a very common point of failure on the Sony h.ear on 3. When I was tearing down my headphones, I tore down the headband arch after removing the headband from the speakers, partly out of curiosity and partly to help me try to superglue them together (take heed, the superglue did not work).
I don't want to let all the learning and pictures go to waste, so this goes through how you would go about tearing down the headband arch.
Because this is superfluous to a lot of repairs and because it doesn't have a specific point, I did not put prerequisite guides here. You can do this with a headband arch already disconnected, or you need to extract one from a pair of Sony h.ear on 3s, which you can do here.
What you need
-
-
The headband arch has two kinds of attachments at the end that mirror each other:
-
Pins that insert into the speaker housings with no cables.
-
Pins with a loose bracket each that screws into the speaker housings. These have the headband cable threaded through them.
-
-
-
Turn the headband flat with the pins with the cable running through them on the bottom.
-
Gently thread the brackets through and out of one cable, then repeat on the other side.
-
-
-
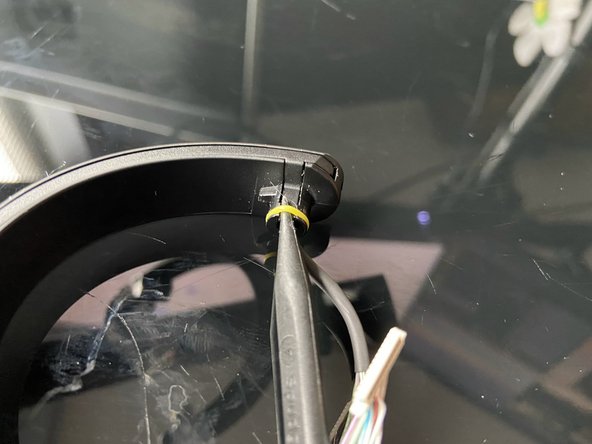
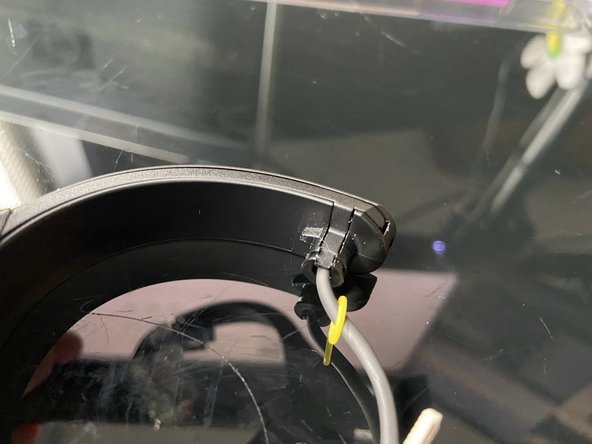
Keeping the headband in the same position they were in for the last step, use the pointed end of a spudger to gently unhook the yellow rubber rings from each of the rear pegs (that had the brackets around them).
-
Gently thread the rubber rings out of the headband cable.
-
-
-
-
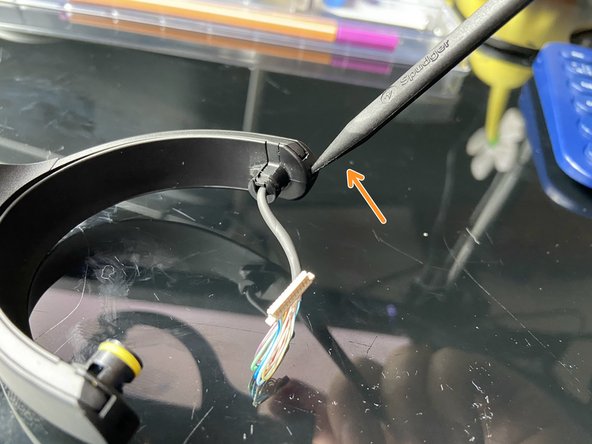
Insert the pointed end of a spudger into one of the holes at the very end of one of the headband arches.
-
Gently push upwards towards the thin arch casing above. This should unlatch the hook.
-
Repeat for all 4 ends of the headband arch.
-
-
-
Gently lift or pry away at the thin parts of the headband arch to separate the thin case segments from the deep case segments.
-
-
-
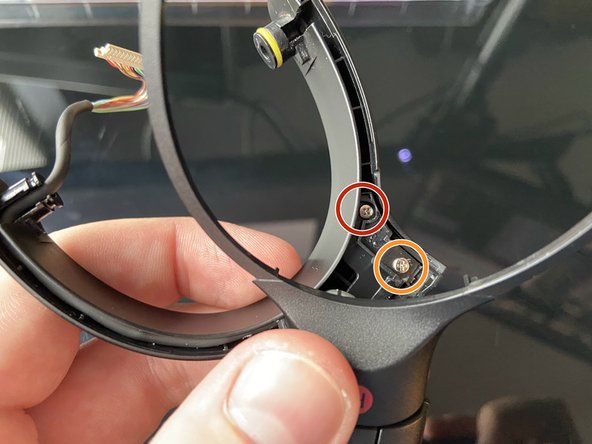
Gently swivel the thin arch casing from the deep arch casing. This reveals two pairs of screws holding a cable retaining bracket in place at the base of the deep arch segment:
-
2x ??? JIS (probably #000) screws
-
2x ??? JIS (probably #000) screws
-
Unscrew the screws and remove the retaining bracket. Don't remove the cable yet.
-
-
-
At this point you can pull the cable out from the deep casing of the headband arch. This also means you can finally separate the thin arch casing from the deep arch casing!
-
-
-
That's all I have at this point. From what I remember there are pretty obvious points of further disassembly if you need or want to continue!
-