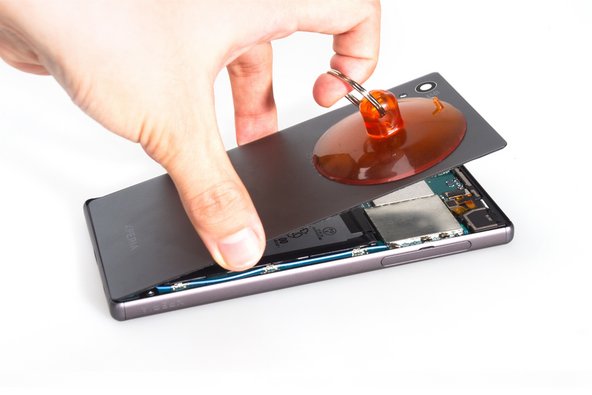
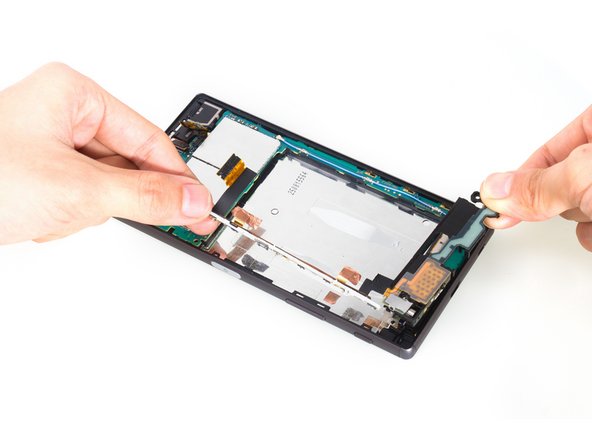
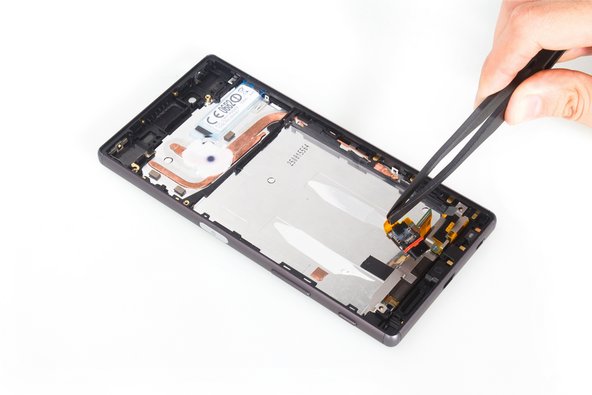
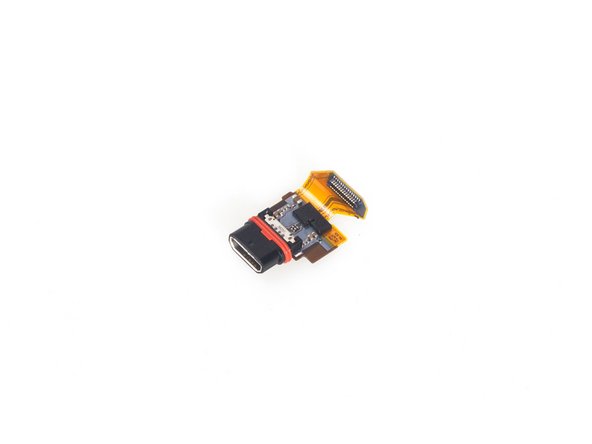
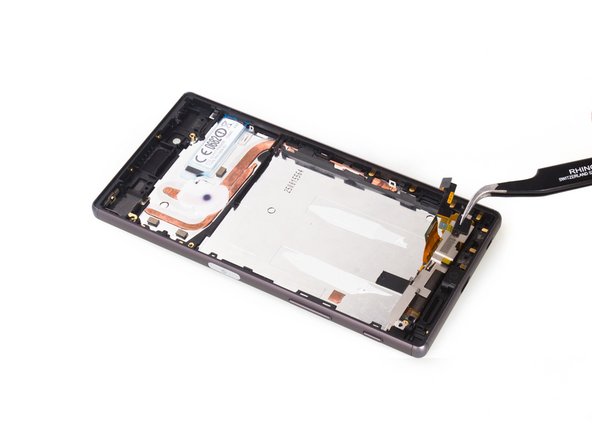
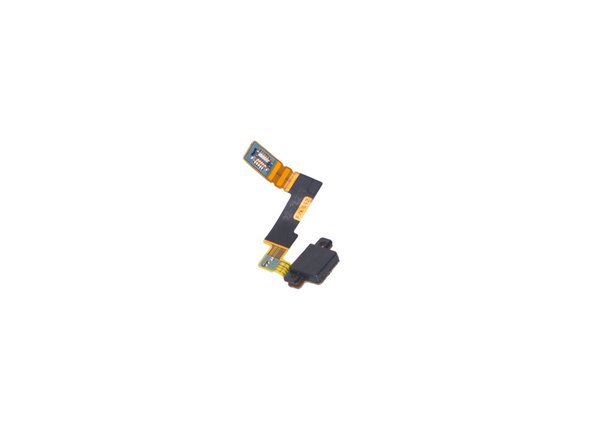
What you need

Video Overview

This teardown is not a repair guide. To repair your Sony Xperia Z5, use our service manual.

  1. Sony Xperia Z5の分解, Sony Xperia Z5の分解: step 1, image 1 of 2 Sony Xperia Z5の分解, Sony Xperia Z5の分解: step 1, image 2 of 2
    • SIMカードトレーを取り出します

  2. Sony Xperia Z5の分解: step 2, image 1 of 2 Sony Xperia Z5の分解: step 2, image 2 of 2
    • 背面を加熱して接着剤を溶かします。

    • 吸盤を取り付け、本体上部の隙間よりメタルオープナーを挿し込みます。

  3. Sony Xperia Z5の分解: step 3, image 1 of 3 Sony Xperia Z5の分解: step 3, image 2 of 3 Sony Xperia Z5の分解: step 3, image 3 of 3
    • ギターピックを挿し込み、スライドさせて接着剤を剥がします。

    • バックカバーを外します。ガラス製のため、慣れていれば吸盤のみで外すことができますが、そうでない場合は接着剤が柔らかいうちにマイナスドライバーなどを挿し込んで取り外すこともできます。

  4. Sony Xperia Z5の分解: step 4, image 1 of 3 Sony Xperia Z5の分解: step 4, image 2 of 3 Sony Xperia Z5の分解: step 4, image 3 of 3
    • バッテリーコネクタとその底に付けられた粘着テープを外します。

    • バッテリーを持ち上げると外れます。

  5. Sony Xperia Z5の分解: step 5, image 1 of 3 Sony Xperia Z5の分解: step 5, image 2 of 3 Sony Xperia Z5の分解: step 5, image 3 of 3
    • 背面カメラとフロントカメラのコネクタ、オーディオジャックとメインのフレキシブルケーブル、ネジを外します。

    • プラスチックブラケットを取り外します。

  6. Sony Xperia Z5の分解: step 6, image 1 of 3 Sony Xperia Z5の分解: step 6, image 2 of 3 Sony Xperia Z5の分解: step 6, image 3 of 3
    • ラウドスピーカを保護しているメタルカバーとネジを外します。

    • 下部のフレキシブルケーブルを持ち上げて外します。

  7. Sony Xperia Z5の分解: step 7, image 1 of 2 Sony Xperia Z5の分解: step 7, image 2 of 2
    • メインのフレキシブルケーブルを外します。(注意:赤く拡大されているところには指紋センサのコネクタがあります。取り外しの際には注意してください。)

  8. Sony Xperia Z5の分解: step 8, image 1 of 2 Sony Xperia Z5の分解: step 8, image 2 of 2
    • メインのフレキシブルケーブルのユニットです。(ラウドスピーカとバイブレーション用のモータも一緒についています。)

  9. Sony Xperia Z5の分解: step 9, image 1 of 2 Sony Xperia Z5の分解: step 9, image 2 of 2
    • 背面カメラを取り外します。

  10. Sony Xperia Z5の分解: step 10, image 1 of 3 Sony Xperia Z5の分解: step 10, image 2 of 3 Sony Xperia Z5の分解: step 10, image 3 of 3
    • 保護シールドを取り出してから、フロントカメラを取り外します。

  11. Sony Xperia Z5の分解: step 11, image 1 of 3 Sony Xperia Z5の分解: step 11, image 2 of 3 Sony Xperia Z5の分解: step 11, image 3 of 3
    • マザーボードのコネクタをそれぞれ外します。

    • マザーボードを取り外します。

  12. Sony Xperia Z5の分解: step 12, image 1 of 3 Sony Xperia Z5の分解: step 12, image 2 of 3 Sony Xperia Z5の分解: step 12, image 3 of 3
    • オーディオジャックのシールドを取り外します。

    • 接着剤を剥がし、オーディオジャックとノイズキャンセリングマイクを取り外します。

  13. Sony Xperia Z5の分解: step 13, image 1 of 1
    • オーディオジャックのフレキシブルケーブルを外すとノイズキャンセリングマイクもついてきます。

  14. Sony Xperia Z5の分解: step 14, image 1 of 3 Sony Xperia Z5の分解: step 14, image 2 of 3 Sony Xperia Z5の分解: step 14, image 3 of 3
    • イヤホンの底から接着剤を剥がし、上部スピーカを取り外します。

  15. Sony Xperia Z5の分解: step 15, image 1 of 3 Sony Xperia Z5の分解: step 15, image 2 of 3 Sony Xperia Z5の分解: step 15, image 3 of 3
    • マイクロUSBポートは押し出すと外すことができます。

  16. Sony Xperia Z5の分解: step 16, image 1 of 3 Sony Xperia Z5の分解: step 16, image 2 of 3 Sony Xperia Z5の分解: step 16, image 3 of 3
    • マイクを取り外します。

  17. Sony Xperia Z5の分解: step 17, image 1 of 1
    • 分解すると、このようになります。

Special thanks to these translators:

en jp

100%

These translators are helping us fix the world! Want to contribute?
Start translating ›

Lenka

Member since: 11/06/15

2,376 Reputation

6 Guides authored

23 Comments

No Service after a tear down. What is the problem?

Yuhao Min - Reply

it is hard to define which part causes such problem. Make sure the signal antenna connects with logic board perfectly.

Witrigs -

Would the water proof go out because of the removal/teardown ?

Tam Alden - Reply

Most likely. The back is glued on so unless you can make that seal perfect again, the phone wont be water proof.

Discalimer: I don't own a z5 and have never taken one apart but I have dissasembled my z3 to replace the screen and they look very similar.

Kip K -

Hi Lenka,

short question was that a normal xperia z5 or the dual SIM Version because it looks like the SIM reader is long enough to Support two SIM cards. It would be nice if you could check if there are two SIM ports here.

Tobias K - Reply

Add Comment

View Statistics:

Past 24 Hours: 2

Past 7 Days: 39

Past 30 Days: 161

All Time: 139,865