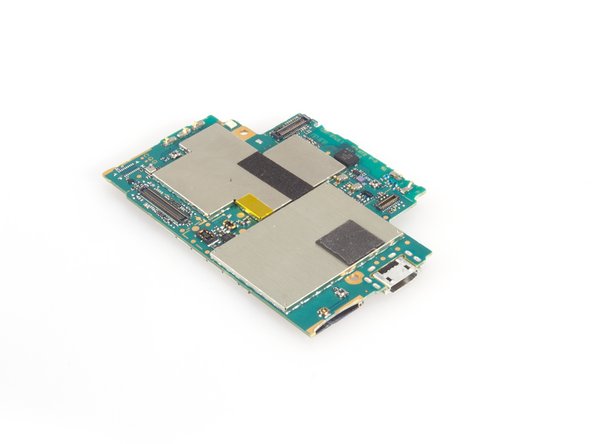
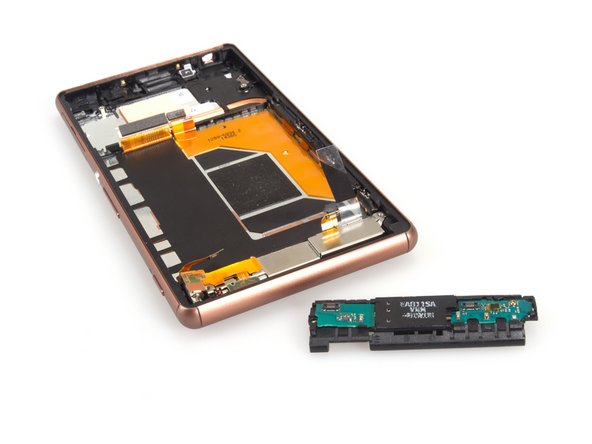
What you need

This teardown is not a repair guide. To repair your Sony Xperia Z3 Dual, use our service manual.

  1. Sony Xperia Z3 Dualの分解, Sony Xperia Z3 Dualの分解: step 1, image 1 of 3 Sony Xperia Z3 Dualの分解, Sony Xperia Z3 Dualの分解: step 1, image 2 of 3 Sony Xperia Z3 Dualの分解, Sony Xperia Z3 Dualの分解: step 1, image 3 of 3
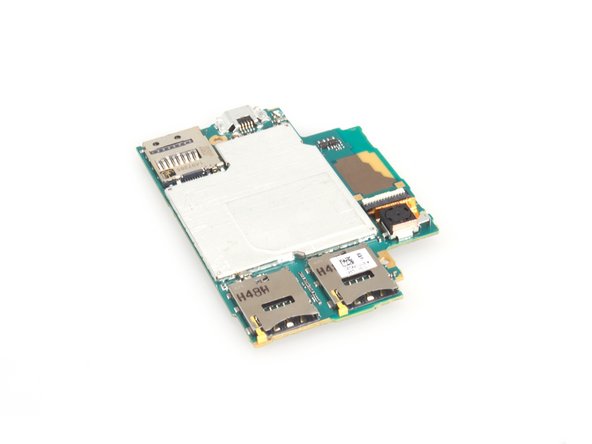
    • 2つのSIMカードトレイを取り出します。

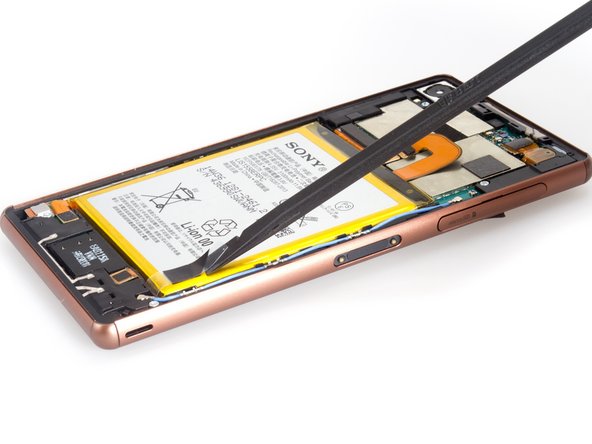
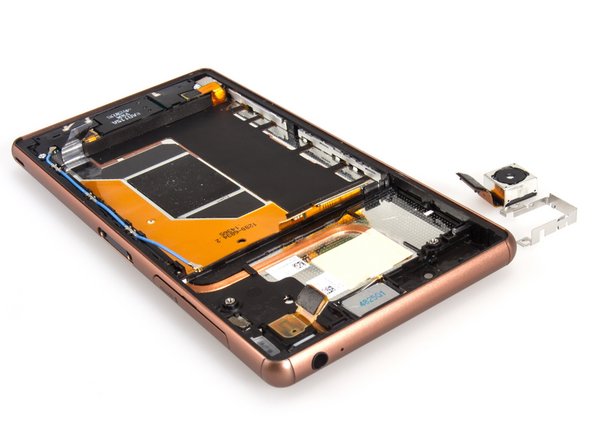
    • 接着ステッカーを柔らかくするため、バックカバーを温めます。

    • 吸盤カップを取り付けて、デバイス上部に隙間を開けます。

  2. Sony Xperia Z3 Dualの分解: step 2, image 1 of 3 Sony Xperia Z3 Dualの分解: step 2, image 2 of 3 Sony Xperia Z3 Dualの分解: step 2, image 3 of 3
    • 開いた隙間にギターのピックを差し込みます。

    • ギターピックをスライドさせて接着ステッカーを切り込んでいきます。ご注意:デバイス左側をスライドする際は、2枚目の画像の方向に進めてください。

  3. Sony Xperia Z3 Dualの分解: step 3, image 1 of 2 Sony Xperia Z3 Dualの分解: step 3, image 2 of 2
    • バッテリーコネクタを外します。

    • 固定用ステッカーを剥がします。

  4. Sony Xperia Z3 Dualの分解: step 4, image 1 of 2 Sony Xperia Z3 Dualの分解: step 4, image 2 of 2
    • バッテリーをこじ開けて取り出します。

    • バッテリー容量は3100mAhです。

  5. Sony Xperia Z3 Dualの分解: step 5, image 1 of 1
    • ネジを外します。

  6. Sony Xperia Z3 Dualの分解: step 6, image 1 of 3 Sony Xperia Z3 Dualの分解: step 6, image 2 of 3 Sony Xperia Z3 Dualの分解: step 6, image 3 of 3
    • 3本のブラケットを取り出します。

  7. Sony Xperia Z3 Dualの分解: step 7, image 1 of 3 Sony Xperia Z3 Dualの分解: step 7, image 2 of 3 Sony Xperia Z3 Dualの分解: step 7, image 3 of 3
    • 全てのコネクタの接続を外します。

    • マザーボードを取り出す前にSIMトレイを取り出します。

    • マザーボードをゆっくりと取り出します。

  8. Sony Xperia Z3 Dualの分解: step 8, image 1 of 3 Sony Xperia Z3 Dualの分解: step 8, image 2 of 3 Sony Xperia Z3 Dualの分解: step 8, image 3 of 3
    • これがSony Xperia Z3 Dualのマザーボードです。

  9. Sony Xperia Z3 Dualの分解: step 9, image 1 of 3 Sony Xperia Z3 Dualの分解: step 9, image 2 of 3 Sony Xperia Z3 Dualの分解: step 9, image 3 of 3
    • フロントカメラとリアカメラを取り出します。

  10. Sony Xperia Z3 Dualの分解: step 10, image 1 of 3 Sony Xperia Z3 Dualの分解: step 10, image 2 of 3 Sony Xperia Z3 Dualの分解: step 10, image 3 of 3
    • イヤホンスピーカーのそばにあるブロッカーをまず取り出します。

    • それからイヤホンスピーカーを押し出して、外します。

  11. Sony Xperia Z3 Dualの分解: step 11, image 1 of 1
    • イヤホンジャックの脇につけられた透明カバーを外します。

  12. Sony Xperia Z3 Dualの分解: step 12, image 1 of 3 Sony Xperia Z3 Dualの分解: step 12, image 2 of 3 Sony Xperia Z3 Dualの分解: step 12, image 3 of 3
    • イヤホンジャックのフレックスカバーを回して引きます。 しかし、これはイヤホンジャックアセンブリの一部です。

    • イヤホンジャックとミッドフレームの間の接着ステッカーを切断して、アセンブリを取り出します。

  13. Sony Xperia Z3 Dualの分解: step 13, image 1 of 1
    • これはアンテナシグナルフレックスです。

  14. Sony Xperia Z3 Dualの分解: step 14, image 1 of 3 Sony Xperia Z3 Dualの分解: step 14, image 2 of 3 Sony Xperia Z3 Dualの分解: step 14, image 3 of 3
    • ネジを外します。

    • コネクタの接続を外します。

    • バイブレータを固定しているブラケットを取り出します。

  15. Sony Xperia Z3 Dualの分解: step 15, image 1 of 3 Sony Xperia Z3 Dualの分解: step 15, image 2 of 3 Sony Xperia Z3 Dualの分解: step 15, image 3 of 3
    • ブラケットを固定しているラウドスピーカーアセンブリを外します。接着剤は使用されていません。 

    • ラウドスピーカーアセンブリをこじ開けて取り出します。ここにも接着剤は使用されていません。

  16. Sony Xperia Z3 Dualの分解: step 16, image 1 of 1
    • 分解はこれで終了です。

Special thanks to these translators:

en jp

100%

Midori Doi is helping us fix the world! Want to contribute?
Start translating ›

Sophia

Member since: 03/25/14

43,810 Reputation

62 Guides authored

9 Comments

Can you put it back together?

zarixevolve - Reply

I dropped mine so I just want to take the battery out is it possibly to take it and then put it back in

zarixevolve - Reply

hi.after changing my xperia z3 dual lcd 3 times.i hade a fluctuating and very week 3g and 4g signal.plz tell me where is the antenna located.i know that there is a flex and a board and antenna cover.what should i change.thanx

zein hamza - Reply

That's not a complete teardown. I would like to see the onboard chips and info's.

emmacorsa17 - Reply

Where can i buy the Sony Xperia Z3 plus Dual motherboard ?

I really need it.

Kwar Kwar - Reply

Add Comment

View Statistics:

Past 24 Hours: 1

Past 7 Days: 11

Past 30 Days: 24

All Time: 39,205