
Sony Xperia M2 Earpiece Replacement

What you need

Video Overview

  1. Sony Xperia M2 Earpiece Replacement, Rear Cover: step 1, image 1 of 3 Sony Xperia M2 Earpiece Replacement, Rear Cover: step 1, image 2 of 3 Sony Xperia M2 Earpiece Replacement, Rear Cover: step 1, image 3 of 3
    • Warm the Back Cover. You can use a hairdryer.

    • Be careful, the Cover is plastic.

    • Use a small suction cup and plastic tools for separating the Rear panel.

    • Before installing the new cover, you must clean the phone from the old adhesive tape and install a new one if your spare part has come without double sided adhesive tape.

  2. Sony Xperia M2 Earpiece Replacement, Battery: step 2, image 1 of 3 Sony Xperia M2 Earpiece Replacement, Battery: step 2, image 2 of 3 Sony Xperia M2 Earpiece Replacement, Battery: step 2, image 3 of 3
    • Disconnect the Battery Cable.

    • The battery is stuck to the phone fame. Use the white tape to remove it.

    • Li-Polymer Battery, 2230 mAh

    • Part number: LIS1551ERPC

    • Please SUBSCRIBE to my channel ツ

  3. Sony Xperia M2 Earpiece Replacement, Logic Board: step 3, image 1 of 2 Sony Xperia M2 Earpiece Replacement, Logic Board: step 3, image 2 of 2
    • Remove the SIM and the memory cards.

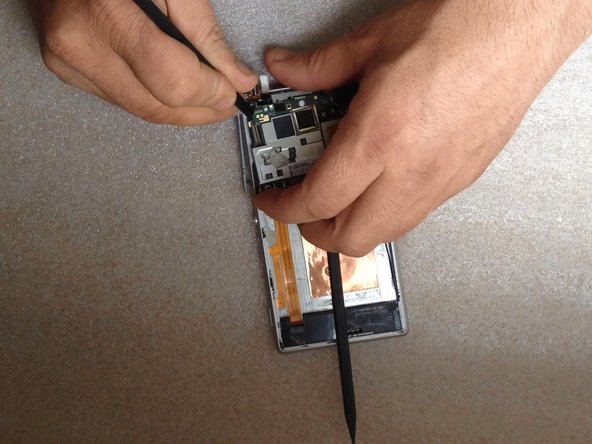
    • Remove x4 T5 Torx Corner screws & x2 T5 Torx Screws on the Board

  4. Sony Xperia M2 Earpiece Replacement: step 4, image 1 of 1
    • Disconnect one by one:

    • Touchscreen flex cable

    • Proximity sensor flex cable

    • Power on, Volume buttons cable

    • SIM & Micro SD flex cable

    • Coaxial antenna cable

  5. Sony Xperia M2 Earpiece Replacement: step 5, image 1 of 2 Sony Xperia M2 Earpiece Replacement: step 5, image 2 of 2
    • Disconnect the LCD Display flex cable. The connector is on the other side of the board, under the Power/Volume buttons flex cable connector.

    • Put one plastic spudger between the Logic board and the Main frame.

  6. Sony Xperia M2 Earpiece Replacement: step 6, image 1 of 3 Sony Xperia M2 Earpiece Replacement: step 6, image 2 of 3 Sony Xperia M2 Earpiece Replacement: step 6, image 3 of 3
    • Step one: move aside less the left side of the board - down.

    • Step two: the left side of the Logic board must go out of the main frame.

    • For this manipulation use only plastic tools.

    • Please SUBSCRIBE to my channel ツ

  7. Sony Xperia M2 Earpiece Replacement, Earpiece: step 7, image 1 of 3 Sony Xperia M2 Earpiece Replacement, Earpiece: step 7, image 2 of 3 Sony Xperia M2 Earpiece Replacement, Earpiece: step 7, image 3 of 3
Conclusion

To reassemble your device, follow these instructions in reverse order.

3 other people completed this guide.

ZFix

Member since: 12/09/13

191,278 Reputation

330 Guides authored

Team

Master Techs Member of Master Techs

Community

322 Members

2,532 Guides authored

0 Comments

Add Comment

View Statistics:

Past 24 Hours: 0

Past 7 Days: 2

Past 30 Days: 9

All Time: 4,237