Introduction
This guide shows how to remove/replace the keyboard on the Sony VAIO VPCEE26FX laptop computer.
What you need
-
-
-
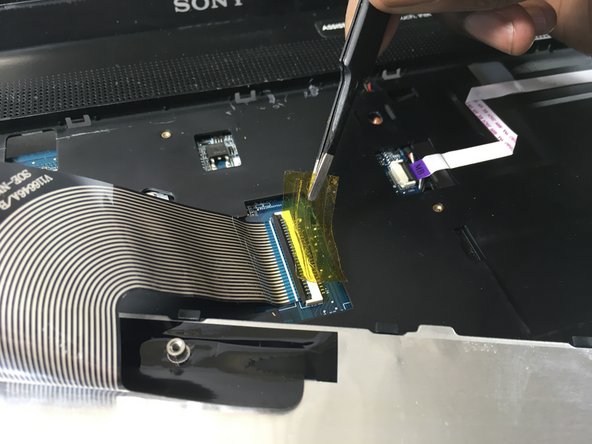
Flip up the small black tab locking the ribbon cable to the Zero Insertion Force (ZIF) connector.
-
The ribbon cable should now be free from the adapter/port.
-


Almost done!
To reassemble your device, follow these instructions in reverse order.
Conclusion
To reassemble your device, follow these instructions in reverse order.
Team

UMass Dartmouth, Team S2-G3, Bailey Spring 2019 Member of UMass Dartmouth, Team S2-G3, Bailey Spring 2019
UMASSD-BAILEY-S19S2G3
3 Members
10 Guides authored