
Sony Ericsson z300 Screens Replacement

What you need

  1. Sony Ericsson z300 Screens Replacement, Back Phone Cover: step 1, image 1 of 1
    • To remove the back cover, use your thumb to press down on the center of case and slide it off.

  2. Sony Ericsson z300 Screens Replacement, Battery: step 2, image 1 of 1
    • Using a fingernail lift the battery out of the phone.

  3. Sony Ericsson z300 Screens Replacement, Front Phone Cover: step 3, image 1 of 1
    • To remove the front cover, lift up the case with a fingernail in the small slot as shown.

  4. Sony Ericsson z300 Screens Replacement, Front Dark Grey Case: step 4, image 1 of 1
    • To remove the front grey case, remove the two screws shown with a T5 Torx Screwdriver.

  5. Sony Ericsson z300 Screens Replacement: step 5, image 1 of 1
    • Pry up the dark grey case with your fingernail until all four snaps around the top are loose.

  6. Sony Ericsson z300 Screens Replacement: step 6, image 1 of 1
    • Lift up towards the bottom and slide the case off.

  7. Sony Ericsson z300 Screens Replacement, Screens: step 7, image 1 of 1
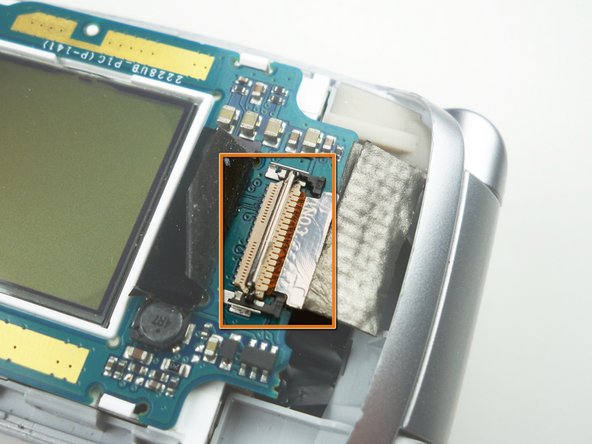
    • Use a plastic opening tool to lift the black tape off of the ribbon cable connector.

  8. Sony Ericsson z300 Screens Replacement: step 8, image 1 of 1
    • Lift the ribbon cable connector lock using a plastic opening tool.

  9. Sony Ericsson z300 Screens Replacement: step 9, image 1 of 2 Sony Ericsson z300 Screens Replacement: step 9, image 2 of 2
    • Slide the black ribbon cable tray out with a plastic opening tool.

    • Shown in the second picture is the try already slid out.

  10. Sony Ericsson z300 Screens Replacement: step 10, image 1 of 2 Sony Ericsson z300 Screens Replacement: step 10, image 2 of 2
    • Slide the ribbon cable out of the connector.

    • Shown in the second picture is the cable already out.

  11. Sony Ericsson z300 Screens Replacement: step 11, image 1 of 1
    • Use a plastic opening tool to lift up on the screen board and release the clips holding it in place.

    • Lift the entire board out of the phone to remove both screens.

Conclusion

To reassemble your device, follow these instructions in reverse order.

Alex Serventi

Member since: 10/07/10

65 Reputation

13 Guides authored

Team

Cal Poly, Team 5-15, Maness Fall 2010 Member of Cal Poly, Team 5-15, Maness Fall 2010

CPSU-MANESS-F10S5G15

4 Members

26 Guides authored

0 Comments

Add Comment

View Statistics:

Past 24 Hours: 0

Past 7 Days: 4

Past 30 Days: 4

All Time: 1,254