
Sonos Connect Fuse Replacement

What you need

  1. Sonos Connect Fuse Replacement, Bottom Part: step 1, image 1 of 1
    • Remove the rubber pads and unscrew

  2. Sonos Connect Fuse Replacement, Continue to unscrew: step 2, image 1 of 1
    • Take care not to damage the wires of the Wi-Fi antennas which are very bothersome.

  3. Sonos Connect Fuse Replacement, Unclip the top cover: step 3, image 1 of 2 Sonos Connect Fuse Replacement, Unclip the top cover: step 3, image 2 of 2
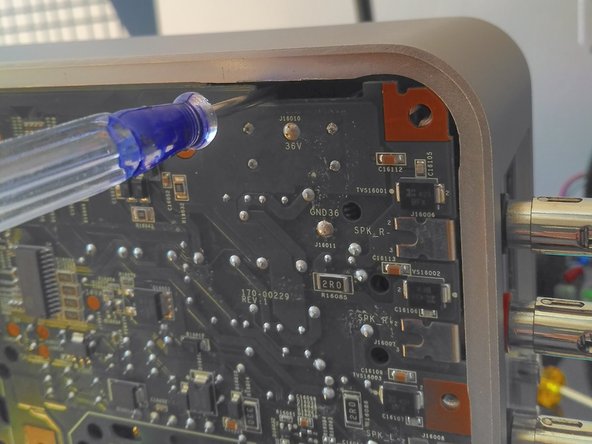
    • By using a screwdriver inserted through each of the 8 peripheral slots, you can access the clips of the top cover.

  4. Sonos Connect Fuse Replacement, Access under the top cover: step 4, image 1 of 1
    • Continue unscrewing (there is a screw under the seal).

  5. Sonos Connect Fuse Replacement, Locate the fuse: step 5, image 1 of 1
    • It's a soldered fuse. You will need to desolder it from the back in order to replace it.

  6. Sonos Connect Fuse Replacement, Replacement fuse: step 6, image 1 of 1
    • About 1$

    • 250V 5A T fuse (time delay).

Conclusion

To reassemble your device, follow these instructions in reverse order.

One other person completed this guide.

Special thanks to these translators:

fr en

100%

These translators are helping us fix the world! Want to contribute?
Start translating ›

YvesG

Member since: 06/04/18

290 Reputation

2 Guides authored

One Comment

Bravo

Ce tuto peux rendre service a des consommateurs abusés par la sociète Sonos .

Merci

bruno vinay - Reply

Add Comment

View Statistics:

Past 24 Hours: 1

Past 7 Days: 17

Past 30 Days: 52

All Time: 1,977