
SolaDyne LED Lantern LED Circuit Board Replacement

What you need

  1. SolaDyne LED Lantern LED Circuit Board Replacement, LED Circuit Board: step 1, image 1 of 1
    • Flip the lantern upside down and unscrew the 4 phillips head screws on the base and remove the base plate.

    • Carefully set screws and base plate aside for reassembly.

  2. SolaDyne LED Lantern LED Circuit Board Replacement: step 2, image 1 of 1
    • Slide the black rubber sleeve off of the outside of the body of the lantern away from the LED globe.

  3. SolaDyne LED Lantern LED Circuit Board Replacement: step 3, image 1 of 1
    • Remove 4 Phillips head screws from the front of the lantern body below the power button.

    • Set aside screws for reassembly.

  4. SolaDyne LED Lantern LED Circuit Board Replacement: step 4, image 1 of 3 SolaDyne LED Lantern LED Circuit Board Replacement: step 4, image 2 of 3 SolaDyne LED Lantern LED Circuit Board Replacement: step 4, image 3 of 3
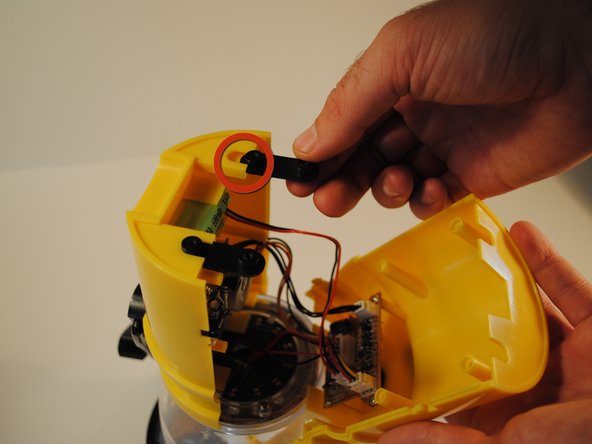
    • To disassemble the main body, grip the lantern so that the front half of the body with the power button on it is in your right hand and the back half with the hand crank is in your left.

    • Pinch the front half of the body on both sides with your thumb and index finger just below the first extruding rim of the front plate while simultaneously pulling the back half away. This may take some effort to do.

    • Be careful to not pull the halves of the body away from each other too hard because the internal wires connecting internal components may break.

    • Take note to remove and set aside black screw mounts located in between the halves at the bottom of the lantern.

    • When putting the front and back plates together during reassembly, make sure to slide the extruding screws from the base of the globe through the corresponding grooves cut into the top of the front and back plates of the main body.

  5. SolaDyne LED Lantern LED Circuit Board Replacement: step 5, image 1 of 1
    • The main power board is located directly behind the power button, screwed into the front plate.

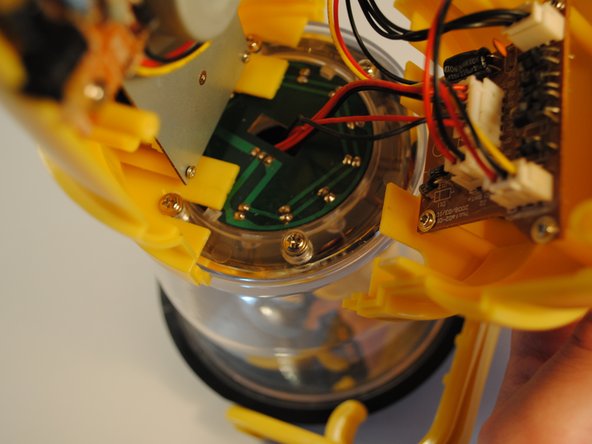
    • Locate the LED board. It is located in the base of the globe, with the LEDs extending up inside the globe.

    • Trace the wires coming from the LED board to the main board. Pull out the white clip connecting the wires from the LED board from the socket on the main board. This will sever the electrical connection between the LED board and the rest of the lantern.

    • In this case, the white clip contains wires from both the LED board and the top solar panel. In order to replace the LED board, the wires connected to the solar panel must be unsoldered.

  6. SolaDyne LED Lantern LED Circuit Board Replacement: step 6, image 1 of 2 SolaDyne LED Lantern LED Circuit Board Replacement: step 6, image 2 of 2
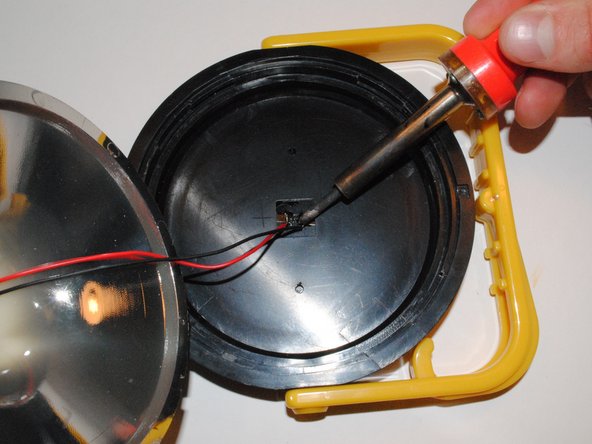
    • Grip the globe of the lantern and turn the top lid of the lantern counter-clockwise so it can be removed.

    • Be careful not to pull the lid off with too much force because the wires connecting the solar panel are attached to the main board, and may damage the main board.

    • Place the lid, with the solar panel down, on the table. Unsolder the two wires connected to the solar panel.

    • Feed wires from solar panel down the main shaft running through the middle of the globe.

  7. SolaDyne LED Lantern LED Circuit Board Replacement: step 7, image 1 of 1
    • Making sure both halves of the lantern are detached from the globe, pull LED board out of the base of the globe. Be careful not to damage any LED connected to the board.

    • Replace with new board, making sure grooves on the new LED board align with corresponding tabs in the base of the globe. This is to ensure the LEDs fit into the base of the globe.

  8. SolaDyne LED Lantern LED Circuit Board Replacement: step 8, image 1 of 2 SolaDyne LED Lantern LED Circuit Board Replacement: step 8, image 2 of 2
    • Feed the two disconnected wires from the white clip back up through the main shaft of the globe to the top portion of the lantern where the lid attaches.

    • Solder the new wires to the base of the solar panel.

    • Reattach the lid to top of the lantern by aligning grooves and turning clockwise.

  9. SolaDyne LED Lantern LED Circuit Board Replacement: step 9, image 1 of 1
    • Attach the wires from the LED board and solar panel to the main board where the old wires were removed.

    • Make sure grooves on the clip holding the red and black wires together align with the pins in the socket on the main board before inserting.

Nicholas Greer

Member since: 10/03/12

8 Reputation

4 Guides authored

Team

Cal Poly, Team 18-38, Regan Fall 2012 Member of Cal Poly, Team 18-38, Regan Fall 2012

CPSU-REGAN-F12S18G38

4 Members

4 Guides authored

View Statistics:

Past 24 Hours: 0

Past 7 Days: 0

Past 30 Days: 0

All Time: 895