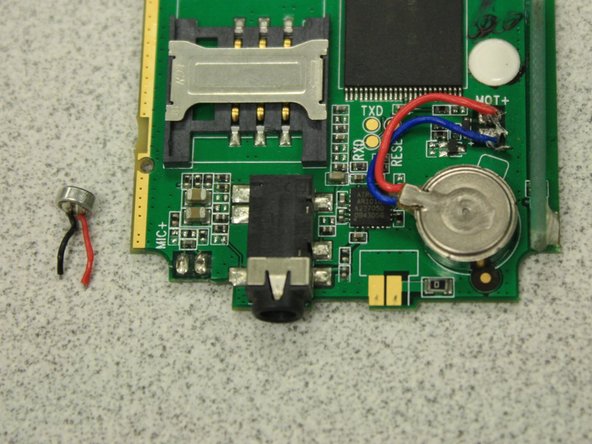
Snapfon ez One Microphone Replacement

What you need

  1. Snapfon ez One Microphone Replacement, Remove the battery cover: step 1, image 1 of 1
    • Turn off the phone to prevent data loss.

    • Press and slide the battery out to remove it.

    • Picture rights belong to Snapfon®. Picture is used for educational purposes only. No copyright infringement intended.

  2. Snapfon ez One Microphone Replacement, Remove the battery: step 2, image 1 of 1
    • Pry the battery out with your thumb or the iFixit opening tool.

    • Make sure to properly dispose of the old battery at a recycling center.

    • Picture rights belong to Snapfon®. Picture is used for educational purposes only. No copyright infringement intended.

  3. Snapfon ez One Microphone Replacement, Removing the plastic inserts: step 3, image 1 of 2 Snapfon ez One Microphone Replacement, Removing the plastic inserts: step 3, image 2 of 2
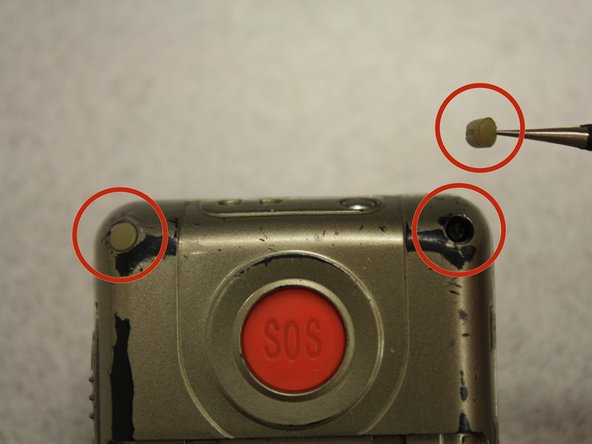
    • Remove the four rubber inserts from the screw holes using a pair of tweezers.

  4. Snapfon ez One Microphone Replacement, Remove the shield screws: step 4, image 1 of 3 Snapfon ez One Microphone Replacement, Remove the shield screws: step 4, image 2 of 3 Snapfon ez One Microphone Replacement, Remove the shield screws: step 4, image 3 of 3
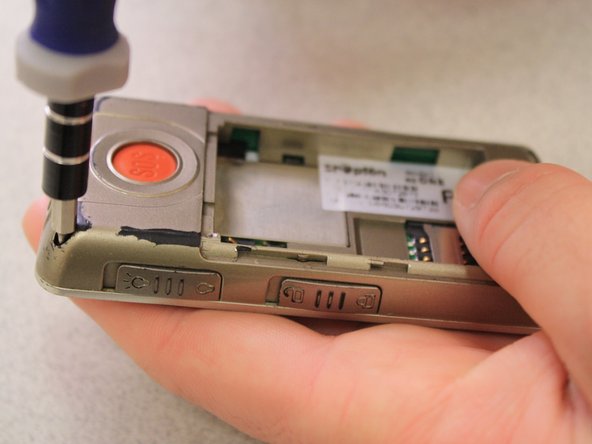
    • Remove the four 3.1mm screws in the corners with a Phillips #00 screwdriver.

  5. Snapfon ez One Microphone Replacement, Separate the case: step 5, image 1 of 3 Snapfon ez One Microphone Replacement, Separate the case: step 5, image 2 of 3 Snapfon ez One Microphone Replacement, Separate the case: step 5, image 3 of 3
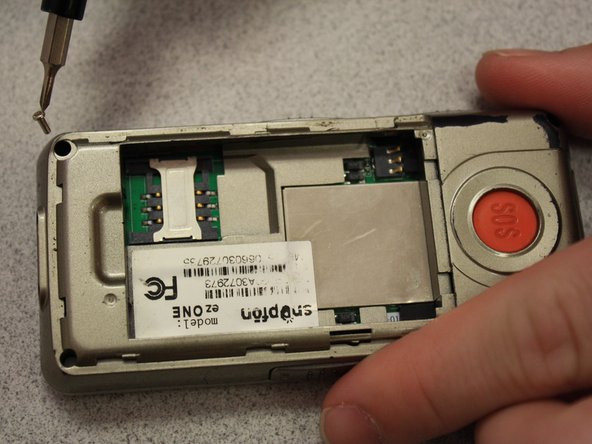
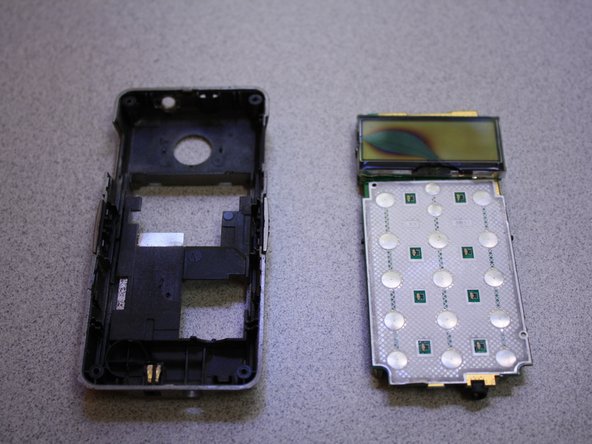
    • Separate the front case from the back case.

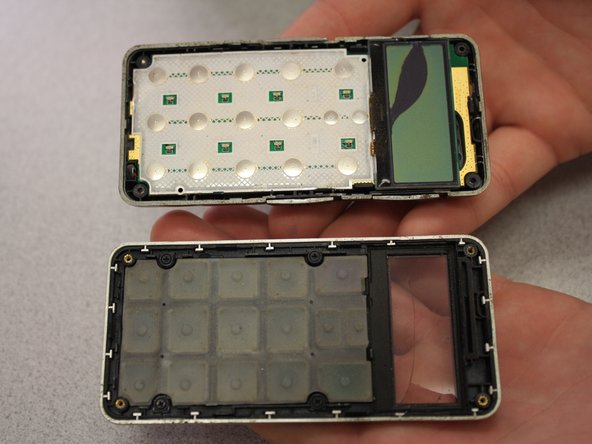
    • Remove the metal bumper from the front case’s perimeter.

  6. Snapfon ez One Microphone Replacement, Remove the volume slider: step 6, image 1 of 1
    • Pry the volume slider button out with tweezers.

    • The volume slider button may fall out during the separation of the front and back cases. This is OK.

  7. Snapfon ez One Microphone Replacement, Remove the motherboard: step 7, image 1 of 3 Snapfon ez One Microphone Replacement, Remove the motherboard: step 7, image 2 of 3 Snapfon ez One Microphone Replacement, Remove the motherboard: step 7, image 3 of 3
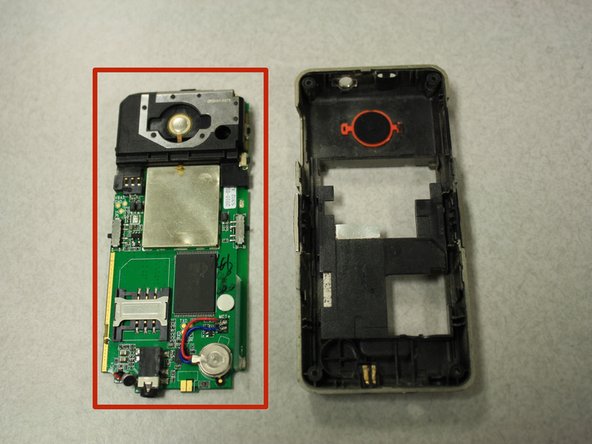
    • Separate the circuit board from the inside of the back case by prying between them with the opening tool.

    • The last picture is a view of the back of the circuit board.

  8. Snapfon ez One Microphone Replacement, Microphone: step 8, image 1 of 1
    • Locate the microphone on the back of the circuit board.

  9. Snapfon ez One Microphone Replacement: step 9, image 1 of 2 Snapfon ez One Microphone Replacement: step 9, image 2 of 2
    • Desolder the microphone from the circuit board using the soldering iron.

    • The solder iron creates high temperatures that may cause bodily harm.

    • Take the replacement microphone and melt the wires to the circuit board with the soldering iron in the same fashion that the old microphone was oriented.

John Bender

Member since: 03/26/14

818 Reputation

8 Guides authored

Team

Clemson, Team 6-5, Benson Spring 2014 Member of Clemson, Team 6-5, Benson Spring 2014

CLEM-BENSON-S14S6G5

3 Members

16 Guides authored

View Statistics:

Past 24 Hours: 0

Past 7 Days: 0

Past 30 Days: 3

All Time: 389