SkullCandy INK'D 2 Audio Jack Replacement

What you need

  1. SkullCandy INK'D 2 Audio Jack Replacement, Audio Jack: step 1, image 1 of 2 SkullCandy INK'D 2 Audio Jack Replacement, Audio Jack: step 1, image 2 of 2
    • Use wire cutters to remove the audio jack.

    • Use wire cutters to remove approximately 1/2 inch of insulation of the wire and separate the four wires inside of it.

    • Red wire is the right speaker '+' terminal.

    • Green wire is the left speaker '+' terminal.

    • Golden wire is the ground terminal.

    • Purple wire is the microphone terminal.

  2. SkullCandy INK'D 2 Audio Jack Replacement: step 2, image 1 of 1
    • Take the replacement connector and separate the wires on it.

    • Red wire is the right earphone.

    • Green wire is the left earphone.

    • Blue wire is the ground terminal.

    • Gold wire is the microphone.

  3. SkullCandy INK'D 2 Audio Jack Replacement: step 3, image 1 of 1
    Tool used on this step:
    Heat Shrink Tubing Assortment
    $7.99
    Buy
    • Put shrink tubing on either one of the wires.

    • For each wire color, put the headphone wire and the replacement wire into clamps. Weave them together using fingers.

    • Review the soldering guide before initiating Step 4.

  4. SkullCandy INK'D 2 Audio Jack Replacement: step 4, image 1 of 1
    • Use soldering equipment to solder together two wires.

    • Repeat this step for each of the four wire colors.

    • Always wear safety glasses when soldering.

  5. SkullCandy INK'D 2 Audio Jack Replacement: step 5, image 1 of 1
    Tool used on this step:
    Digital Multimeter
    $19.99
    Buy
    • Using Digital Multimeter in the "Continuity" mode, place two probes on the soldered wires of the same color. You will hear audio signal indicating that there is a connection.

    • Repeat this for each of the wire colors.

    • If there is no Multimeter signal, you will need to resolder the wires and to make sure that wires of different colors are completely separated.

  6. SkullCandy INK'D 2 Audio Jack Replacement: step 6, image 1 of 3 SkullCandy INK'D 2 Audio Jack Replacement: step 6, image 2 of 3 SkullCandy INK'D 2 Audio Jack Replacement: step 6, image 3 of 3
    Tool used on this step:
    Heat Gun
    $24.99
    Buy
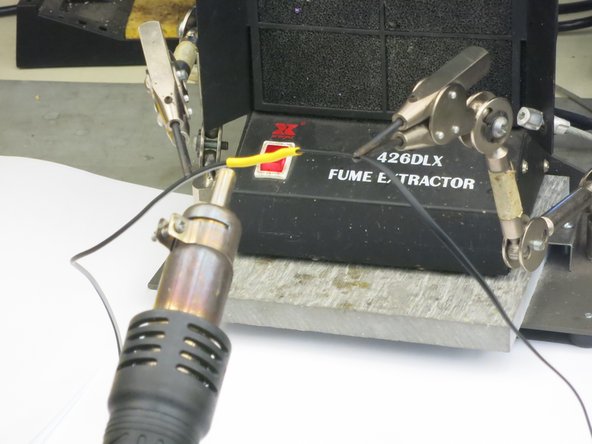
    • After all wires are soldered, cover them with shrink tubing.

    • Use the heat gun to shrink the tubing and fit it tightly around the wires.

    • Gently apply heat in order to shape the tubing around the soldered wires.

Conclusion

Repeat the procedure if you need to install a new audio jack.

Maksim Bondaruk

Member since: 10/16/17

119 Reputation

1 Guide authored

Team

Cal Poly, Team S4-G1, Livingston Fall 2017 Member of Cal Poly, Team S4-G1, Livingston Fall 2017

CPSU-LIVINGSTON-F17S4G1

5 Members

25 Guides authored

0 Comments

Add Comment

View Statistics:

Past 24 Hours: 7

Past 7 Days: 27

Past 30 Days: 119

All Time: 15,459