
Sega CD Genesis Connector Replacement

What you need

  1. Sega CD Genesis Connector Replacement, Sega CD Plastic Housing Removal: step 1, image 1 of 2 Sega CD Genesis Connector Replacement, Sega CD Plastic Housing Removal: step 1, image 2 of 2
    • Using a Phillips head screwdriver remove six screws from the bottom of the console.

    • The six screws are marked.

  2. Sega CD Genesis Connector Replacement: step 2, image 1 of 1
    • Remove the two screws that attach the Genesis' connector to the rest of the console.

    • The two screws are marked in the diagram.

  3. Sega CD Genesis Connector Replacement: step 3, image 1 of 1
    • Slide the lock tab to the left to separate the halves of the console.

  4. Sega CD Genesis Connector Replacement: step 4, image 1 of 1
    • Lift from the left side to remove the top of the case.

  5. Sega CD Genesis Connector Replacement: step 5, image 1 of 1
    • Using the spudger, pry the cover off of the Genesis attachment.

  6. Sega CD Genesis Connector Replacement: step 6, image 1 of 1
    • Lift the top of the case to remove the cover.

  7. Sega CD Genesis Connector Replacement: step 7, image 1 of 1
    • Remove the faceplate by pulling it up, then out.

  8. Sega CD Genesis Connector Replacement, Genesis Connector: step 8, image 1 of 2 Sega CD Genesis Connector Replacement, Genesis Connector: step 8, image 2 of 2
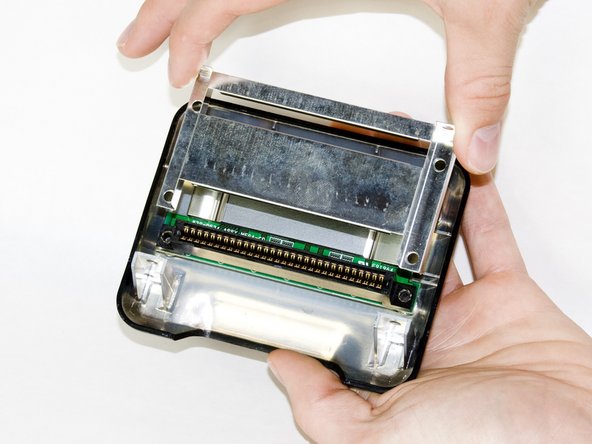
    • Using a #00 Philips screwdriver remove the two screws that attach the Genesis adapter to the console.

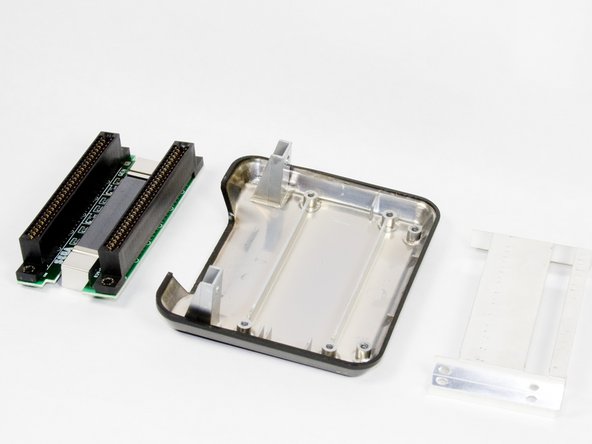
    • Disconnect the adapter from the console by carefully pulling the adapter out.

  9. Sega CD Genesis Connector Replacement: step 9, image 1 of 1
    • Remove the four screws from the metal plate as shown using a #00 Philips screwdriver.

    • The four half inch bronze screws are indicated by the yellow marking circles.

  10. Sega CD Genesis Connector Replacement: step 10, image 1 of 2 Sega CD Genesis Connector Replacement: step 10, image 2 of 2
    • Carefully remove the metal cover from the connector by sliding the cover up and out.

  11. Sega CD Genesis Connector Replacement: step 11, image 1 of 2 Sega CD Genesis Connector Replacement: step 11, image 2 of 2
    • Remove the connector from the housing.

Ryan Kotzebue

Member since: 10/07/10

271 Reputation

4 Guides authored

Team

Cal Poly, Team 5-14, Maness Fall 2010 Member of Cal Poly, Team 5-14, Maness Fall 2010

CPSU-MANESS-F10S5G14

4 Members

12 Guides authored

View Statistics:

Past 24 Hours: 1

Past 7 Days: 2

Past 30 Days: 9

All Time: 5,847