
Samsung POWERbot VR9000 Left Driving Wheel Replacement

What you need

  1. Samsung POWERbot VR9000 Left Driving Wheel Replacement, Top Chassis: step 1, image 1 of 2 Samsung POWERbot VR9000 Left Driving Wheel Replacement, Top Chassis: step 1, image 2 of 2
    • Turn off the emergency switch located at the bottom right of the POWERbot.

  2. Samsung POWERbot VR9000 Left Driving Wheel Replacement: step 2, image 1 of 2 Samsung POWERbot VR9000 Left Driving Wheel Replacement: step 2, image 2 of 2
    • Insert the plastic opening tool under the black cover, near the Samsung logo on the back of the device, and partially pry open.

  3. Samsung POWERbot VR9000 Left Driving Wheel Replacement: step 3, image 1 of 2 Samsung POWERbot VR9000 Left Driving Wheel Replacement: step 3, image 2 of 2
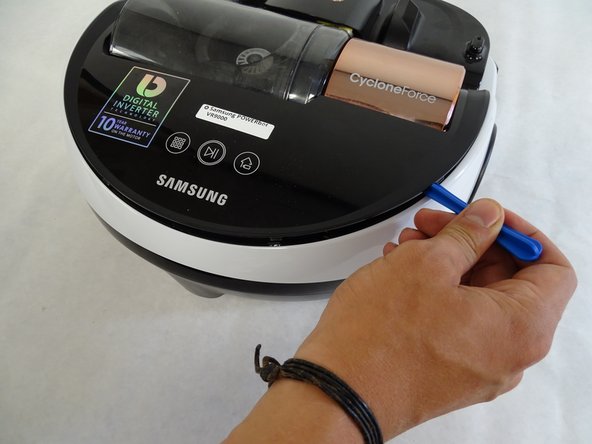
    • Slide the plastic opening tool to the left, remaining under the black cover, until two left side pins have been detached. Then slide the plastic opening tool to the right until two right side pins have been detached.

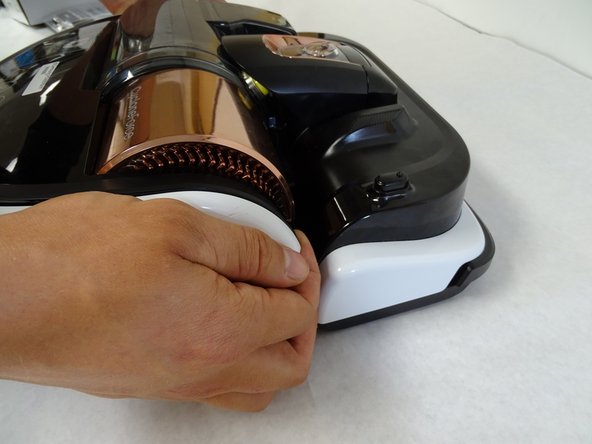
    • Grab the two clips near the front of the black cover, on in front of each wheel. Pull the clips away from the wheels.

    I needed to replace the left drive wheel on a SR20J9250U model. It is largely the same and many parts have VR9000H stamped on them. I will add any differences as I see them.

    For this step, there are three clips plus the clip in front of the wheel on each side. First clip is approx 6 cm from the centre at the back. Next is approx 11cm from the first clip and the third is 11 cm from the second clip (almost above the wheel). Then there is the clip in front of each wheel that you can see.

    Matt - Reply

  4. Samsung POWERbot VR9000 Left Driving Wheel Replacement: step 4, image 1 of 3 Samsung POWERbot VR9000 Left Driving Wheel Replacement: step 4, image 2 of 3 Samsung POWERbot VR9000 Left Driving Wheel Replacement: step 4, image 3 of 3
    • Remove the black cover.

  5. Samsung POWERbot VR9000 Left Driving Wheel Replacement: step 5, image 1 of 2 Samsung POWERbot VR9000 Left Driving Wheel Replacement: step 5, image 2 of 2
    • Insert the plastic opening tool under copper-colored cover, under the words "CycloneForce," and pry open, applying a small rotation, until the two pins are released .

    • Grab the underside of the cover and lift upwards while pushing forward until the cover pops off.

  6. Samsung POWERbot VR9000 Left Driving Wheel Replacement: step 6, image 1 of 2 Samsung POWERbot VR9000 Left Driving Wheel Replacement: step 6, image 2 of 2
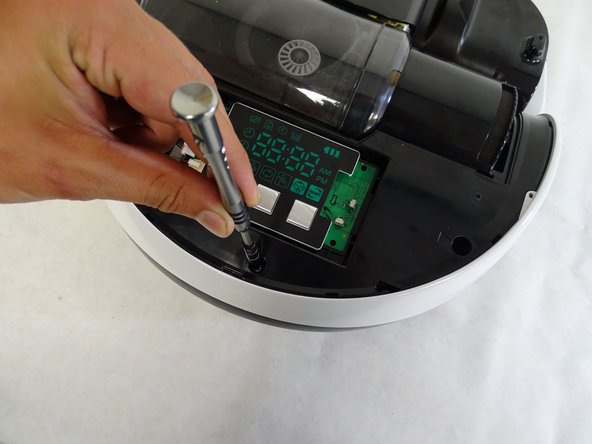
    • Remove the three 6mm Phillips #1 screws in the holes near the back of the device.

    On my model SR20J9250J there is a forth screw on the right hand side I front of the vacuum motor that needs to be removed to lift the body off in step 10.

    Matt - Reply

    Whoops, this is step 7. Read further next time.

    Matt - Reply

  7. Samsung POWERbot VR9000 Left Driving Wheel Replacement: step 7, image 1 of 2 Samsung POWERbot VR9000 Left Driving Wheel Replacement: step 7, image 2 of 2
    • Remove the 6mm Phillips #1 screw in the hole that was under the copper-colored vacuum cover.

  8. Samsung POWERbot VR9000 Left Driving Wheel Replacement: step 8, image 1 of 2 Samsung POWERbot VR9000 Left Driving Wheel Replacement: step 8, image 2 of 2
    • Flip the device over and remove the 6mm Phillips #1 screw in front of the left (from this perspective, right) wheel.

  9. Samsung POWERbot VR9000 Left Driving Wheel Replacement: step 9, image 1 of 2 Samsung POWERbot VR9000 Left Driving Wheel Replacement: step 9, image 2 of 2
    • Detach the wider circuit connector by pressing down gently on the left end of the clip and pulling the connector out.

    • Pull the connector out by the top and bottom of the white piece and not by the wires.

  10. Samsung POWERbot VR9000 Left Driving Wheel Replacement: step 10, image 1 of 2 Samsung POWERbot VR9000 Left Driving Wheel Replacement: step 10, image 2 of 2
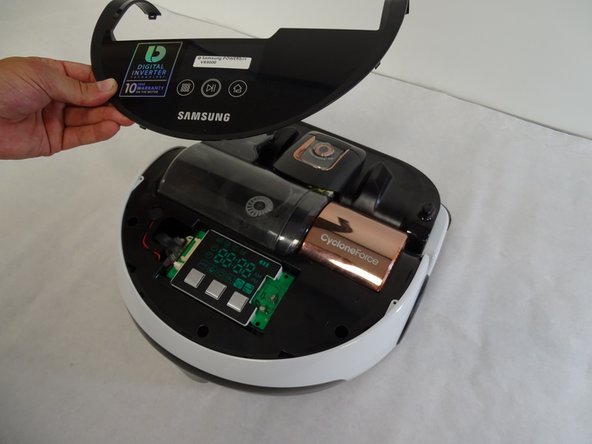
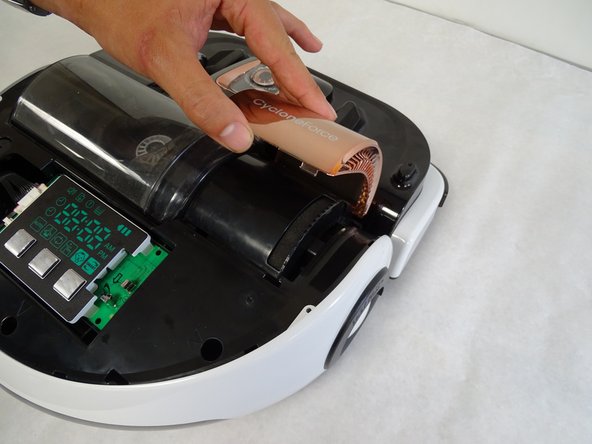
    • Remove the top chassis from the POWERbot by grabbing the wheel covers and lifting upwards.

    Remove screw on bottom of wheel

    Doris Emrich - Reply

  11. Samsung POWERbot VR9000 Left Driving Wheel Replacement, Left Driving Wheel: step 11, image 1 of 2 Samsung POWERbot VR9000 Left Driving Wheel Replacement, Left Driving Wheel: step 11, image 2 of 2
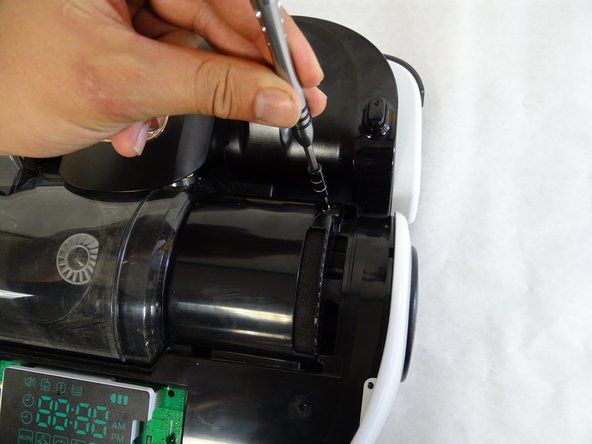
    • Remove the two 5mm Phillips #1 screws in the holes closest to the left wheel.

  12. Samsung POWERbot VR9000 Left Driving Wheel Replacement: step 12, image 1 of 2 Samsung POWERbot VR9000 Left Driving Wheel Replacement: step 12, image 2 of 2
    • Detach the top-most circuit connector on the left side by pressing down gently on the left end of the clip and pulling the connector out.

    • Pull the connector out by the top and bottom of the white piece and not by the wires.

    You made need to gently pull back some foam (stops vibration) to reveal the clip.

    Matt - Reply

  13. Samsung POWERbot VR9000 Left Driving Wheel Replacement: step 13, image 1 of 1
    • Remove the driving wheel assembly from the POWERbot by grabbing the wheel and lifting upwards.

Conclusion

To reassemble your device, follow these instructions in reverse order.

26 other people completed this guide.

Kyle Chin

Member since: 04/24/17

1,919 Reputation

4 Guides authored

Team

Cal Poly, Team S15-G3, Banghart Spring 2017 Member of Cal Poly, Team S15-G3, Banghart Spring 2017

CPSU-BANGHART-S17S15G3

4 Members

14 Guides authored

9 Comments

Thanks for the info but can you tell me where I can get the wheel assembly as I think the motor has burned out. Thanks

Stephen Rawlings - Reply

Thank you so much :) … You helped me save all the money that I have spent on the Samsung Powerbot as I thought there is no way to fix it !

Can't Thank you enough Kyle ;)

shiraku gori - Reply

Thanks for your information, also I would like to find the spare parts of wheel assembly . Can you recommend me for seller and prices?

October 23, 2018

Narit pukkapan

Rubber Tree - Reply

Thank you for the usefull instructions. The problem was the wheel engine broken. I’ve been surprised that it was not brushless. Now I will try to fix it. Have a nice time

David - Reply

Thank you for your instructions. I open it up and clean the left wheel decoder by blowing air thru it. Put it back and it run as new. Thank you again.

Uyen Vo - Reply

The instruction worked out great, however there were two flat rubber pieces that fell out of the vacuum during the disassembly. Any idea where they came from? The vacuum worked great for two days, but now it’s not charging any more. I’m wondering if the rubber pieces, which I left out, had something to do with it.

julio_urquidi - Reply

as i’m going through ebay I see alot of Samsung power-bots with broken left wheels where the spring breaks does anyone know why that happens as it happend to me

your life is a lie - Reply

how to order for replacement spare part?

usery1985 - Reply

How much volt does the wheel’s motor requires?

Voralit Tiemsing - Reply

Add Comment

View Statistics:

Past 24 Hours: 3

Past 7 Days: 14

Past 30 Days: 56

All Time: 18,182