
Samsung NP700Z5AH Display Replacement

What you need

  1. Samsung NP700Z5AH Display Replacement, Battery: step 1, image 1 of 1
    • Remove the ten 6.6mm Philips#00 screws securing the lower case to the upper case.

  2. Samsung NP700Z5AH Display Replacement: step 2, image 1 of 3 Samsung NP700Z5AH Display Replacement: step 2, image 2 of 3 Samsung NP700Z5AH Display Replacement: step 2, image 3 of 3
    • Using your fingers, pinch the edge of the SD card and pull to remove it.

  3. Samsung NP700Z5AH Display Replacement: step 3, image 1 of 2 Samsung NP700Z5AH Display Replacement: step 3, image 2 of 2
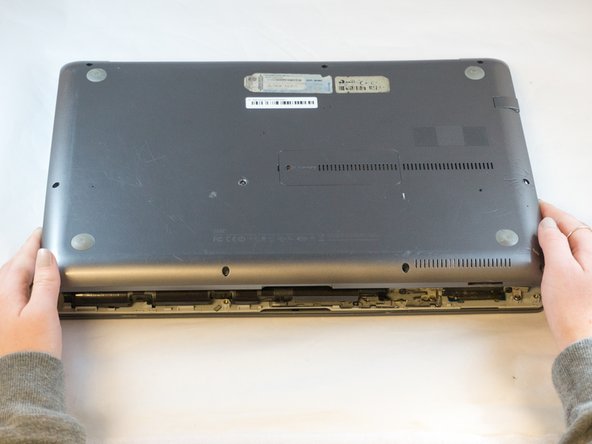
    • Wedge your fingers in between the upper case and the lower case

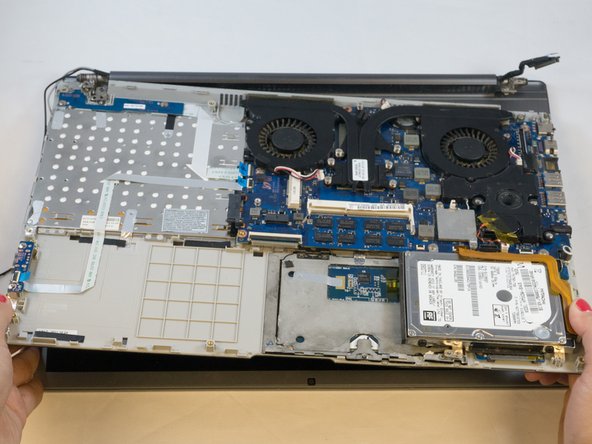
    • Gently pull the lower case away from the upper case to remove it

  4. Samsung NP700Z5AH Display Replacement: step 4, image 1 of 2 Samsung NP700Z5AH Display Replacement: step 4, image 2 of 2
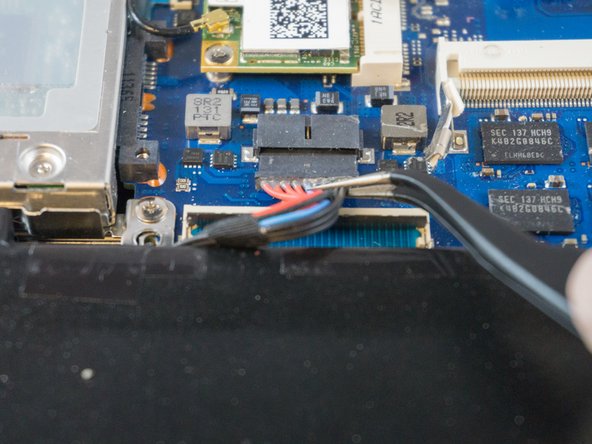
    • Using tweezers or your fingertips, carefully pull on the battery connector to disconnect it from the motherboard.

    • Be sure to pull straight backwards, or you risk damaging the wires.

  5. Samsung NP700Z5AH Display Replacement: step 5, image 1 of 1
    • Remove the two 4.4mm Phillips#00 screws from the battery case.

  6. Samsung NP700Z5AH Display Replacement: step 6, image 1 of 2 Samsung NP700Z5AH Display Replacement: step 6, image 2 of 2
    • Place your fingers on the corner sections of the battery.

    • Lift to remove the battery.

    • If you choose to use tools to remove the battery be careful not to damage it. A damaged lithium-ion battery may leak dangerous chemicals and/or catch fire. Use only plastic pry tools.

  7. Samsung NP700Z5AH Display Replacement, Display: step 7, image 1 of 2 Samsung NP700Z5AH Display Replacement, Display: step 7, image 2 of 2
    • Place the tip of the spudger under the metal caps of the black and grey coaxial connectors and pry upwards to disconnect them.

    • After they are disconnected, un-thread the coaxial connectors from around the fan.

    • To reinstall, hold the connectors in place and gently press them straight down. The connectors "snap" into their sockets much like the metal snaps on a jacket.

  8. Samsung NP700Z5AH Display Replacement: step 8, image 1 of 3 Samsung NP700Z5AH Display Replacement: step 8, image 2 of 3 Samsung NP700Z5AH Display Replacement: step 8, image 3 of 3
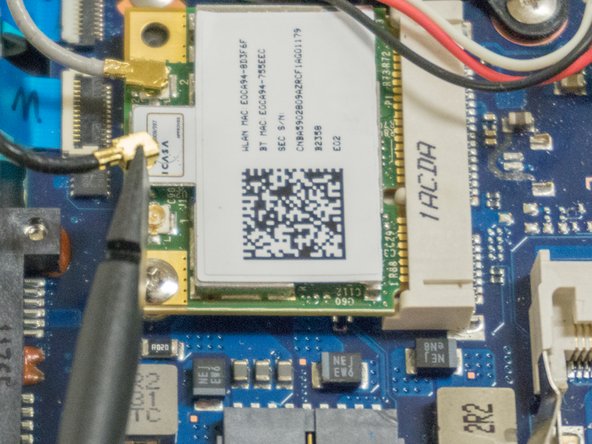
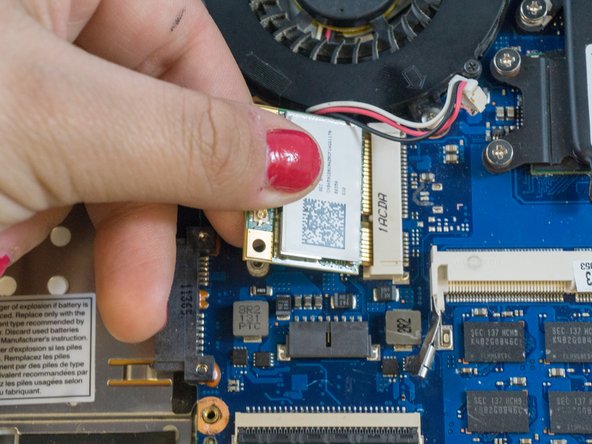
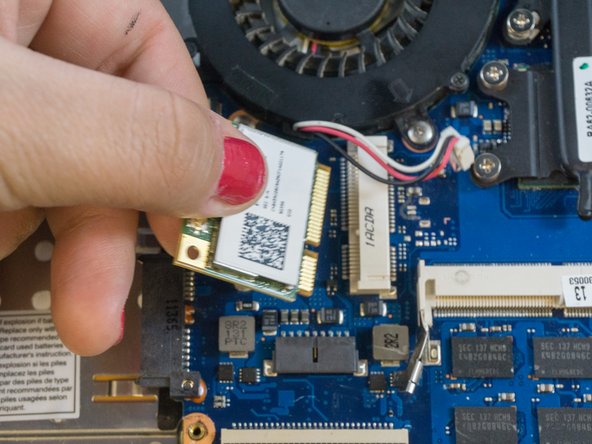
    • Using the Phillips#00, remove the single 3.5mm screw from the wireless card.

    • Grasp the edges of the wireless card with your fingers and pull straight backwards to remove it.

  9. Samsung NP700Z5AH Display Replacement: step 9, image 1 of 2 Samsung NP700Z5AH Display Replacement: step 9, image 2 of 2
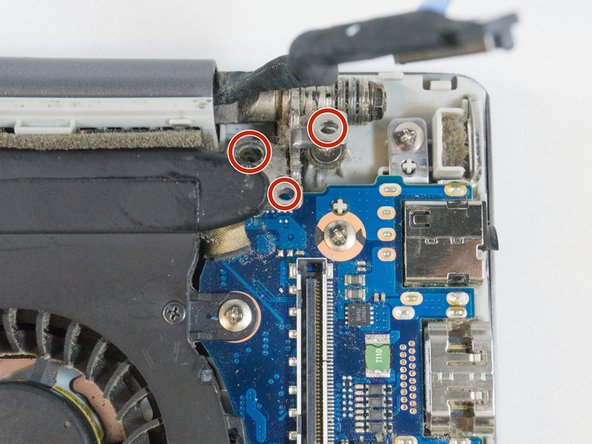
    • Using the Phillips#00, remove the six 4.5mm screws from the corner brackets holding the display to the inner case.

  10. Samsung NP700Z5AH Display Replacement: step 10, image 1 of 3 Samsung NP700Z5AH Display Replacement: step 10, image 2 of 3 Samsung NP700Z5AH Display Replacement: step 10, image 3 of 3
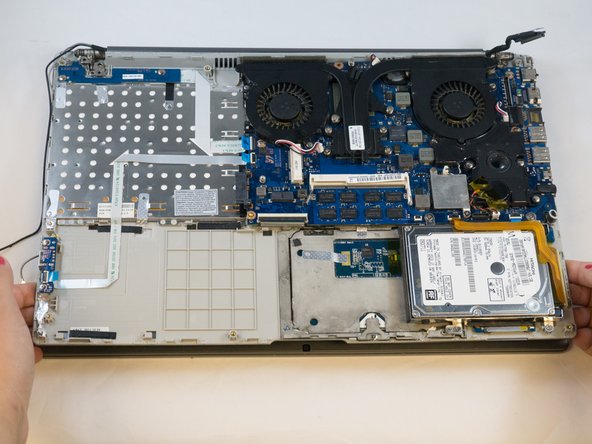
    • Using your fingers, grasp the edges of the inner case then lift and pull away to separate it from the display.

View Statistics:

Past 24 Hours: 1

Past 7 Days: 1

Past 30 Days: 4

All Time: 834