
Samsung NP-NC10-KA02US Hard Drive Replacement

What you need

  1. Samsung NP-NC10-KA02US Hard Drive Replacement, Battery: step 1, image 1 of 2 Samsung NP-NC10-KA02US Hard Drive Replacement, Battery: step 1, image 2 of 2
    • Locate the external battery on the bottom side of the device.

    • Locate the tab on the right side of the battery.

    • Shift the tab to the left.

  2. Samsung NP-NC10-KA02US Hard Drive Replacement: step 2, image 1 of 1
    • Locate the tab on the left side of the device's battery.

    • Push the left tab to the right.

  3. Samsung NP-NC10-KA02US Hard Drive Replacement: step 3, image 1 of 1
    • Pull the battery up from the device.

  4. Samsung NP-NC10-KA02US Hard Drive Replacement, Back Plate: step 4, image 1 of 1
    • Locate the 14, 3.93 mm, screws that need to be removed on the base of the computer.

  5. Samsung NP-NC10-KA02US Hard Drive Replacement: step 5, image 1 of 1
    • Remove all 14 of the 3.93 mm screws using a PH1 screw bit.

  6. Samsung NP-NC10-KA02US Hard Drive Replacement: step 6, image 1 of 2 Samsung NP-NC10-KA02US Hard Drive Replacement: step 6, image 2 of 2
    • Using two plastic opening tools remove the back plate.

    • These plastic opening tools have a flat-head that extends as a wedge which are utilized to separate pressure fit plastic components without causing any damage to them.

    • The back plate is now removed exposing all of the hardware components.

  7. Samsung NP-NC10-KA02US Hard Drive Replacement, Hard Drive: step 7, image 1 of 2 Samsung NP-NC10-KA02US Hard Drive Replacement, Hard Drive: step 7, image 2 of 2
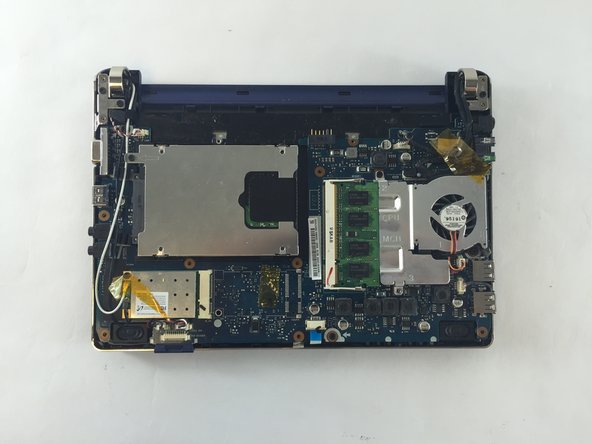
    • Locate the hard drive.

    • Remove the one 3.93 mm screw holding the hard drive in place using a PH1 screw bit.

  8. Samsung NP-NC10-KA02US Hard Drive Replacement: step 8, image 1 of 2 Samsung NP-NC10-KA02US Hard Drive Replacement: step 8, image 2 of 2
    • Hold the end of the hard drive farthest from where it is connected to the netbook. Then gently pull in the opposite direction of where the hard drive is connected.

    • Your hard drive is now removed.

Conclusion

To reassemble your device, follow these instructions in reverse order.

5 other people completed this guide.

Brian Smith

Member since: 10/03/16

405 Reputation

2 Guides authored

Team

USF Tampa, Team 1-1, Sullivan Fall 2016 Member of USF Tampa, Team 1-1, Sullivan Fall 2016

USFT-SULLIVAN-F16S1G1

3 Members

6 Guides authored

2 Comments

Thanks for your kindness.

นพไกร ใจดี - Reply

Where can I get the screws from

Lucky Jacob - Reply

Add Comment

View Statistics:

Past 24 Hours: 0

Past 7 Days: 7

Past 30 Days: 42

All Time: 5,945