Samsung Galaxy View Motherboard Replacement

What you need

  1. Samsung Galaxy View Motherboard Replacement, Kickstand: step 1, image 1 of 1
    • Place the device on a hard flat surface with its screen facing downwards.

    • Rotate the the kickstand so that the handle grip hole is up in the air and not touching the back of the tablet.

  2. Samsung Galaxy View Motherboard Replacement: step 2, image 1 of 3 Samsung Galaxy View Motherboard Replacement: step 2, image 2 of 3 Samsung Galaxy View Motherboard Replacement: step 2, image 3 of 3
    • Stick the pointy end of the spudger into the circular opening of the leftmost metallic latch.

    • With the spudger still inserted, pry the spudger to the right pushing the latch opening along with it.

    • Once the latch is moved to the right, pull up on the left side of the kickstand, releasing it from the back of the tablet.

    • Repeat the previous steps for the rightmost latch, and then lift the kickstand off the back of the tablet.

  3. Samsung Galaxy View Motherboard Replacement, Battery: step 3, image 1 of 2 Samsung Galaxy View Motherboard Replacement, Battery: step 3, image 2 of 2
    • Check the device is completely turned off.

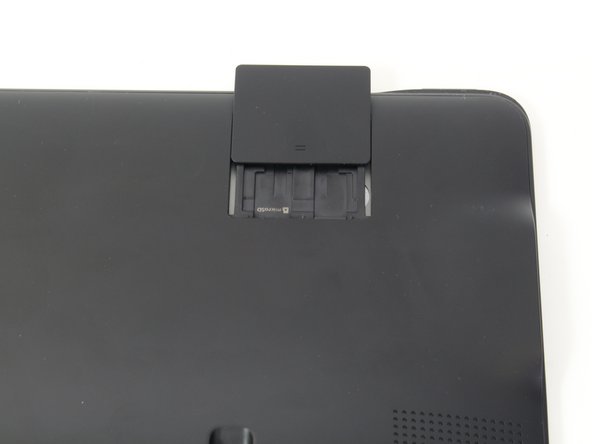
    • Slide open the SD compartment tab, and remove the SD card to ensure all data is saved.

  4. Samsung Galaxy View Motherboard Replacement: step 4, image 1 of 3 Samsung Galaxy View Motherboard Replacement: step 4, image 2 of 3 Samsung Galaxy View Motherboard Replacement: step 4, image 3 of 3
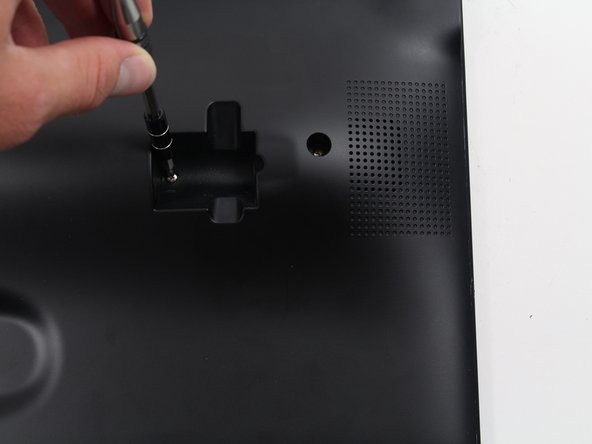
    • Remove the 4 screws (4 mm in length) using the Phillips #0 screwdriver.

  5. Samsung Galaxy View Motherboard Replacement: step 5, image 1 of 3 Samsung Galaxy View Motherboard Replacement: step 5, image 2 of 3 Samsung Galaxy View Motherboard Replacement: step 5, image 3 of 3
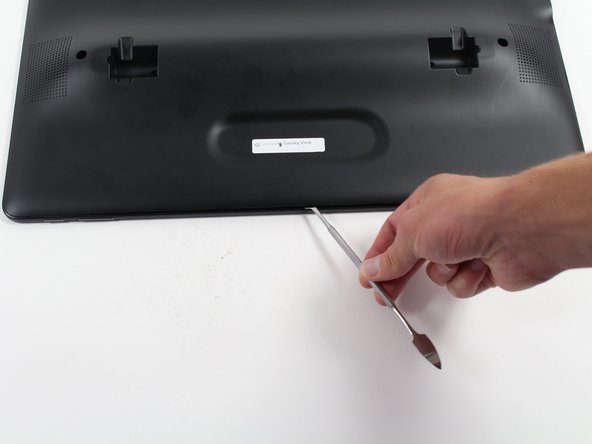
    • Insert the plastic opening tool between the seam of the back panel and the front casing to create an initial opening.

    • Insert the metal spudger within the opening.

    • Move the metal spudger down the seam, prying the back panel open as you go.

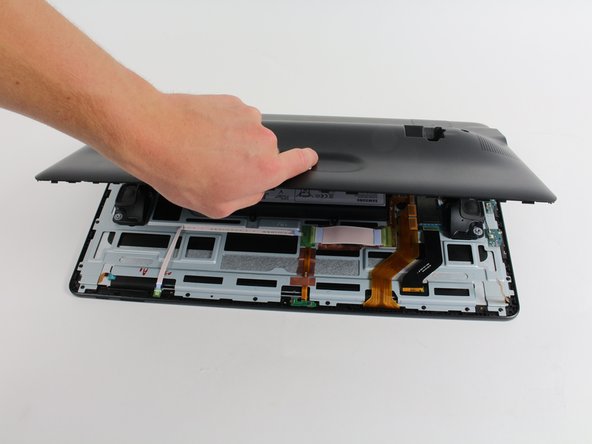
    • Once a large enough opening is made, pry the entire back panel off with your hand.

    • You will hear loud popping from the magnetized latches. This is not causing damage to the device and will require some force to open.

  6. Samsung Galaxy View Motherboard Replacement: step 6, image 1 of 2 Samsung Galaxy View Motherboard Replacement: step 6, image 2 of 2
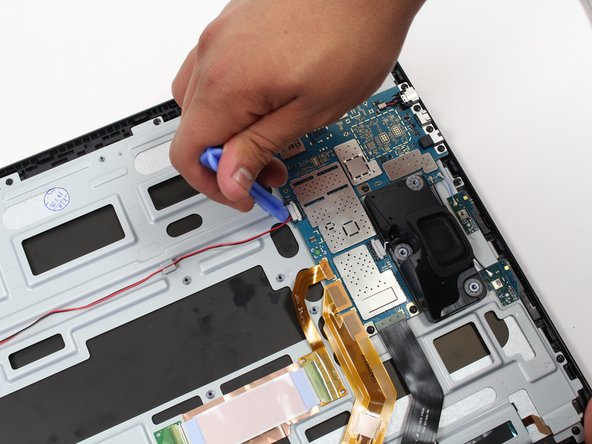
    • Using the plastic opening tool, lift off the orange press-fit connector (marked with a white arrow-head) where it attaches to the motherboard.

  7. Samsung Galaxy View Motherboard Replacement: step 7, image 1 of 3 Samsung Galaxy View Motherboard Replacement: step 7, image 2 of 3 Samsung Galaxy View Motherboard Replacement: step 7, image 3 of 3
    • Remove the 6 screws (4 mm in length) using the Phillips #0 screwdriver.

    • Remove the battery from the device.

  8. Samsung Galaxy View Motherboard Replacement, Speakers: step 8, image 1 of 3 Samsung Galaxy View Motherboard Replacement, Speakers: step 8, image 2 of 3 Samsung Galaxy View Motherboard Replacement, Speakers: step 8, image 3 of 3
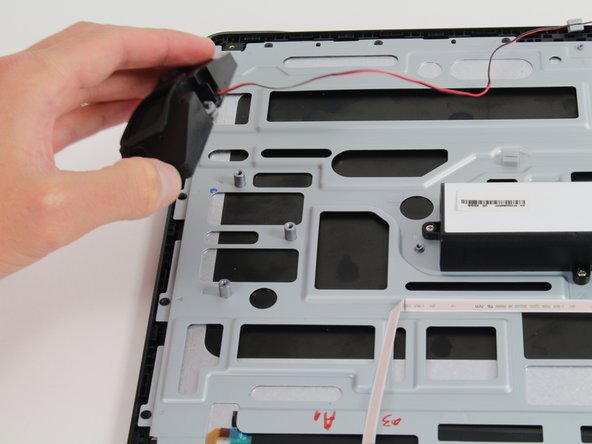
    • Use the plastic opening tool to disconnect the white bundled cable connector that links the left speaker to the motherboard via a red wire.

    • Remove the left speaker by gripping it with your hand and lifting it off of the pegs.

  9. Samsung Galaxy View Motherboard Replacement: step 9, image 1 of 2 Samsung Galaxy View Motherboard Replacement: step 9, image 2 of 2
    • Remove the right speaker by gripping it with your hand and pulling it straight up and off of the pegs.

    • The white bundled wire connector, and the red wire attaching the speaker to the motherboard, will come off when lifting the speaker.

  10. Samsung Galaxy View Motherboard Replacement, Motherboard: step 10, image 1 of 2 Samsung Galaxy View Motherboard Replacement, Motherboard: step 10, image 2 of 2
    • Insert the plastic opening tool beneath the orange press-fit connector attached to the bottom left side of the motherboard and use a leverage motion to pry the connector from the board.

    • Repeat the above step for the other two orange press-fit connectors attached on the bottom left side of the motherboard.

  11. Samsung Galaxy View Motherboard Replacement: step 11, image 1 of 2 Samsung Galaxy View Motherboard Replacement: step 11, image 2 of 2
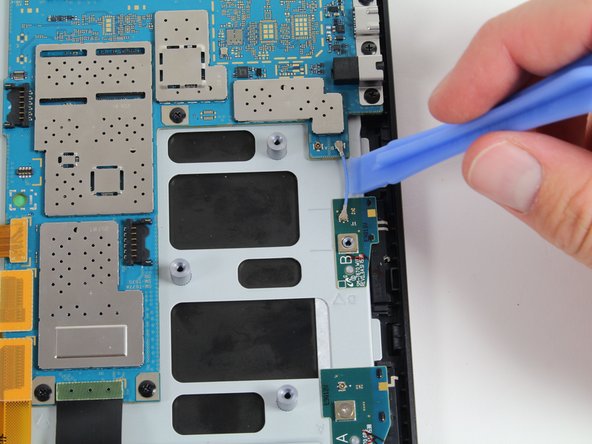
    • Use the plastic opening tool to pry up on the blue antenna cable connector near the right edge of the motherboard.

    • Repeat the above for the black antenna cable connector positioned next to the blue wire.

  12. Samsung Galaxy View Motherboard Replacement: step 12, image 1 of 3 Samsung Galaxy View Motherboard Replacement: step 12, image 2 of 3 Samsung Galaxy View Motherboard Replacement: step 12, image 3 of 3
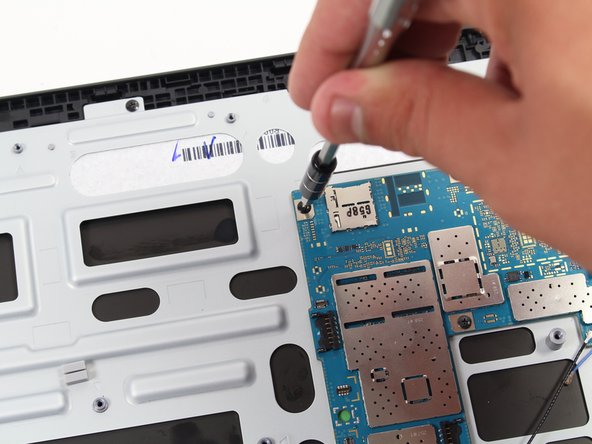
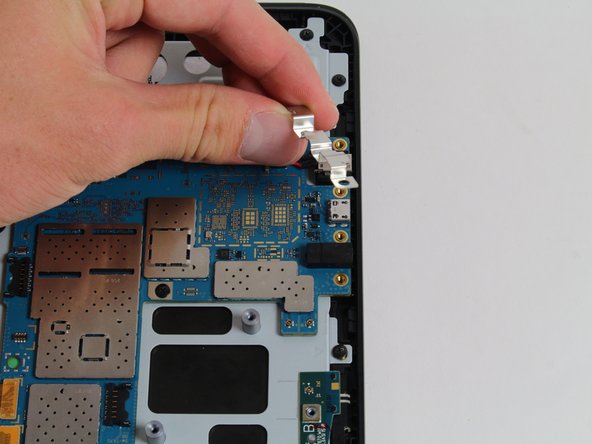
    • Use a Phillips #00 screwdriver to remove the nine 3 mm screws around the motherboard.

    • There is a metal bracket beneath four of the screws on the right side of motherboard. This bracket will also be removed during this step.

  13. Samsung Galaxy View Motherboard Replacement: step 13, image 1 of 1
    • Lift the motherboard straight up to remove it from the device.

Amberley Powell

Member since: 10/06/16

762 Reputation

2 Guides authored

Team

Cal Poly, Team 4-5, Livingston Fall 2016 Member of Cal Poly, Team 4-5, Livingston Fall 2016

CPSU-LIVINGSTON-F16S4G5

4 Members

12 Guides authored

View Statistics:

Past 24 Hours: 1

Past 7 Days: 8

Past 30 Days: 33

All Time: 6,790