Introduction
Use this guide to replace a worn-out battery in your Samsung Galaxy S6 Edge+.
Before disassembling your phone, discharge the battery below 25%. A charged lithium-ion battery can catch fire and/or explode if accidentally punctured.
If your battery is swollen, take appropriate precautions. Do not heat your phone. If needed, you can use a dropper or syringe to inject isopropyl alcohol (90+%) around the edges of the back cover to weaken the adhesive. Swollen batteries can be very dangerous, so wear eye protection and exercise due caution, or take it to a professional if you're not sure how to proceed.
This guide involves removing the rear glass, which destroys the adhesive holding it in place. The adhesive will need to be replaced before the rear glass is replaced or reinstalled.
What you need
-
-
Heat an iOpener and apply it to the volume button side of the phone for about two minutes.
-
-
-
Once the back panel is hot to the touch, apply a suction cup near the center of the phone, and as close as possible to the edge of the panel.
-
Lift on the suction cup to create a small gap underneath the rear glass, and insert an opening pick into the gap.
-
-
-
Repeat the heating and cutting procedure for the remaining three sides of the phone.
-
Leave an opening pick under each edge to prevent the adhesive from resealing.
-
-
-
-
First use tweezers to peel away any remaining adhesive from both the back cover and the phone's chassis.
-
Then, clean the adhesion areas with high concentration isopropyl alcohol (at least 90%) and a lint-free cloth. Swipe in one direction only, not back and forth. This will help prep the surface for the new adhesive.
-
Be sure to turn on your phone and test your repair before installing new adhesive and resealing the phone.
-
Replacement adhesive comes in a pre-cut sheet to match the exact contours of the back cover. The sheet is asymmetrical, so make sure the screw holes in the adhesive sheet line up with the screws on the frame before applying the adhesive.
-
After installing the rear cover, apply strong, steady pressure to your phone for several minutes to help the adhesive form a good bond, such as by placing it under a stack of heavy books.
-
-
-
Press down on the back of the battery while you lift up on the edges of the midframe to separate the midframe from the rest of the phone.
-
-
-
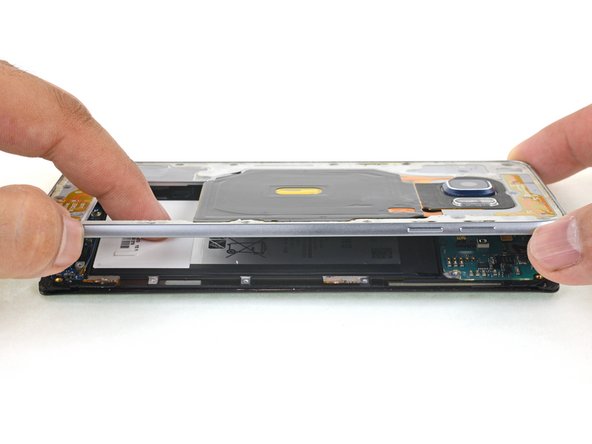
Insert an opening pick between the display frame and the battery.
-
Slide the pick underneath the battery as far as you can while maintaining a firm grip on the pick.
-
Slide the pick down the side of the battery to break up the adhesive underneath.
-
-
-
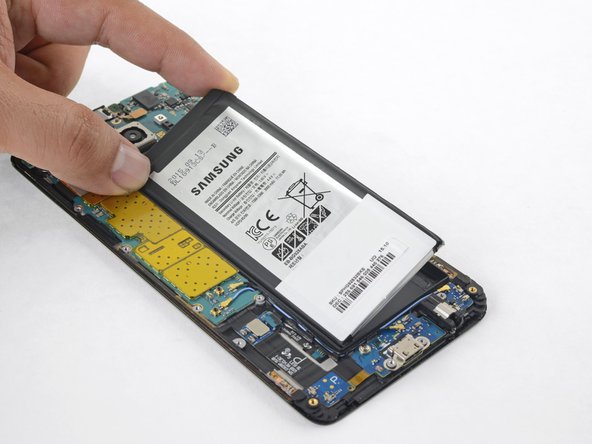
Twist the opening pick to lift the battery away from the display frame.
-
Remove the battery.
-
Remove any remaining adhesive from the phone, and clean the glued areas with isopropyl alcohol and a lint-free cloth.
-
Secure the new battery with pre-cut adhesive or double-sided adhesive tape. In order to position it correctly, apply the new adhesive into the phone, not directly onto the battery. The adhesive should go around the perimeter of the battery compartment, but not in the rectangular cutout in the center (which is actually the back side of the display).
-
Press the battery firmly into place for 5-10 seconds.
-