Introduction
Use this guide to remove or replace the battery in your Samsung Galaxy S21.
For your safety, discharge the battery below 25% before disassembling your phone. This reduces the risk of a dangerous thermal event if the battery is accidentally damaged during the repair. If your battery is swollen, take appropriate precautions.
Although it’s not necessary to remove the interconnect cables to replace the battery, we advise doing so. It makes the battery removal and reassembly much easier.
You'll need replacement adhesive in order to complete this repair.
What you need
-
-
Heat an iOpener and apply it to the back cover's bottom edge for two minutes.
-
-
-
Apply a suction cup to the back of the phone, as close to the center of the bottom edge as possible.
-
Pull up on the suction cup with strong, steady force to create a gap between the back cover and the frame.
-
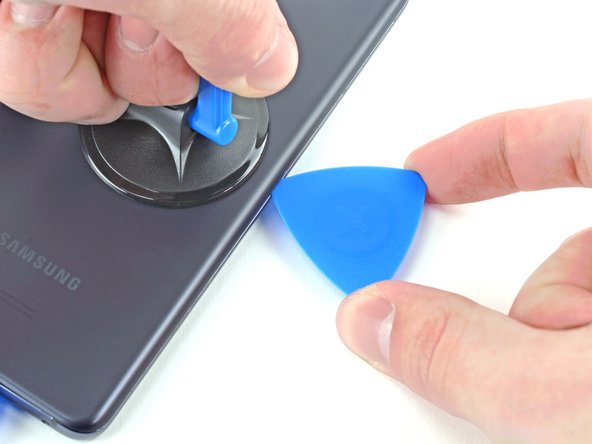
Insert an opening pick into the gap.
-
-
-
Slide the pick back and forth along the bottom edge to slice through the adhesive.
-
Leave the pick in to prevent the adhesive from resealing.
-
-
-
Apply a heated iOpener to the back cover's left edge for two minutes.
-
-
-
Apply a suction cup to the back of the phone, as close to the center of the left edge as possible.
-
Pull up on the suction cup with strong, steady force to create a gap between the back cover and the frame.
-
Insert an opening pick into the gap.
-
-
-
Apply a heated iOpener to the back cover's right edge for two minutes.
-
-
-
Apply a suction cup to the back of the phone, as close to the center of the right edge as possible.
-
Pull up on the suction cup with strong, steady force to create a gap between the back cover and the frame.
-
Insert an opening pick into the gap.
-
-
-
Rotate the right-edge opening pick around the top-right corner of the phone.
-
-
-
Slide the top-most opening pick as close to the camera shell as possible.
-
Repeat for the left-edge pick.
-
-
-
Heat an iOpener and apply it to the camera shell for two minutes.
-
-
-
-
Rotate the back cover counterclockwise to create a gap between the camera shell and the frame.
-
Insert an opening pick in the gap.
-
-
-
Gently slide the two picks toward the camera shell so they are under the corners of the back cover adjacent to the camera shell.
-
Move the picks back and forth along the bridge between the back cover and the camera shell until you create a gap between the camera shell and the frame.
-
-
-
Remove the back cover.
-
This is a good point to power on your phone and test all functions before sealing it up. Be sure to power your phone back down completely before you continue working.
-
Remove any adhesive chunks with a pair of tweezers or your fingers. Use some high concentration (over 90%) isopropyl alcohol to wipe away any adhesive residue.
-
If you're using Samsung custom-cut adhesives, follow this guide.
-
If you're using double-sided tape, follow this guide.
-
-
-
Use a Phillips screwdriver to remove the five 4 mm-long screws securing the motherboard bracket to the frame.
-
-
-
Use a pair of tweezers to gently pull up and unclip the motherboard bracket from the frame.
-
-
-
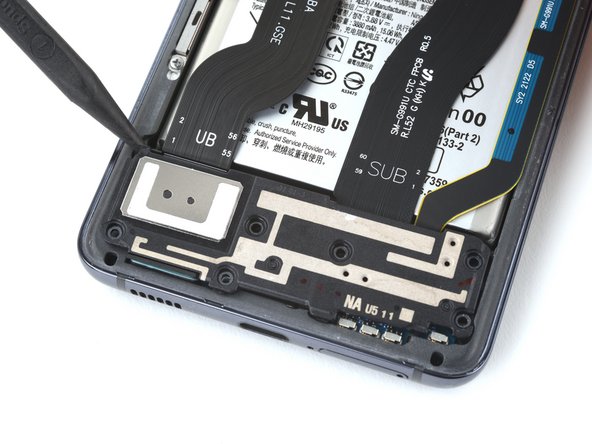
While using tweezers, or your fingers, to hold the motherboard bracket out of the way, use a spudger to pry up the battery press connector.
-
-
-
While still holding the motherboard bracket out of the way, use a spudger to pry up and disconnect the wireless charging coil's press connector.
-
-
-
Use your fingers to gently peel the wireless charging coil away from the phone.
-
-
-
Use a Phillips screwdriver to remove the six 4 mm screws securing the loudspeaker to the frame.
-
-
-
Insert the point of a spudger into the notch in the top-left corner of the loudspeaker and pry up to release the clips holding it in place.
-
Remove the loudspeaker.
-
-
-
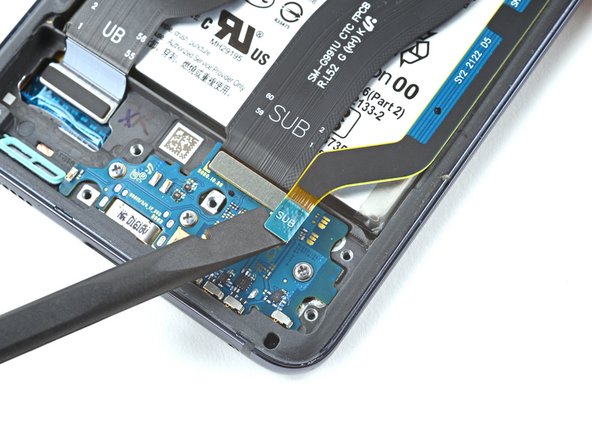
Use the flat end of a spudger to pry up and disconnect the primary interconnect cable's press connector.
-
-
-
Use the flat end of a spudger to pry up and disconnect the secondary interconnect cable's press connector.
-
-
-
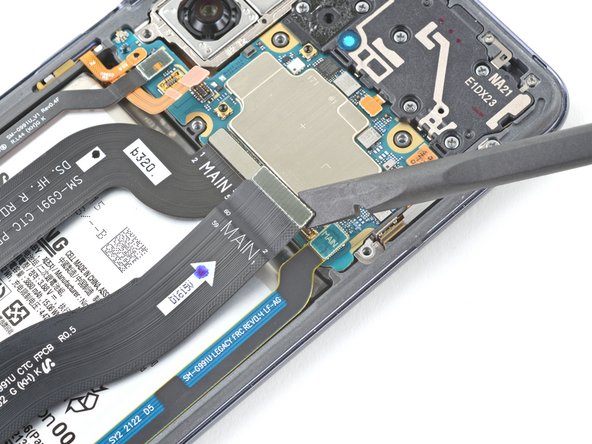
Use the flat end of a spudger to pry up on the secondary interconnect cable's press connector.
-
Repeat for the primary interconnect cable's press connector.
-
-
-
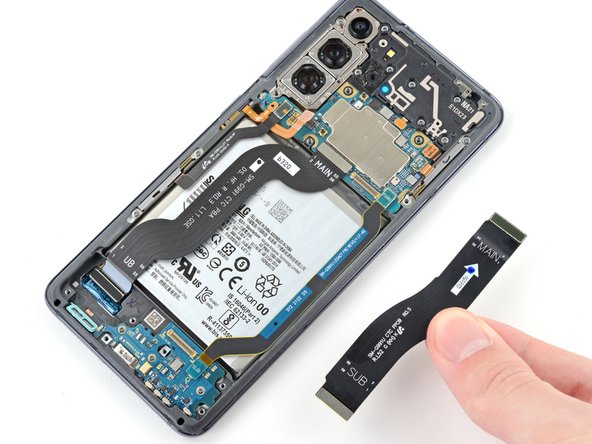
Use tweezers, or your fingers, to remove the secondary and primary interconnect cables.
-
-
-
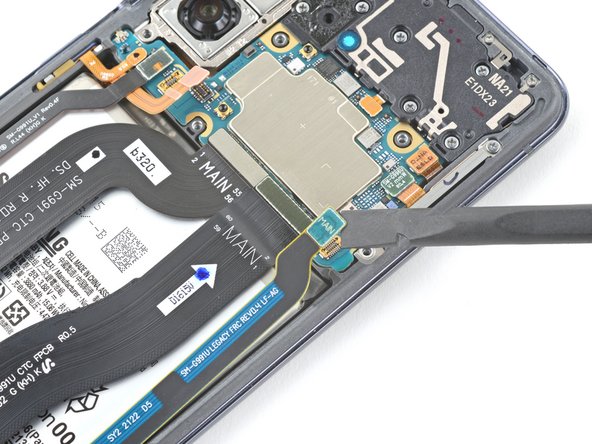
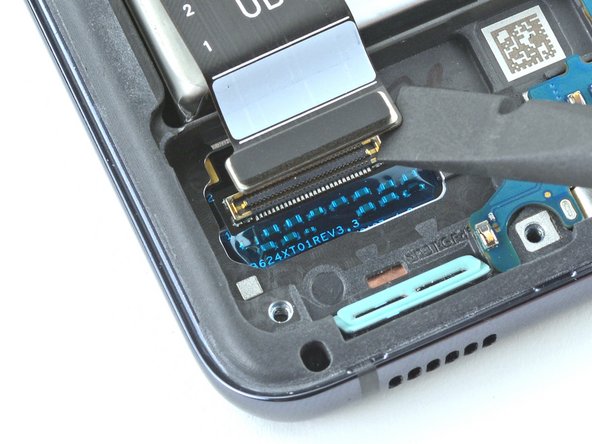
Use a spudger to pry up and disconnect the display cable's bottom press connector.
-
-
-
Apply a few drops of high concentration (over 90%) isopropyl alcohol to the gaps surrounding the battery's perimeter.
-
-
-
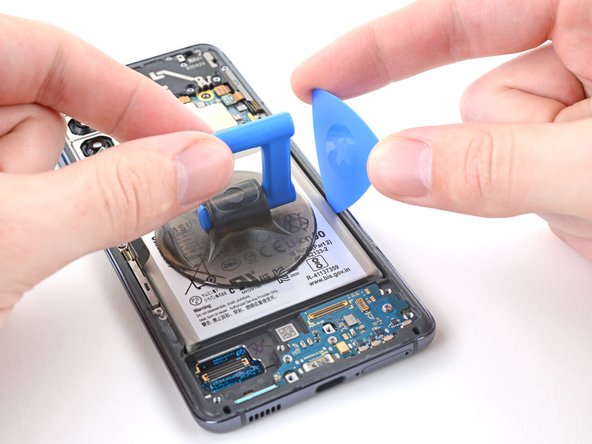
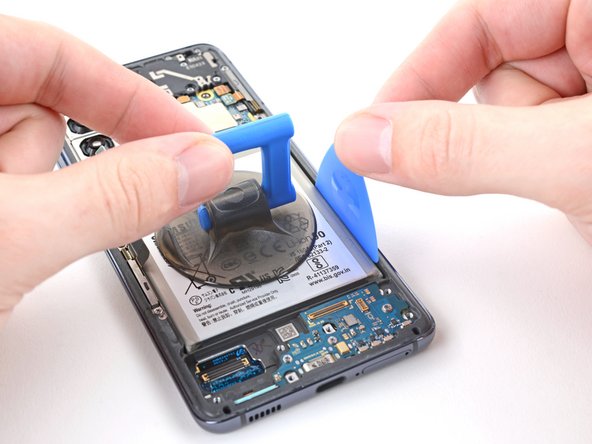
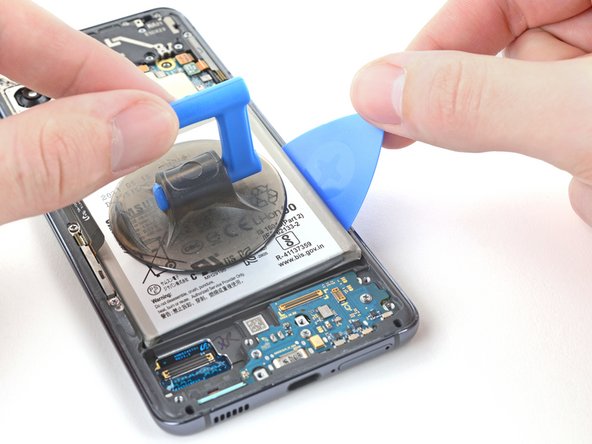
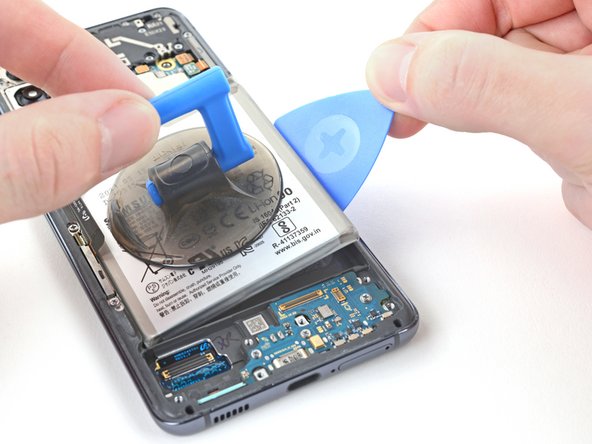
Apply a suction cup to the battery, as close to the center of the right edge as possible.
-
Insert an opening pick into the edge with the widest gap between the frame and the battery.
-
Rotate the opening pick to insert its long edge into the gap.
-
-
-
Pull up on the suction cup with strong, steady force and pry up with the opening pick to separate the battery from the frame.
-


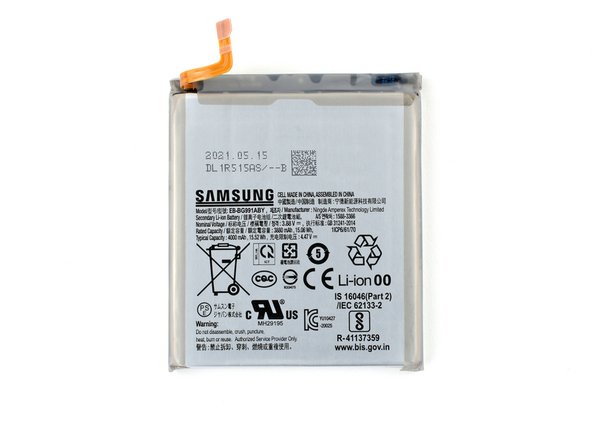
Compare your new replacement part to the original part—you may need to transfer remaining components or remove adhesive backings from the new part before installing.
To reassemble your device, follow the above steps in reverse order.
Follow this guide to perform a battery cycle reset, and calibrate your newly-installed battery.
Take your e-waste to an R2 or e-Stewards certified recycler.
Repair didn’t go as planned? Check out our Answers community for troubleshooting help.
Cancel: I did not complete this guide.
13 other people completed this guide.


7 Comments
Yes, unfortunately the warranty will be voided if you "tamper" with any of the components.
Just a note to the last step regarding iso. Be careful not applying too much iso - it will run down to the display via the hole in the back.
The glue is a pain but I wasn't nearly as careful on the bottom part as the guide suggested and was able to get it off just fine. I also didn't bother to remove the old glue and it holds well enough