
Samsung Galaxy Note II USB Board Replacement

What you need

  1. Samsung Galaxy Note II USB Board Replacement, Stylus: step 1, image 1 of 2 Samsung Galaxy Note II USB Board Replacement, Stylus: step 1, image 2 of 2
    • Grasp the end of the stylus and remove it from its slot in the midframe.

  2. Samsung Galaxy Note II USB Board Replacement, Rear Case: step 2, image 1 of 2 Samsung Galaxy Note II USB Board Replacement, Rear Case: step 2, image 2 of 2
    • Pry with a plastic opening tool, or your fingernail, in the divot to the left of the rear-facing camera, near the power button.

  3. Samsung Galaxy Note II USB Board Replacement: step 3, image 1 of 3 Samsung Galaxy Note II USB Board Replacement: step 3, image 2 of 3 Samsung Galaxy Note II USB Board Replacement: step 3, image 3 of 3
    • Lift the rear case by the corner nearest the divot and remove it from the phone.

  4. Samsung Galaxy Note II USB Board Replacement, MicroSD Card: step 4, image 1 of 3 Samsung Galaxy Note II USB Board Replacement, MicroSD Card: step 4, image 2 of 3 Samsung Galaxy Note II USB Board Replacement, MicroSD Card: step 4, image 3 of 3
    • If you have an SD card inserted, use the flat end of a spudger, or your fingernail, to press the microSD card slightly deeper into its slot until you hear a click.

    • After the click, release the card and it will pop out of its slot.

    • Remove the microSD card.

    • For reassembly, push the microSD card into the slot until it clicks in place.

  5. Samsung Galaxy Note II USB Board Replacement, Battery: step 5, image 1 of 2 Samsung Galaxy Note II USB Board Replacement, Battery: step 5, image 2 of 2
    • Insert a plastic opening tool, or your finger, into the notch of the battery compartment and lift the battery upward.

  6. Samsung Galaxy Note II USB Board Replacement: step 6, image 1 of 1
    • Remove the battery from the midframe.

  7. Samsung Galaxy Note II USB Board Replacement, Midframe: step 7, image 1 of 1
    • Remove the eleven 4.0 mm Phillips #00 screws securing the midframe to the display assembly.

  8. Samsung Galaxy Note II USB Board Replacement: step 8, image 1 of 3 Samsung Galaxy Note II USB Board Replacement: step 8, image 2 of 3 Samsung Galaxy Note II USB Board Replacement: step 8, image 3 of 3
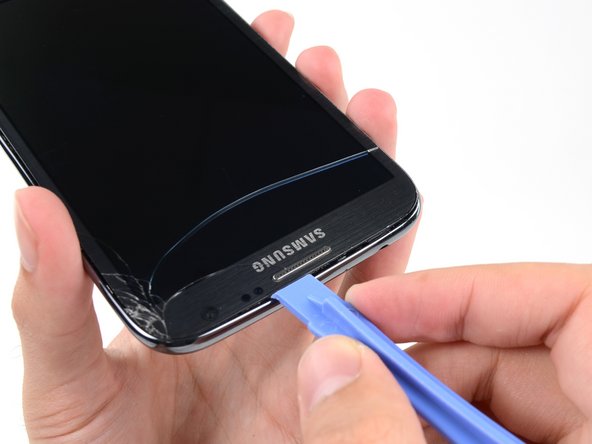
    • Insert your plastic opening tool between the midframe and front panel assembly on the side of the phone.

    • Slide the plastic opening tool down the seam.

  9. Samsung Galaxy Note II USB Board Replacement: step 9, image 1 of 3 Samsung Galaxy Note II USB Board Replacement: step 9, image 2 of 3 Samsung Galaxy Note II USB Board Replacement: step 9, image 3 of 3
    • Continue to run the plastic opening tool down the seam.

  10. Samsung Galaxy Note II USB Board Replacement: step 10, image 1 of 2 Samsung Galaxy Note II USB Board Replacement: step 10, image 2 of 2
    • Carefully pry around the corner with a plastic opening tool.

  11. Samsung Galaxy Note II USB Board Replacement: step 11, image 1 of 2 Samsung Galaxy Note II USB Board Replacement: step 11, image 2 of 2
    • Pry along the top of the phone with a plastic opening tool.

  12. Samsung Galaxy Note II USB Board Replacement: step 12, image 1 of 2 Samsung Galaxy Note II USB Board Replacement: step 12, image 2 of 2
    • Push the plastic opening tool down to free the corner of the midframe from the display assembly.

  13. Samsung Galaxy Note II USB Board Replacement: step 13, image 1 of 2 Samsung Galaxy Note II USB Board Replacement: step 13, image 2 of 2
    • Free the clips along the power button side of the phone.

    • Lastly, free the two clips along the top and bottom edge of battery compartment.

  14. Samsung Galaxy Note II USB Board Replacement: step 14, image 1 of 2 Samsung Galaxy Note II USB Board Replacement: step 14, image 2 of 2
    • Lift the display assembly out of the midframe.

  15. Samsung Galaxy Note II USB Board Replacement, Speaker Enclosure: step 15, image 1 of 1
    • Remove the 3 mm Phillips #00 screw from the speaker enclosure.

  16. Samsung Galaxy Note II USB Board Replacement: step 16, image 1 of 1
    • Remove the speaker enclosure.

  17. Samsung Galaxy Note II USB Board Replacement, USB Board: step 17, image 1 of 2 Samsung Galaxy Note II USB Board Replacement, USB Board: step 17, image 2 of 2
    • Using the flat end of a spudger, disconnect the USB board cable connector.

    • Use the tip of a spudger to disconnect the antenna cable connector from the USB board.

  18. Samsung Galaxy Note II USB Board Replacement: step 18, image 1 of 2 Samsung Galaxy Note II USB Board Replacement: step 18, image 2 of 2
    • Push the flat end of a spudger under the USB board to separate it from the display assembly.

    • Insert the spudger at a shallow angle to avoid bending or damaging the USB board.

  19. Samsung Galaxy Note II USB Board Replacement: step 19, image 1 of 1
    • Remove the USB board from the display assembly.

Sam Goldheart

Member since: 10/18/12

465,647 Reputation

538 Guides authored

Team

iFixit Member of iFixit

Staff

135 Members

16,732 Guides authored

View Statistics:

Past 24 Hours: 1

Past 7 Days: 4

Past 30 Days: 23

All Time: 37,732