
Samsung Galaxy Media Player 5 Rear and Front Facing Cameras Replacement

What you need

  1. Samsung Galaxy Media Player 5 Rear and Front Facing Cameras Replacement, Rear and Front Facing Cameras: step 1, image 1 of 2 Samsung Galaxy Media Player 5 Rear and Front Facing Cameras Replacement, Rear and Front Facing Cameras: step 1, image 2 of 2
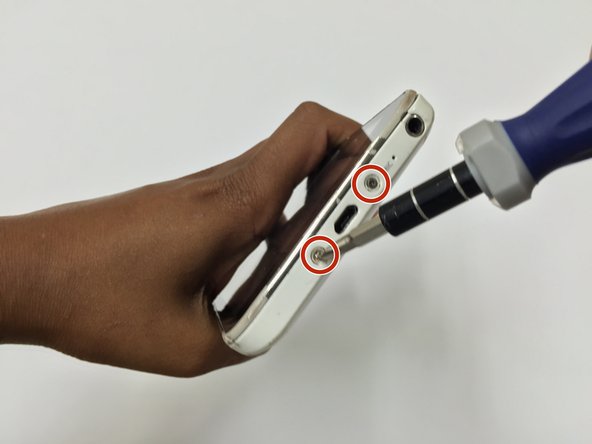
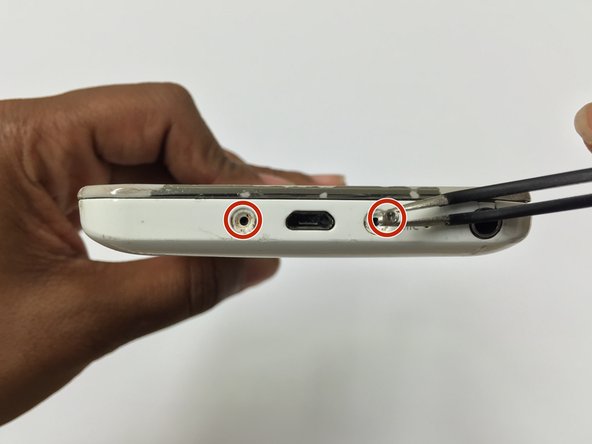
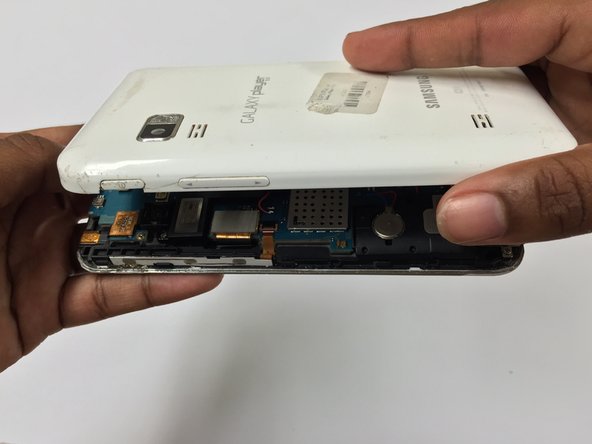
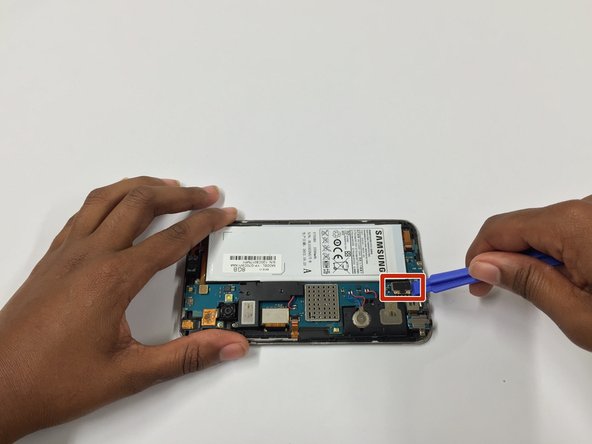
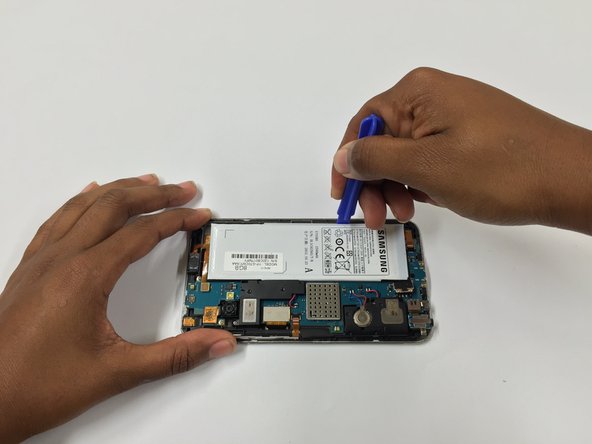
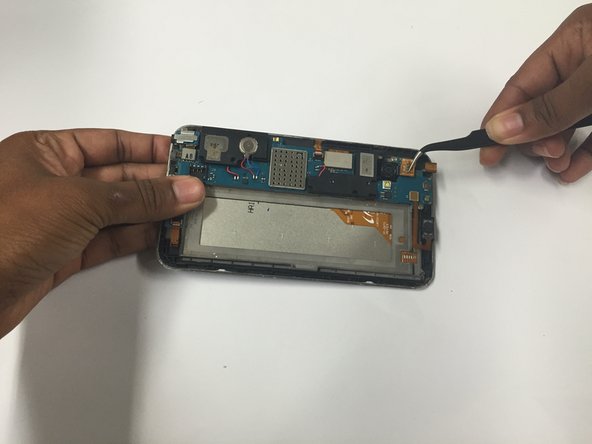
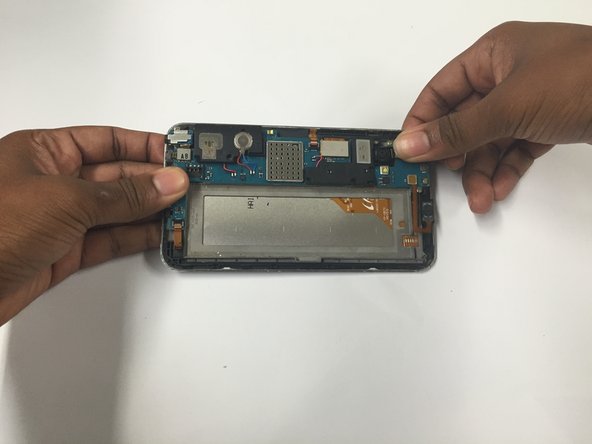
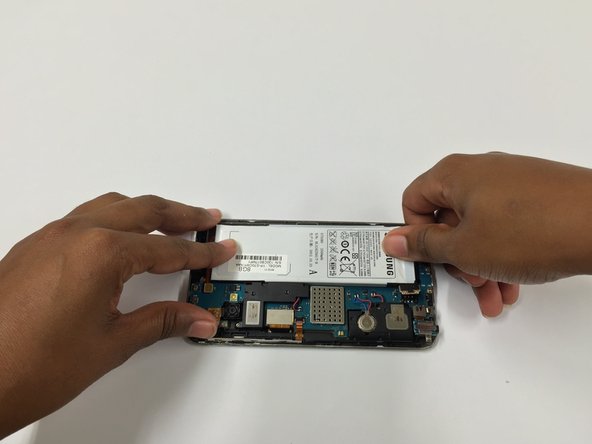
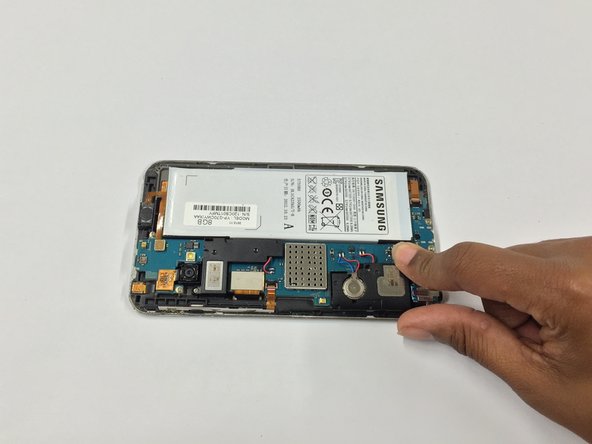
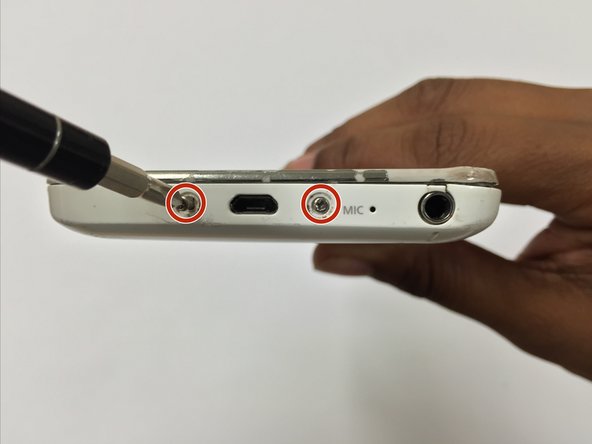
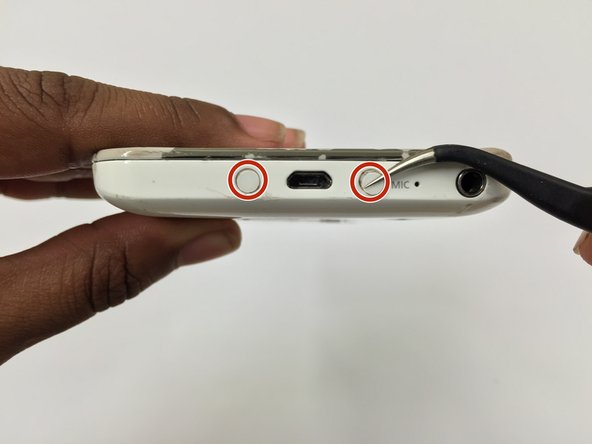
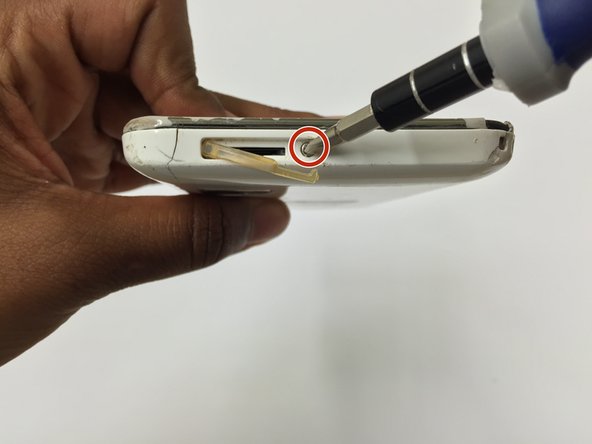
    • Remove SD Memory Card before taking the device apart. Using the screwdriver, remove the 10mm Phillips screw that is near the SD Memory Card port.

  2. Samsung Galaxy Media Player 5 Rear and Front Facing Cameras Replacement: step 2, image 1 of 1
    • Remove the white caps which are covering the screws that are located on either side of the charging port.

    • You may have to use a low heat blow dryer for 5 to 10 seconds, or other equivalent heat source to loosen the adhesive.

  3. Samsung Galaxy Media Player 5 Rear and Front Facing Cameras Replacement: step 3, image 1 of 2 Samsung Galaxy Media Player 5 Rear and Front Facing Cameras Replacement: step 3, image 2 of 2
    • Continue to unscrew the two 10mm Phillips Screws from the bottom of the device.

  4. Samsung Galaxy Media Player 5 Rear and Front Facing Cameras Replacement: step 4, image 1 of 1
    • Starting from the bottom and working around, use an opening pick to separate the front cover housing from the back cover housing.

    • You will hear a popping sound, indicating the separation.

  5. Samsung Galaxy Media Player 5 Rear and Front Facing Cameras Replacement: step 5, image 1 of 2 Samsung Galaxy Media Player 5 Rear and Front Facing Cameras Replacement: step 5, image 2 of 2
    • Take the back housing cover off of the device.

  6. Samsung Galaxy Media Player 5 Rear and Front Facing Cameras Replacement: step 6, image 1 of 2 Samsung Galaxy Media Player 5 Rear and Front Facing Cameras Replacement: step 6, image 2 of 2
    • Detach the tab the battery is attached to and the battery using the same prying tool in an upward motion.

    • Adhesive is behind the battery, but it is not strong.

  7. Samsung Galaxy Media Player 5 Rear and Front Facing Cameras Replacement: step 7, image 1 of 1
    • Remove the rear and front facing cameras by lifting the tab that they are attached to with the tweezers, they should come up quickly, and together.

    • Both of the Cameras are attached to one flex cable, so when you remove the tab both of them should come out.

  8. Samsung Galaxy Media Player 5 Rear and Front Facing Cameras Replacement: step 8, image 1 of 2 Samsung Galaxy Media Player 5 Rear and Front Facing Cameras Replacement: step 8, image 2 of 2
    • Gently put in the new rear facing and front facing camera and snap the tab back onto the motherboard.

  9. Samsung Galaxy Media Player 5 Rear and Front Facing Cameras Replacement: step 9, image 1 of 2 Samsung Galaxy Media Player 5 Rear and Front Facing Cameras Replacement: step 9, image 2 of 2
    • Insert the battery into its position, and reconnect its tab onto the motherboard.

  10. Samsung Galaxy Media Player 5 Rear and Front Facing Cameras Replacement: step 10, image 1 of 1
    • Now put the rear housing cover on the device, starting from its bottom side, and snap the edges all the way around to close the device.

  11. Samsung Galaxy Media Player 5 Rear and Front Facing Cameras Replacement: step 11, image 1 of 3 Samsung Galaxy Media Player 5 Rear and Front Facing Cameras Replacement: step 11, image 2 of 3 Samsung Galaxy Media Player 5 Rear and Front Facing Cameras Replacement: step 11, image 3 of 3
    • Lastly reinsert the screws at the bottom of the device, as well as the screw inside the SD Memory Card port.

Conclusion

To reassemble your device, follow these instructions in reverse order.

2 other people completed this guide.

China Ayala

Member since: 03/05/15

584 Reputation

4 Guides authored

0 Comments

Add Comment

View Statistics:

Past 24 Hours: 0

Past 7 Days: 0

Past 30 Days: 4

All Time: 250