
Samsung Galaxy A40 Super AMOLED Screen Replacement

What you need

  1. Samsung Galaxy A40 Super AMOLED Screen Replacement, Remove the SIM tray: step 1, image 1 of 3 Samsung Galaxy A40 Super AMOLED Screen Replacement, Remove the SIM tray: step 1, image 2 of 3 Samsung Galaxy A40 Super AMOLED Screen Replacement, Remove the SIM tray: step 1, image 3 of 3
    • Insert a SIM card eject tool, a SIM eject bit or a straightened paper clip into the hole on the SIM tray located on the left side of the phone.

    • Press your SIM card eject tool firmly into the hole in order to eject the SIM card tray.

    • Remove the SIM card tray.

    • When reinserting the cards, make sure to properly orient them in the tray.

  2. Samsung Galaxy A40 Super AMOLED Screen Replacement, Loosen the back cover adhesive: step 2, image 1 of 1
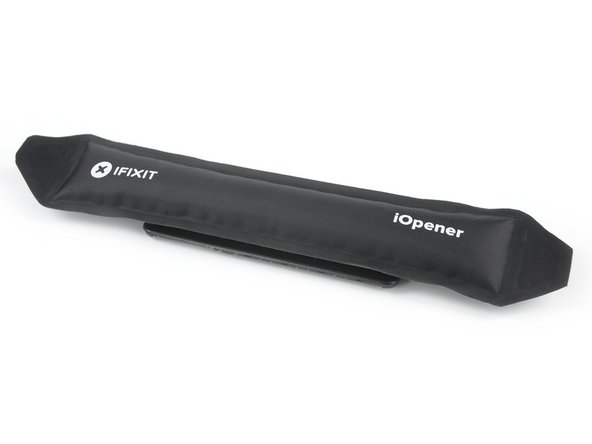
    • Apply a heated iOpener to the back cover to loosen the adhesive underneath. Apply the iOpener for at least two minutes.

  3. Samsung Galaxy A40 Super AMOLED Screen Replacement, Insert an opening pick: step 3, image 1 of 2 Samsung Galaxy A40 Super AMOLED Screen Replacement, Insert an opening pick: step 3, image 2 of 2
    • Secure a suction handle to the right edge of the back cover, as close to the edge as possible.

    • If the phone's back cover is damaged, the suction handle may not stick. Try lifting it with strong tape, or superglue the suction handle in place and allow it to cure so you can proceed.

    • Lift the back cover with the suction handle to create a small gap between the back cover and the frame.

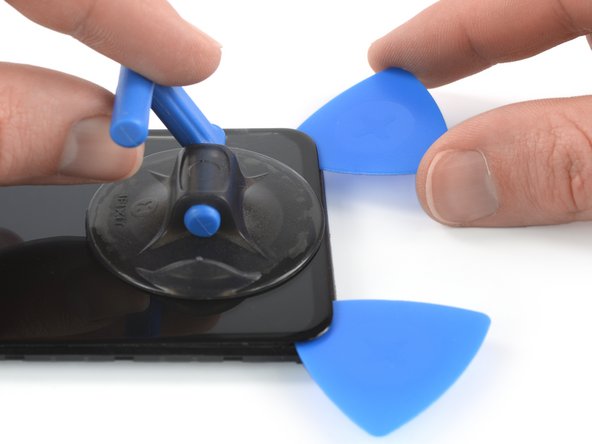
    • Insert an opening pick into the gap.

    • In case you have trouble creating a gap, apply more heat to further soften the adhesive. Follow the iOpener instructions to avoid overheating.

  4. Samsung Galaxy A40 Super AMOLED Screen Replacement, Slice the adhesive: step 4, image 1 of 2 Samsung Galaxy A40 Super AMOLED Screen Replacement, Slice the adhesive: step 4, image 2 of 2
    • Slide the opening pick to the bottom right corner and leave it in place to prevent the adhesive from resealing.

  5. Samsung Galaxy A40 Super AMOLED Screen Replacement, Insert a second opening pick: step 5, image 1 of 2 Samsung Galaxy A40 Super AMOLED Screen Replacement, Insert a second opening pick: step 5, image 2 of 2
    • Insert a second opening pick at the bottom right corner.

    • Slide the opening pick along the right edge of your phone to cut the adhesive beneath the back cover.

    • Leave the opening pick in the top right corner.

    • At this point of the back cover removal feel free to remove the suction cup or continue to use it for a better grip.

  6. Samsung Galaxy A40 Super AMOLED Screen Replacement, Cut the adhesive: step 6, image 1 of 2 Samsung Galaxy A40 Super AMOLED Screen Replacement, Cut the adhesive: step 6, image 2 of 2
    • Insert a third opening pick at the top right corner of your phone.

    • Slide the opening pick along the top edge of your phone to cut the adhesive.

    • Leave the opening pick in the top left corner to prevent the adhesive from resealing.

    • If the adhesive becomes hard to cut, it has most likely cooled down. Use your iOpener to reheat it.

  7. Samsung Galaxy A40 Super AMOLED Screen Replacement: step 7, image 1 of 2 Samsung Galaxy A40 Super AMOLED Screen Replacement: step 7, image 2 of 2
    • Insert a fourth opening pick at the top left corner of your phone.

    • Slide the opening pick along the left edge of your phone to cut the adhesive.

    • Leave the opening pick in the bottom left corner.

  8. Samsung Galaxy A40 Super AMOLED Screen Replacement: step 8, image 1 of 2 Samsung Galaxy A40 Super AMOLED Screen Replacement: step 8, image 2 of 2
    • Insert a fifth opening pick to cut the remaining adhesive at the bottom edge of your phone.

    • In order to cut all the adhesive at the bottom edge of the device, you need to insert the opening pick about 0.4 inch (1cm).

  9. Samsung Galaxy A40 Super AMOLED Screen Replacement, Remove the back cover: step 9, image 1 of 2 Samsung Galaxy A40 Super AMOLED Screen Replacement, Remove the back cover: step 9, image 2 of 2
    • To avoid tearing the fingerprint cable during the following step, make sure to gently press down the fingerprint reader while lifting the back cover.

    • Fold the back cover upwards and remove it.

  10. Samsung Galaxy A40 Super AMOLED Screen Replacement, Unfasten the screws: step 10, image 1 of 1
    • Remove the thirteen 3.4 mm-long Phillips #00 screws.

  11. Samsung Galaxy A40 Super AMOLED Screen Replacement, Insert an opening pick: step 11, image 1 of 2 Samsung Galaxy A40 Super AMOLED Screen Replacement, Insert an opening pick: step 11, image 2 of 2
    • Insert an opening pick between the left edge of the phone assembly and the midframe.

    • Slide the opening pick along the left edge of the phone to release the plastic clips holding the midframe in place.

  12. Samsung Galaxy A40 Super AMOLED Screen Replacement, Release the plastic clips: step 12, image 1 of 2 Samsung Galaxy A40 Super AMOLED Screen Replacement, Release the plastic clips: step 12, image 2 of 2
    • Slide the opening pick around the bottom right corner and release the plastic clips at the bottom edge of the phone assembly.

  13. Samsung Galaxy A40 Super AMOLED Screen Replacement: step 13, image 1 of 2 Samsung Galaxy A40 Super AMOLED Screen Replacement: step 13, image 2 of 2
    • Slide the opening pick along the right edge of the phone assembly to release the remaining plastic clips holding the midframe in place.

  14. Samsung Galaxy A40 Super AMOLED Screen Replacement, Remove the midframe: step 14, image 1 of 1
    • Remove the midframe.

  15. Samsung Galaxy A40 Super AMOLED Screen Replacement, Disconnect the battery: step 15, image 1 of 2 Samsung Galaxy A40 Super AMOLED Screen Replacement, Disconnect the battery: step 15, image 2 of 2
    • Use the flat end of a spudger to pry up and disconnect the battery cable.

  16. Samsung Galaxy A40 Super AMOLED Screen Replacement, Disconnect the display cable: step 16, image 1 of 2 Samsung Galaxy A40 Super AMOLED Screen Replacement, Disconnect the display cable: step 16, image 2 of 2
    • Use a spudger to disconnect the display flex cable at the bottom right corner of your phone.

  17. Samsung Galaxy A40 Super AMOLED Screen Replacement, Loosen the display adhesive: step 17, image 1 of 1
    • Apply a heated iOpener to the screen to loosen the adhesive underneath. Apply the iOpener for at least two minutes.

  18. Samsung Galaxy A40 Super AMOLED Screen Replacement, Insert an opening pick: step 18, image 1 of 3 Samsung Galaxy A40 Super AMOLED Screen Replacement, Insert an opening pick: step 18, image 2 of 3 Samsung Galaxy A40 Super AMOLED Screen Replacement, Insert an opening pick: step 18, image 3 of 3
    • Once the screen is warm to the touch, apply a suction handle to the bottom edge of the phone.

    • If the phone's screen is cracked, the suction handle may not stick. Try lifting it with strong tape, or superglue the suction handle in place and allow it to cure so you can proceed.

    • Lift the screen with the suction handle to create a small gap between the screen and the frame.

    • Insert the tip of an opening pick in the gap between the midframe and the screen.

    • Slide the opening pick to the bottom left corner to cut the adhesive. Leave it in its place to prevent the adhesive from resealing.

  19. Samsung Galaxy A40 Super AMOLED Screen Replacement, Slice the display adhesive: step 19, image 1 of 2 Samsung Galaxy A40 Super AMOLED Screen Replacement, Slice the display adhesive: step 19, image 2 of 2
    • Insert a second opening pick and slide it to the bottom right corner of the screen to cut the adhesive.

    • Leave the picks in their place to prevent the adhesive from resealing.

  20. Samsung Galaxy A40 Super AMOLED Screen Replacement: step 20, image 1 of 2 Samsung Galaxy A40 Super AMOLED Screen Replacement: step 20, image 2 of 2
    • If the adhesive becomes hard to cut, it has most likely cooled down. Use your iOpener to reheat it.

    • Insert a third opening pick under the bottom left corner of the phone.

    • Slide the opening pick up to the top left corner to cut the adhesive. Leave it there to prevent the adhesive from resealing.

  21. Samsung Galaxy A40 Super AMOLED Screen Replacement: step 21, image 1 of 2 Samsung Galaxy A40 Super AMOLED Screen Replacement: step 21, image 2 of 2
    • Insert a fourth opening pick at the top left corner.

    • Slide the opening pick along the top edge of the phone to cut the adhesive. Leave the pick in the top right corner of the screen to prevent the adhesive from resealing.

    • When you slice near the front facing camera, insert only the tip of the opening pick to avoid damaging or smearing the camera.

    • The top speaker grill located above the front facing camera falls out easily. Be careful not to lose it.

  22. Samsung Galaxy A40 Super AMOLED Screen Replacement: step 22, image 1 of 2 Samsung Galaxy A40 Super AMOLED Screen Replacement: step 22, image 2 of 2
    • Insert a fifth opening pick and slide it along the right edge of the phone to cut the remaining adhesive.

    • Try not to remove the display all the way yet. The display is still held onto the midframe by adhesive beneath its center.

    • Leave the opening picks in their place to prevent the adhesive from resealing.

  23. Samsung Galaxy A40 Super AMOLED Screen Replacement, Loosen the display adhesive: step 23, image 1 of 1
    • Apply a heated iOpener to the screen to loosen the adhesive underneath its center. Apply the iOpener for at least two minutes.

  24. Samsung Galaxy A40 Super AMOLED Screen Replacement, Insert a plastic card: step 24, image 1 of 2 Samsung Galaxy A40 Super AMOLED Screen Replacement, Insert a plastic card: step 24, image 2 of 2
    Tool used on this step:
    Plastic Cards
    $2.99
    Buy
    • Slide a plastic card underneath the bottom right corner of the screen.

    • Use the plastic card to cut the adhesive beneath the center of the screen by sliding it to the top right corner of the phone.

    • Try not to remove the display all the way yet, the display cable is still threaded through the frame and possible adhered on the inner side of the midframe.

  25. Samsung Galaxy A40 Super AMOLED Screen Replacement, Remove the screen: step 25, image 1 of 3 Samsung Galaxy A40 Super AMOLED Screen Replacement, Remove the screen: step 25, image 2 of 3 Samsung Galaxy A40 Super AMOLED Screen Replacement, Remove the screen: step 25, image 3 of 3
    • Thread the display flex cable through the gap in the midframe and remove the screen.

    • Compare your new replacement part to the original part—you may need to transfer remaining components or remove adhesive backings from the new part before installing.

Conclusion

If possible, turn on your device and test your repair before installing new adhesive and resealing.

Compare your new replacement part to the original part—you may need to transfer remaining components or remove adhesive backings from the new part before installing.

To reassemble your device, follow these instructions in reverse order. Apply new adhesive where necessary after cleaning the relevant areas with isopropyl alcohol (>90%).

The best way to secure the new screen is to apply a sheet of custom-cut double-sided tape to the back of the screen.

Take your e-waste to an R2 or e-Stewards certified recycler.

Repair didn’t go as planned? Try some basic troubleshooting, or ask our Answers community for help.

12 other people completed this guide.

Dominik Schnabelrauch

Member since: 11/23/16

202,758 Reputation

682 Guides authored

Team

iFixit Member of iFixit

Staff

135 Members

16,732 Guides authored

One Comment

ach du gute Güte, ich repariere gerade ein Samsung A40 (Displaytausch).. ohne Worte - jetzt weiß ich, wieso Apple iPhones etwas teurer sind!!!!

HJ Meister - Reply

Add Comment

View Statistics:

Past 24 Hours: 8

Past 7 Days: 38

Past 30 Days: 193

All Time: 12,559