
Samsung Captivate Antenna Cable Replacement

What you need

  1. Samsung Captivate Antenna Cable Replacement, Battery: step 1, image 1 of 1
    • Remove the back cover by pressing on the bottom section of the phone and sliding the bottom piece downward.

    • Lift up the back cover.

  2. Samsung Captivate Antenna Cable Replacement: step 2, image 1 of 1
    • Place your finger on the bottom of the battery and lift to remove.

  3. Samsung Captivate Antenna Cable Replacement: step 3, image 1 of 1
    • Replace the old battery with the new one.

  4. Samsung Captivate Antenna Cable Replacement, Rear Case: step 4, image 1 of 1
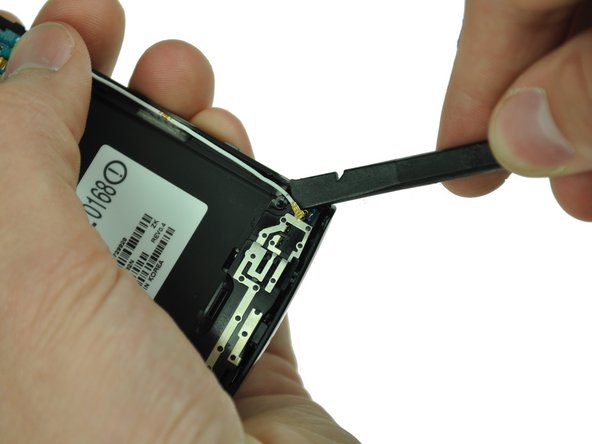
    • Insert the spudger underneath the bottom section of the phone.

    • Gently lift and push the spudger to slide the bottom section down to reveal two hidden screws.

  5. Samsung Captivate Antenna Cable Replacement: step 5, image 1 of 1
    • Remove the six 4.5mm #000 Phillips screws.

  6. Samsung Captivate Antenna Cable Replacement: step 6, image 1 of 3 Samsung Captivate Antenna Cable Replacement: step 6, image 2 of 3 Samsung Captivate Antenna Cable Replacement: step 6, image 3 of 3
    • Starting at a bottom corner, use the spudger to separate the rear case from the front display.

    • Move the spudger towards the top on both sides. The plastic opening tool is easier to use for this step.

    • Be careful when detaching the top. Free each side, stopping short of the center of the cover. Apply backward pressure on both corners with a finger applying pressure on the center, and slide the whole back cover toward the bottom of the device. Note: forcing the cover can result in cracked plastic.

  7. Samsung Captivate Antenna Cable Replacement: step 7, image 1 of 1
    • Separate the rear case from the phone.

  8. Samsung Captivate Antenna Cable Replacement, Antenna Cable: step 8, image 1 of 2 Samsung Captivate Antenna Cable Replacement, Antenna Cable: step 8, image 2 of 2
    • Use a spudger tool to pry up the antenna cable from the connector on the motherboard.

    • Pry up the other end of the cable from the connector on the antenna array.

Conclusion

To reassemble your device, follow these instructions in reverse order.

7 other people completed this guide.

Drew Bentz

Member since: 09/22/11

565 Reputation

5 Guides authored

Team

Cal Poly, Team 20-25, Maness Fall 2011 Member of Cal Poly, Team 20-25, Maness Fall 2011

CPSU-MANESS-F11S20G25

3 Members

9 Guides authored

2 Comments

Quick question, is this the antenna for wifi or cellular network?

Michael Perdomo - Reply

This is actually just the cable that connects the motherboard to the antenna array. I believe the antenna array that it connects to is for WiFi though.

Drew Bentz -

Add Comment

View Statistics:

Past 24 Hours: 0

Past 7 Days: 0

Past 30 Days: 0

All Time: 3,597