
Rydis H68 Pro Motherboard Replacement

What you need

  1. Rydis H68 Pro Motherboard Replacement, Battery: step 1, image 1 of 2 Rydis H68 Pro Motherboard Replacement, Battery: step 1, image 2 of 2
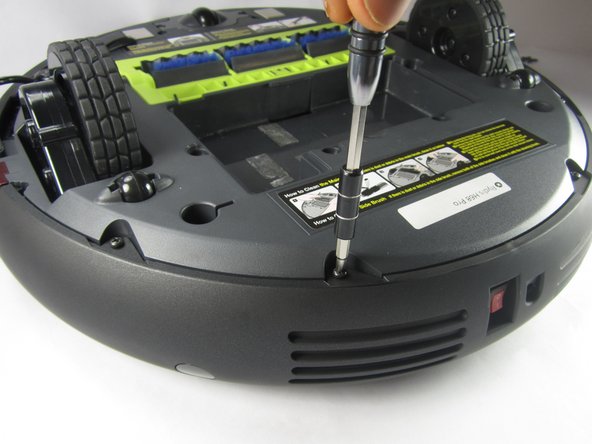
    • Flip the vacuum over so that the wheels are facing you.

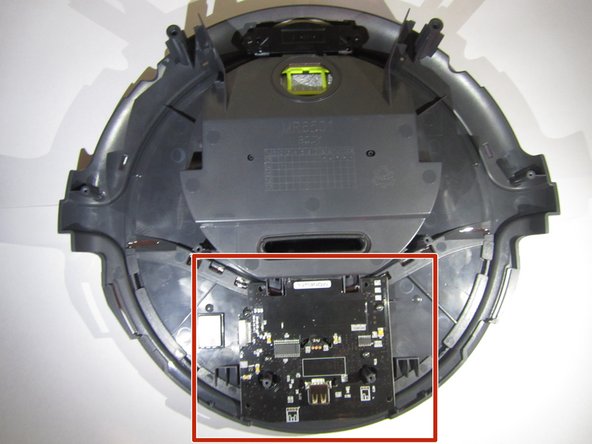
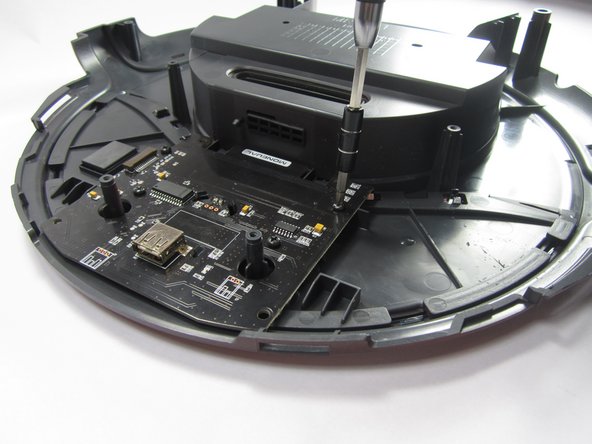
    • Use a Phillips #1 screwdriver to remove the four 10 mm screws that surround the battery cover.

  2. Rydis H68 Pro Motherboard Replacement: step 2, image 1 of 1
    • Lift the battery cover up to reveal the battery.

    • Remove the battery.

  3. Rydis H68 Pro Motherboard Replacement, Bumper: step 3, image 1 of 3 Rydis H68 Pro Motherboard Replacement, Bumper: step 3, image 2 of 3 Rydis H68 Pro Motherboard Replacement, Bumper: step 3, image 3 of 3
    • Remove the eight 10 mm Phillips #1 screws.

  4. Rydis H68 Pro Motherboard Replacement: step 4, image 1 of 3 Rydis H68 Pro Motherboard Replacement: step 4, image 2 of 3 Rydis H68 Pro Motherboard Replacement: step 4, image 3 of 3
    • Hold the front bumper and pull it off.

    • It requires a lot of force to pull the bumper off.

  5. Rydis H68 Pro Motherboard Replacement: step 5, image 1 of 3 Rydis H68 Pro Motherboard Replacement: step 5, image 2 of 3 Rydis H68 Pro Motherboard Replacement: step 5, image 3 of 3
    • Pry off the back bumper by going around the entire top of the bumper with the metal spudger.

  6. Rydis H68 Pro Motherboard Replacement, Motherboard: step 6, image 1 of 3 Rydis H68 Pro Motherboard Replacement, Motherboard: step 6, image 2 of 3 Rydis H68 Pro Motherboard Replacement, Motherboard: step 6, image 3 of 3
    • To access the motherboard, lift the top portion of the vacuum off.

  7. Rydis H68 Pro Motherboard Replacement: step 7, image 1 of 2 Rydis H68 Pro Motherboard Replacement: step 7, image 2 of 2
    • Use a Phillips #1 screwdriver to remove the four 10 mm screws holding the motherboard in place.

  8. Rydis H68 Pro Motherboard Replacement: step 8, image 1 of 3 Rydis H68 Pro Motherboard Replacement: step 8, image 2 of 3 Rydis H68 Pro Motherboard Replacement: step 8, image 3 of 3
    • Pinch the two tabs together, shown here, to loosen the motherboard out of the vacuum.

    • Lightly pull on the USB connector shown to lift the motherboard out.

Conclusion

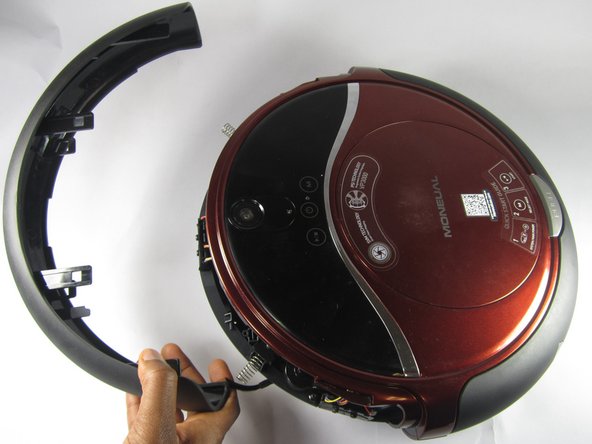
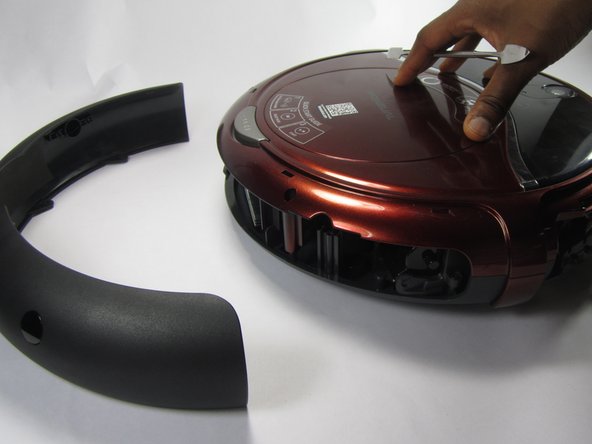
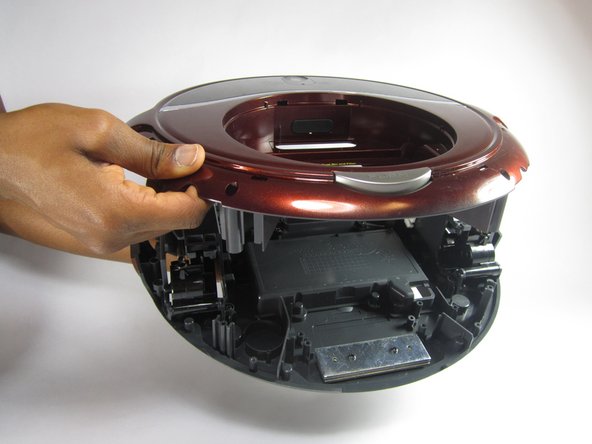
To reassemble your device, follow these instructions in reverse order.

One other person completed this guide.

Jessica Alimonti

Member since: 02/17/17

138 Reputation

1 Guide authored

Team

USFT-Lacy-S17S005G2 Member of USFT-Lacy-S17S005G2

Repair Café

4 Members

10 Guides authored

3 Comments

This was GREAT.... Lots of pics :-)

I was able to pull the mother board without much trouble. Mostly scared of breaking the connections.

NOW???? Where do I buy the darn thing?

Please respond,

Robert

Robert Kilgore - Reply

Unfortunately, it looks like Moneual had some fraud issues and went under in 2014. It may be difficult to get your hands on replacement parts for the Rydis H68 Pro. =[

Richard -

where are the internal batteries CR2032 ?? I have heard that problems maybe due to internal batteries and not motherboard. Unable to get top off.

Do you know how to do a factory reset ? thank you. N. Tribley Oct. 23

naomi - Reply

Add Comment

View Statistics:

Past 24 Hours: 0

Past 7 Days: 1

Past 30 Days: 3

All Time: 1,267