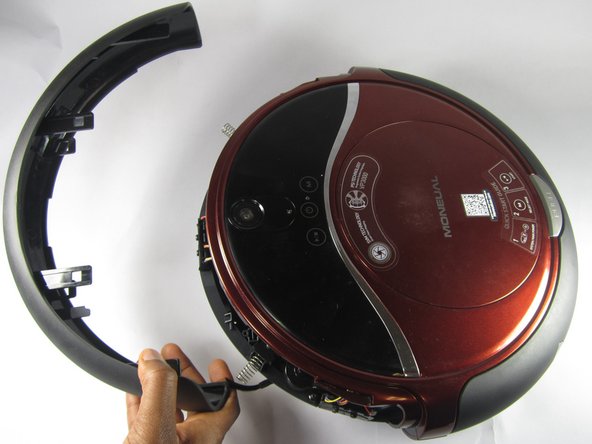
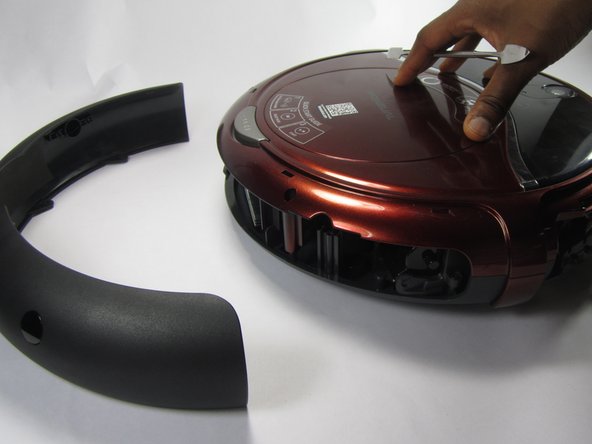
Rydis H68 Pro Bumper Replacement

What you need

  1. Rydis H68 Pro Bumper Replacement, Battery: step 1, image 1 of 2 Rydis H68 Pro Bumper Replacement, Battery: step 1, image 2 of 2
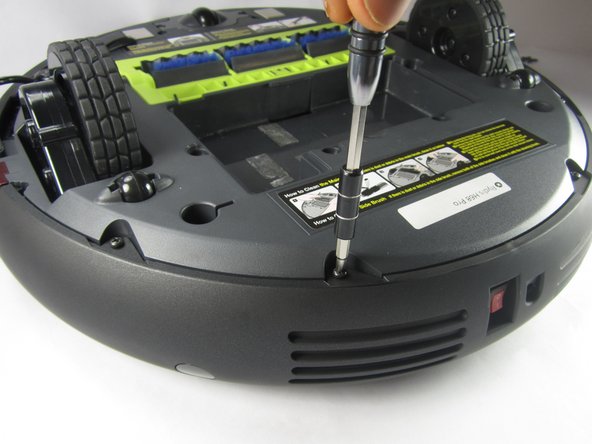
    • Flip the vacuum over so that the wheels are facing you.

    • Use a Phillips #1 screwdriver to remove the four 10 mm screws that surround the battery cover.

  2. Rydis H68 Pro Bumper Replacement: step 2, image 1 of 1
    • Lift the battery cover up to reveal the battery.

    • Remove the battery.

  3. Rydis H68 Pro Bumper Replacement, Bumper: step 3, image 1 of 3 Rydis H68 Pro Bumper Replacement, Bumper: step 3, image 2 of 3 Rydis H68 Pro Bumper Replacement, Bumper: step 3, image 3 of 3
    • Remove the eight 10 mm Phillips #1 screws.

  4. Rydis H68 Pro Bumper Replacement: step 4, image 1 of 3 Rydis H68 Pro Bumper Replacement: step 4, image 2 of 3 Rydis H68 Pro Bumper Replacement: step 4, image 3 of 3
    • Hold the front bumper and pull it off.

    • It requires a lot of force to pull the bumper off.

  5. Rydis H68 Pro Bumper Replacement: step 5, image 1 of 3 Rydis H68 Pro Bumper Replacement: step 5, image 2 of 3 Rydis H68 Pro Bumper Replacement: step 5, image 3 of 3
    • Pry off the back bumper by going around the entire top of the bumper with the metal spudger.

Joe Balduz

Member since: 02/15/17

231 Reputation

2 Guides authored

Team

USFT-Lacy-S17S005G2 Member of USFT-Lacy-S17S005G2

Repair Café

4 Members

10 Guides authored

View Statistics:

Past 24 Hours: 0

Past 7 Days: 0

Past 30 Days: 5

All Time: 432