
Replace AirPort Time Capsule A1409 HDD

What you need

  1. Replace AirPort Time Capsule A1409 HDD, Hard Disk Drive: step 1, image 1 of 3 Replace AirPort Time Capsule A1409 HDD, Hard Disk Drive: step 1, image 2 of 3 Replace AirPort Time Capsule A1409 HDD, Hard Disk Drive: step 1, image 3 of 3
    • Put the unit upside down and take off the rubber bottom cover. It is better to start at a corner.

    • Rubber becomes brittle as it ages. Depending on air temperature and how set the adhesive is, you may need to spend some time warming the back plate with a hot plate (on low) or hair dryer.

    The rubber tears real easy with age so carefully work your way inwards from each corner.

    AndreasT - Reply

    Just happen to me :/

    Ben Capehart -

  2. Replace AirPort Time Capsule A1409 HDD: step 2, image 1 of 3 Replace AirPort Time Capsule A1409 HDD: step 2, image 2 of 3 Replace AirPort Time Capsule A1409 HDD: step 2, image 3 of 3
    • Remove the # 10 Phillips # 00 screws that hold the Time Capsule's lower metal bracket.

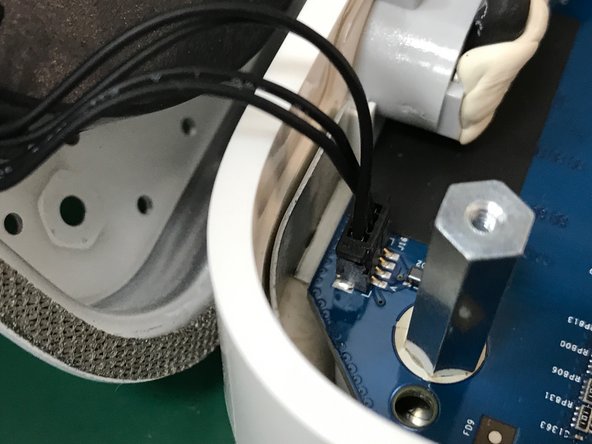
    • Open to the left leaving the network connectors on that side. Do not open it fully to avoid breaking the fan cable.

    thanks for doing this guide.

    1. remove hash sign (#) before the 10. “Remove the 10 Phillips...

    2. second bullet - “Do not open all the way to avoid…

    Brian McNiff - Reply

    I agree!

    Good Job!

    Ben Capehart -

  3. Replace AirPort Time Capsule A1409 HDD: step 3, image 1 of 2 Replace AirPort Time Capsule A1409 HDD: step 3, image 2 of 2
    • With the tip of a spudger carefully remove the fan connector then remove the metal bottom cover.

  4. Replace AirPort Time Capsule A1409 HDD: step 4, image 1 of 3 Replace AirPort Time Capsule A1409 HDD: step 4, image 2 of 3 Replace AirPort Time Capsule A1409 HDD: step 4, image 3 of 3
    • Find the temperature sensor on the surface of the hard disk.

    • Carefully remove the tape covering the temperature sensor.

  5. Replace AirPort Time Capsule A1409 HDD: step 5, image 1 of 2 Replace AirPort Time Capsule A1409 HDD: step 5, image 2 of 2
    • Remove the clip that holds the temperature sensor and remove both.

  6. Replace AirPort Time Capsule A1409 HDD: step 6, image 1 of 2 Replace AirPort Time Capsule A1409 HDD: step 6, image 2 of 2
    • Lift the hard drive a bit without pulling too hard to not cause damage to the power and data connectors of the hard disk. Removing the power connector from the hard drive

    • Remove the data connector from the hard disk.

  7. Replace AirPort Time Capsule A1409 HDD: step 7, image 1 of 2 Replace AirPort Time Capsule A1409 HDD: step 7, image 2 of 2
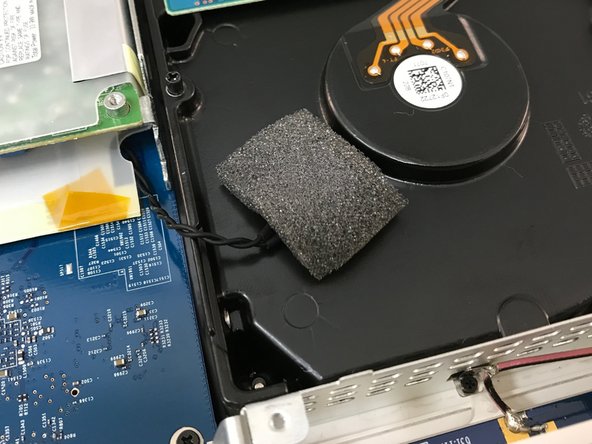
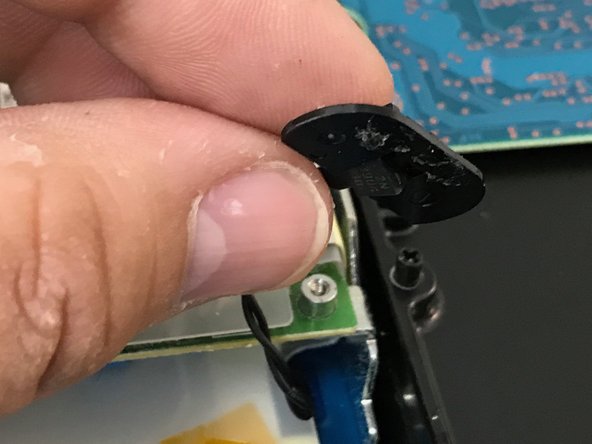
    • Once we have the disc out of the Time Capsule, we remove the 4 Phillips head # 00 pillars and place them in the new unit.

    A #1 Philips works a lot better on these

    Heath Kehoe - Reply

    Not gonna lie, I used a eye glasses repair kit screwdriver.

    kilereeds -

    Wow worked perfect! Thanks! But funny thing is I wanted to remove the hard drive to upgrade my Windows 11 Home PC and I just used dos kill disc to wipe it to 0’s

    kilereeds - Reply

    Hello there, is this SATA II or SATA III HDD?

    Tomas Fiala - Reply

Conclusion

To reassemble your gadget, follow these instructions backward.

38 other people completed this guide.

Special thanks to these translators:

es en

100%

These translators are helping us fix the world! Want to contribute?
Start translating ›

David Medrano

Member since: 12/22/13

1,441 Reputation

1 Guide authored

Team

Tecnico Center Teatinos, S.L. Member of Tecnico Center Teatinos, S.L.

Business

1 Member

3 Guides authored

12 Comments

I replaced a dead drive in about 30 mins following these instructions. The steps are clear, straight forward and the photos were extremely helpful. Many thanks as I now have a renovated AirPort Time Capsule.

Peter Long - Reply

I just replaced the 2 TB WDC Green with a WD Red Pro 4 TB with this guide in less than 30 min. Except for the fan cable it was a cake walk.

Alex Senger - Reply

Successfully upgraded my A1409 to a Western Digital - WD100PURZ - 5400 RPM Class SATA 6 Gb/s 256MB Cache 3.5. There are two additional steps: (a), there is a rubber strip around the original drive that reduces noise and protects the drive, gently remove from the original drive and place on the new drive; (b) once the rubber strip is on the drive, it is hard to get into place, angle the drive towards the connector side, and press in.

Brunob00 - Reply

12 TB WD RED (inbuilt version WD120EMAZ) just confirmed for 1409 (G4 version).

you are welcome

AD G - Reply

Hola. Reemplacé el disco con toda facilidad pero, desgraciadamente, la Utilidad AirPort no lo está reconociendo ni consigue borrarlo para activarlo. El HD nuevo es un WD Red de 10 TB. Si alguien puede ayudarme a resolver el problema, agradezco mucho.

I MM - Reply

Hi. Is it possible to upgrade this to an SSD?

Bobby Barbour - Reply

Yes, you could also use an SSD, just follow the same procedure.

Idrees -

How to Clone or Copy data to a new hard drive?

Ben Capehart - Reply

4 TB WD Green drive replacement. 30 minutes start to finish, backup just started after formatting the disk. DO NOT forget to format the disk first. Disk format can be done from within the Airport Utility. Don't forget to remember that password!

jay Snoke - Reply

It's not formatting the installed WD Red WD101EFAX which I've installed. Any help or suggestions?

Evgeny Kozlov - Reply

Take it out then Try formatting it on Mac and then re-install it and try formatting again.

Ben Capehart -

This was super helpful. I used the microwaveable ifixit gel opener to loosen the glue on the rubber pad. Starting from one side and wedging a metal pry tool underneath as I moved about 1-2 inches at a time, reheating every few inches. Worked perfectly, no rips or tears on the rubber.

I mounted an SSD with VHB tape left over from another project, it holds drive securely against the side of the drive mount.

During reassembly, the glue on the back is still tacky enough to hold the rubber on, but a few small pieces of VHB tape in the corners helped.

It’s actually useful again, and very handy for my legacy Macs. Thanks for posting this!

Daniel PCRR - Reply

Add Comment

View Statistics:

Past 24 Hours: 11

Past 7 Days: 72

Past 30 Days: 258

All Time: 21,076