Introduction
The Dell U2711 Monitor has a problem with unstable contacts due to corrosion. The symptom is a flickering screen. Knocking on the top of the monitor can make this symptom go away for a while, but a longer term solution is to clean the contacts.
The problem can be seen in this video:
What you need
-
-
Lay the display on a desk with the front facing down. Best use a towel to save the desk and display from scratching.
-
Unscrew the four hex screws that secure the stand.
-
-
-
Starting opposite of the buttons, pry open the display bezel with a plectrum.
-
You have to apply some force.
-
Don't lift the rear panel higher than two centimeters. There are delicate flat cables on the button side which might be damaged.
-
Be extra careful at the buttons, you don't want to damage a cable.
-
-
-
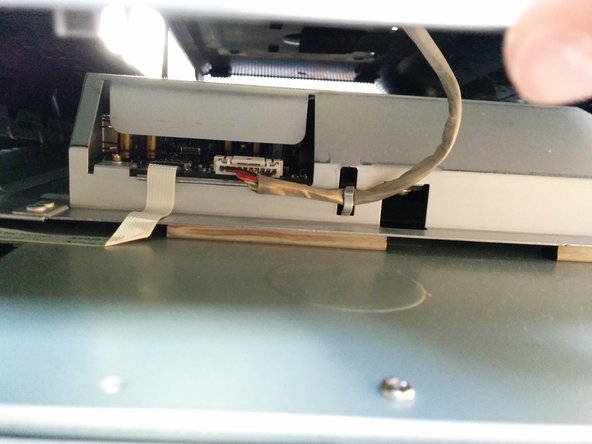
Unplug the USB cable of the card reader.
-
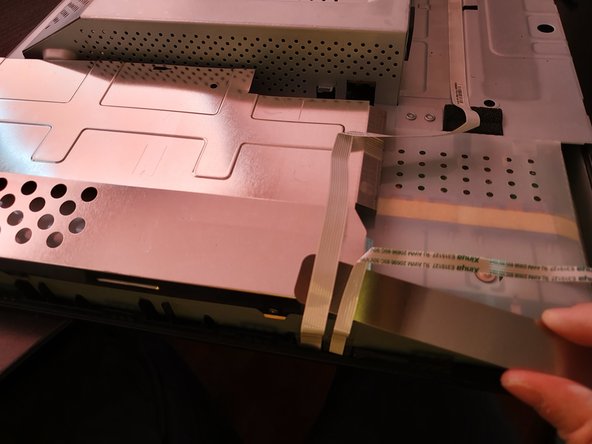
Remove the rear cover.
-
-
-
-
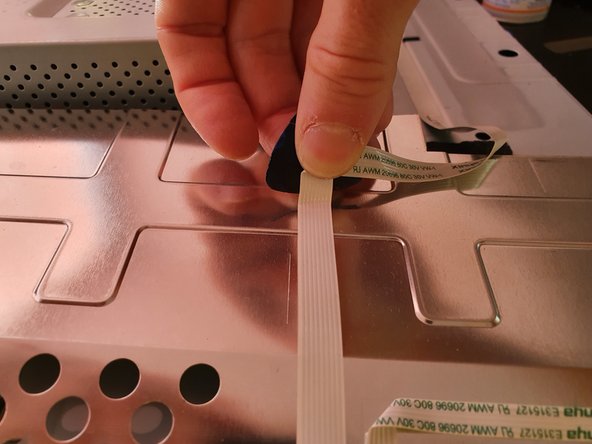
Remove the shiny cover in the middle.
Slide in the direction of the arrow and lift once it moves. I didn't realize this until a few seconds later.
-
-
-
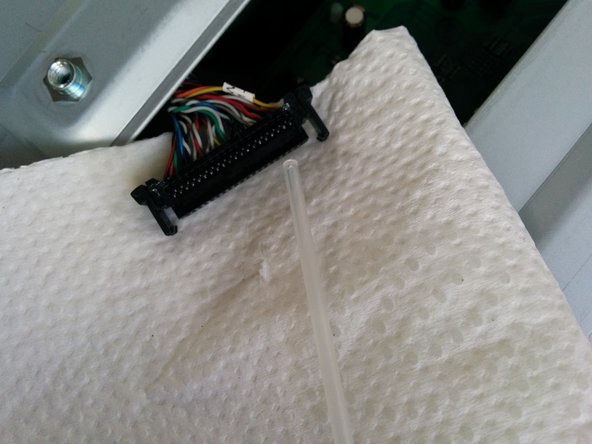
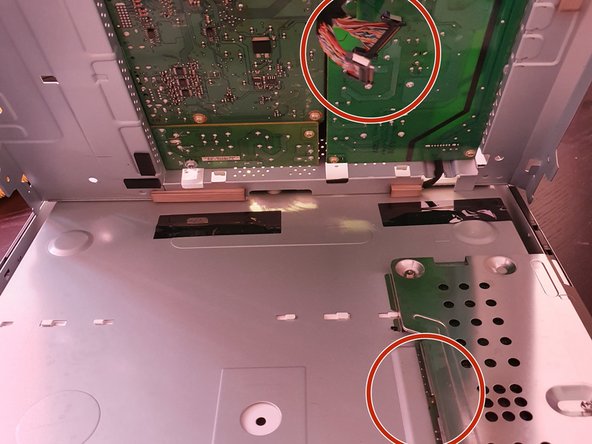
There are two black connectors below the cover.
-
Unplug both and treat with contact spray.
-
Plug both back in.
-
Reassemble the display.
-
You should be fine for a while. Notice that the corrorsion might return in a few months.
1. I recommend that you don’t reassemble the display until you have completed step 8.
2. Also, I wouldn’t plug the two cables back in yet.
3. It is easier and safer, to let them drop below - for they are the same cables that you will be unplugging in step 8 to clean its plug & sockets. By leaving them free to drop through when you carefully lift the panel (Step 8), you are less likely to stress the plugs with the panel sufficiently tilted to gain sufficient access to the plugs.
Note:
4. The cables cross over each other from top to bottom, so the left cable - viewed from the top plug, crosses over the right cable, and plugs into the right socket underneath (seen in step 8).
Conversely, the top right plugged cable (view from the top), crosses to the Left Socket underneath.
-


To reassemble your device, follow these instructions in reverse order.
To reassemble your device, follow these instructions in reverse order.
Cancel: I did not complete this guide.
28 other people completed this guide.
26 Comments
Worked for me too!!! Ended up with slightly chipped casing... but who cares! i now have a as-good-as-new screen image....
So glad i found this post... was initially exploring replacing capacitors method.... but didn't start..... glad i do not need to go to that route anymore.
For anyone looking for this, you should have 1) an electrical contact cleaner and 2) TORX screwdriver!!
Once I took my U2711 apart, the connectors didn't look too corroded (in fact, they looked fine) but the process of cleaning them and unseating the connectors has fixed the flickering! Thanks a lot! took me about 15 minutes!
Took about 10 minutes .... first repair after having this monitor since they were first released ..... Back to loving my Dell again :)
Anyone know a way to open these w/o any damage? Mines mint and its a monitor my dad gave me before he died so I am on a mission to get it fixed or fix it myself which ever gets me the best results...
I just took my time and used the plastic pry tool. The clips seem to be about an inch apart.
Thank you for this guide!
Getting the bezel apart is by far the hardest part. You've got to make sure to pry it open starting where there isn't a clip then move slowly around the monitor. After that the rest of the repair was relatively easy. I cleaned the connector (M and F ends) with contact cleaner and q-tips. Then I used the iFixit screwdriver with the smallest flat head to scrub (LIGHTLY) the tops and all sides of the pins. I think that is what really cleaned them off because the shiny metal started to show through
dint work .. made the problem worse than before ..it worked for a few day and then was back to a worse state .
Thanks a lot
it works !
but this guide is missing some more steps.
You should also clean the other end of the cable
thanks to comment in https://www.youtube.com/watch?v=ks9yukoC...
the next steps are:
Remove the side metal cover with two screws. (left on the pic from step 4)
take care while removing about the connected cables: there is one under the cover, and 3 flat cables that goes to the screen buttons
Remove the large top metal cover and board with the 4 screws and pull off the cable to the side.
There are two cables that get pinched together on the board to remove them. The other ends are metallic and are the trouble makers. Clean with contact cleaner all of these connecters.
I took more picture and could contribute to this guide but seems I don't have permissions :(
Thanks, added ;)
Jeho -
more pictures: http://imgur.com/a/9HY7U
Thanks! Indeed not difficult. I used 2 steak knives to open the case. The beginning is a bit tough i.e. have to push your tool (e.g. plectrum, knife whatever) under the grey band around the screen for about 4mm. The tip is than far enough in to use as a lever to push the front of the screen off (i.e. plastic extends 4-6mm behind the grey band.
Comments by Alex are great as well. Thanks. Additional tip - to remove the flat cable connector from the main PCB, you have to flip open the connector i.e. not pull it out but flip the black part of the connector upwards.
Used WD-40 iso contact fluid. Cleans less probably, but at least should give a better durability of the fix.
Thank you for this guide! I was getting flickering on half the screen and now it's back to normal. Six hours into full screen video and it hasn't returned.
Is there any way to repair the HDMI port on this monitor? Mine isnt working since i have bought it in 2011, now i kind of need it. The port seems very loose, when i use the screw above it it wingles left and right. Not sure if its worth to open it up, looks like its not possible to get to the HDMI port through that massive inside plate?
I had this problem repeatedly despite cleaning the contacts. Every time the monitor would heat up, the connector would loosen and the screen would have to be left to cool down. I think I’ve finally solved the issue! By pressing a medium sized flathead screwdriver (I used an S2 5) between the two rows of pins in the header I’ve spread the pins slightly, and the connector now firmly holds in place. Worth a try if your connectors keep coming loose.
I just attempted this repair as well. Before I had numerous issues where most of the time I got green noise on the right half of the screen (it’s internally driven as two screens I think). The repair seems to have worked fine, I had no proper contact cleaner so I used some high % alcohol from now. If the problem returns I will buy some proper cleaner. My LVDS cables looked to be perfectly clear beforehand but you never know.
Finding a good tool to pop the clips on the front bezel was the hardest part, this isn’t adviceable but I wound up going with a very flat screwdriver to pry it open and then some hard plastic object to knock all the clips. A few of the clips snapped off sadly but nothing that really affected the integrity of the bezel connection.
I was getting flickering on the right half on my Dell U2711. I used this guide to open up the monitor and reseat connectors and clean off any corrosion found on circuit board. The toughest part is prying open the monitor’s bezel. Takes a little patience and persistence to do it. Make sure you follow the guide exactly as it states when prying open the monitor’s bezel (start from the opposite side of the monitor’s buttons) and the bezel should come off without any damage to the buttons or cabling provided it is done carefully. This guide does a great job of explaining everything!
Thanks a lot .The flickering is done.About 15 minutes.
Excellent Guide!
Before starting, remove watch and rings!
After unplugging press the power button a couple of times to ensure capacitors fully discharged.
Process: used two steps to ‘condition’ all plugs & sockets:
1. Used contact cleaner for removal of oxidation (ChemZ Contact Cleaner) &,
2. Used a moisture retardant (ChemZ 24-7 Electrical Formula) to finalise the process.
I also treated the Mains socket and plug and the DP socket and plug, as well as the remaining I/O ports.
Be careful to mask off immediate areas around spraying to prevent overspray onto other compoenents.
Oh… wore rubber surgical gloves:
a) to protect hands from sprays, &
b) to ensure no oils from hands inadvertantly contaminate any internal compoents.
Finally, I have also added a comment at the end of Step 5 with a couple more suggestions before moving on to steps 6 to 8.
Once again, many thanks, the process has so far worked fine for me and was a relief not to have to spend $100’s to get a ‘Professional’ to repair.
Thanks a lot for this guide.
My display stopped working after years of service. Thanks to your guide I was able to take it apart and it turns out that there are 6 bulgy capacitors in there. Hopefully replacing those will do the trick.
Thank you, glad I could help!
Jeho -
My U2711b Monitor had T-10 Torx Screws
shoes75 - Reply