
RCA Pro10 Edition Display Screen Replacement

What you need

  1. RCA Pro10 Edition Display Screen Replacement, Speaker: step 1, image 1 of 2 RCA Pro10 Edition Display Screen Replacement, Speaker: step 1, image 2 of 2
    • Using a separating tool, look for a seam in the plastic casing that looks most accessible.

    • Use the prying tool to separate the front and back casing, working your way around the perimeter.

    • Utilize a card tool or a pick to assist in keeping the case separated.

    • To reassemble the device simply align the two casing halves and pinch to snap together or press down on the edges while the device in on a table.

  2. RCA Pro10 Edition Display Screen Replacement: step 2, image 1 of 1
    • Flip over the back of the device while keeping it close to the front, the speaker is attached to it.

    • Remove the yellow tape securing the speaker to the back casing.

  3. RCA Pro10 Edition Display Screen Replacement: step 3, image 1 of 2 RCA Pro10 Edition Display Screen Replacement: step 3, image 2 of 2
    • Use the separating tool to pry the speaker from its surface.

    • Use caution when removing the speaker, you may damage the screen.

    • Cut or desolder the wires to replace or repair the speaker.

  4. RCA Pro10 Edition Display Screen Replacement, Camera: step 4, image 1 of 3 RCA Pro10 Edition Display Screen Replacement, Camera: step 4, image 2 of 3 RCA Pro10 Edition Display Screen Replacement, Camera: step 4, image 3 of 3
    • Using a P00 Phillips screwdriver, remove the three screws securing the black plastic camera housing and remove it.

    • Peel back the beige tape while holding down the camera ribbon cable to prevent tears

  5. RCA Pro10 Edition Display Screen Replacement: step 5, image 1 of 2 RCA Pro10 Edition Display Screen Replacement: step 5, image 2 of 2
    • Lift the locking tab that is securing the camera ribbon cable.

    • Slide the ribbon cable out from the connector and remove from casing.

  6. RCA Pro10 Edition Display Screen Replacement, Power/Volume Buttons: step 6, image 1 of 1
    • Use a P00 Phillips screwdriver to remove the three screws securing the button board.

    • Desolder the contacts on the button board to remove or replace it.

  7. RCA Pro10 Edition Display Screen Replacement, Battery: step 7, image 1 of 2 RCA Pro10 Edition Display Screen Replacement, Battery: step 7, image 2 of 2
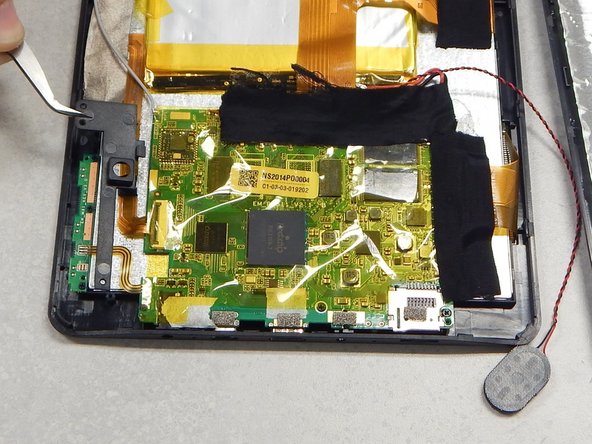
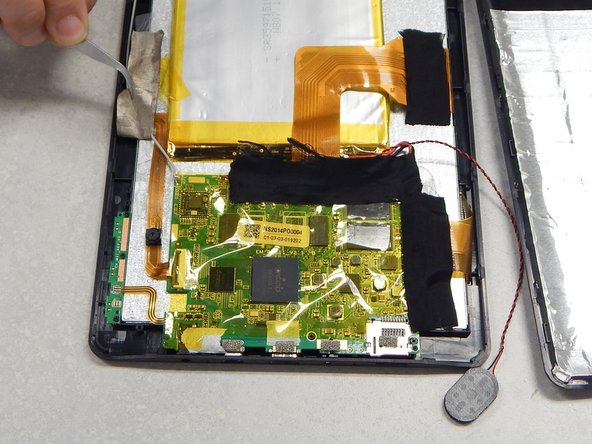
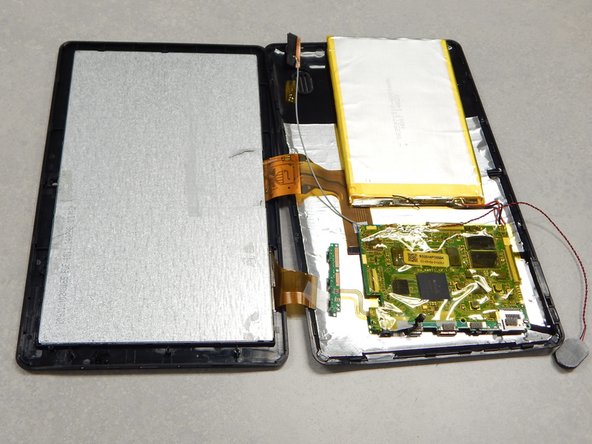
    • Peel off the black tape on the battery and main-board.

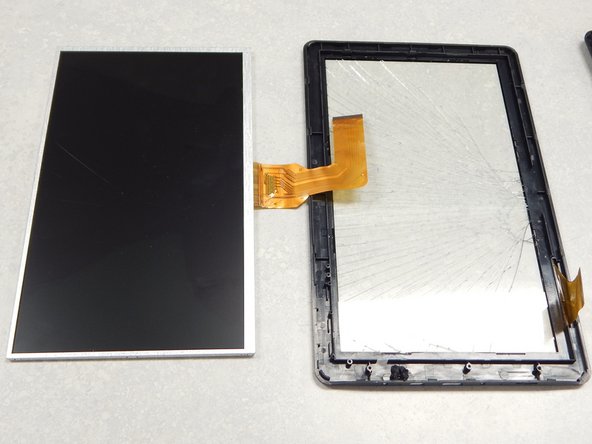
    • Peel off the black tape securing the screen ribbon cable to the back of the screen.

    • Use caution to avoid damaging either ribbon cable.

  8. RCA Pro10 Edition Display Screen Replacement: step 8, image 1 of 2 RCA Pro10 Edition Display Screen Replacement: step 8, image 2 of 2
    • Slide out the ribbon cable lock that is securing the screen ribbon cable.

    • Move the ribbon cable out of the way using tape if necessary.

  9. RCA Pro10 Edition Display Screen Replacement: step 9, image 1 of 2 RCA Pro10 Edition Display Screen Replacement: step 9, image 2 of 2
    Tool used on this step:
    Plastic Cards
    $2.99
    Buy
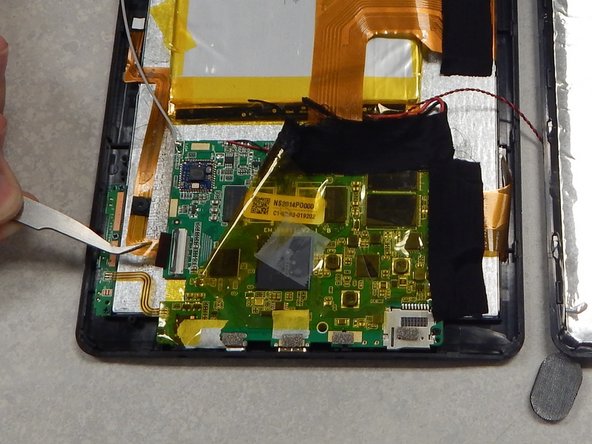
    • Remove the yellow tape securing the battery to the screen.

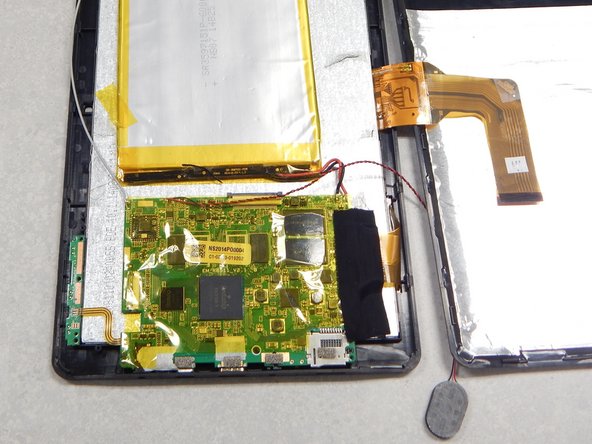
    • Use a plastic card or pick to separate the battery from the screen.

    • Do not bend or puncture battery, battery is difficult to separate from screen.

    • Cut or desolder the wires on the battery to remove or replace it.

  10. RCA Pro10 Edition Display Screen Replacement, Display Screen: step 10, image 1 of 1
    • Peel the WiFi antenna off of the monitor and move out of the way.

  11. RCA Pro10 Edition Display Screen Replacement: step 11, image 1 of 3 RCA Pro10 Edition Display Screen Replacement: step 11, image 2 of 3 RCA Pro10 Edition Display Screen Replacement: step 11, image 3 of 3
    • Remove the black tape on the screen and the main-board.

    • Lift the ribbon cable lock securing the digitizer ribbon cable.

    • Slide out the digitizer ribbon cable and move away from the device, use tape to secure if necessary.

  12. RCA Pro10 Edition Display Screen Replacement: step 12, image 1 of 1
    • Use a P00 Phillips screwdriver to remove the three screws securing the main-board to the back casing.

  13. RCA Pro10 Edition Display Screen Replacement: step 13, image 1 of 3 RCA Pro10 Edition Display Screen Replacement: step 13, image 2 of 3 RCA Pro10 Edition Display Screen Replacement: step 13, image 3 of 3
    • Lift the main-board up and away from the ports to reveal the microphone.

    • Use tweezers to remove the microphone from the black silicone.

    • Move the main-board off the screen.

  14. RCA Pro10 Edition Display Screen Replacement: step 14, image 1 of 2 RCA Pro10 Edition Display Screen Replacement: step 14, image 2 of 2
    • Use a separator tool to lift the screen from the port side of the casing and remove it.

    • To reassemble the device, follow these steps in reverse unless specified otherwise.

Conclusion

To reassemble your device, follow these instructions in reverse order.

9 other people completed this guide.

Tyler Schuster

Member since: 01/27/15

476 Reputation

1 Guide authored

Team

4 Comments

Gracias y ademas la buenas fotografias ayudaron una inmesidad.

Kl

Klaus laage - Reply

Nothing spectacular happened I just turned on my tablet today and voila! My display is crazed on part of the screen! I read these steps a couple times and I just don't understand how if this process is intended to replace the display screen a display screen isn't listed as a necessary part purchase. I have faith in reader generated sites so please help!

Denise Engle - Reply

Denise a new display screen would need to be purchased. Unless you absolutely have to have this particular tablet fixed I suggest buying a new one.

Chris Blackwell -

hola, podrĂ¡s tener este repuesto de la pantalla lcd para la venta para ese modelo?

gracias

William Weygel

williamw666@hotmail.com

William Weygel - Reply

Add Comment

View Statistics:

Past 24 Hours: 0

Past 7 Days: 1

Past 30 Days: 6

All Time: 6,237