Introduction
Originally my Pono Player would run for 5 or 6 hours. Now, 6 years later, the battery can only play a 45 minute album on a good day. Time to upgrade that battery ‘cause I love this little music player.
Let face facts, 18650 batteries will recharge a couple of hundred times but the capacity degrades. Perhaps the Panasonics, Sonys, Sanyos and LGs really are higher quality and will keep recharging to full capacity in the 1000s; show me the data. My Pono has a “McNair New Power” 3.78V, 2950mAh cell (they all had the same cell). Remove the black plastic wrapper and label (thanks for the label and specs fellas) low and behold it is a Samsung 18650, rated at 3.7, 3000 mAh, with a little protection PCB added on the plus end.
The Pono’s original battery is “protected”. Can the Pono power IC work with an unprotected battery? No, I don’t think that is a good idea. Will an off the shelf protected 18650 battery work with the Pono power design? I don’t know, I haven’t delved into it, if you do post it.
I bought a high capacity, name brand, medium low current, unprotected, flat top 18650 to put in my Pono. I want to spot weld nickle tabs on the plus and minus contacts (like a real battery manufacturer) rather than solder to the battery (like a hobbyist). Then I will reinstall the original little PCB in the plus end, it has the cable and connector for the Pono power input, cool.
It turns out people are doing this spot welding operation quite a bit using a motorcycle battery or a “super cap array” and a moped starter relay to make DIY battery arrays for e-bikes and e-skate boards. Spot welding batteries at home is fun and dangerous, PPE required. There are battery spot welders that can do this work for < $200 on Amazon which are safer. I plan on using a few batteries not hundreds so I’m using a 100 CCA motorcycle battery I have available, a $15 dollar 12 V relay and 2 copper nails for welding contacts. Should you solder or spot weld your battery? WELL, MISUSING OR MISHANDLING LITHIUM ION BATTERIES CAN POSE A SERIOUS RISK OF PERSONAL INJURY, PROPERTY DAMAGE, OR DEATH.
This is a link to the very well done Pono Player Teardown by Mike Beauchamp, I will not repeat this effort here.
https://www.youtube.com/watch?v=xIV8Od-e...
This is a link to the SWEET! youtube video by “darkevind“ of a home grown battery tab spot welder that inspired me. The linked video has 100k views but his follow on video (also valuable for this project) has over 400k views. Very fun as I said but play with 18650s at your own risk, seriously.
https://www.youtube.com/watch?v=fEV21DIV...
Here is the battery I installed. Do not buy 18650 batteries from a flaky vendor, there have been confirmed counterfeit batteries sold online.
What you need
-
-
Open the Pono Player (watch the video, the link is in the intro).
-
Disconnect the battery cable.
-
Take some time to remove the glue from the crevices of the shell. I used the guitar pick and tweezers.
-
-
-
-
Install the ring shaped orange paper insulator under the plus tab. Put the disk shaped insulator in place and tape them down.
-
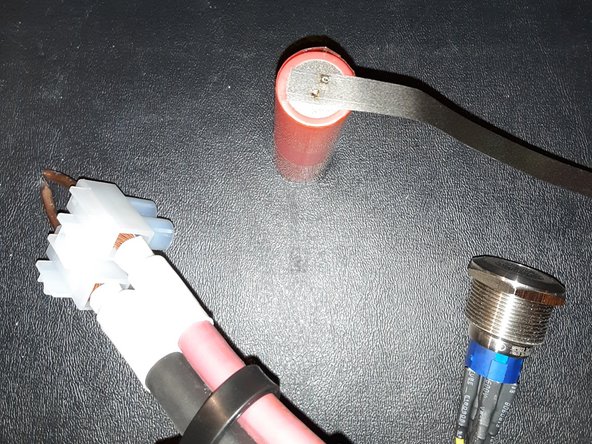
Trim the minus nickle tab to length first, I used a scissors. Hold the end of the MINUS tab away from the PLUS terminal and bend it. Bend the minus tab making a 90 degree above the PLUS terminal (battery top) but leave enough room for the PCBA and insulators, maybe 3/16ths inch above the battery edge.
-
Trim the plus nickle tab to length. Bend the plus tab now and leave enough room for the PCBA and insulators, maybe 3/16ths inch above the battery edge.
-
Shape (cut) each nickle tab to make contact to the protection PCBA pads. The nickle material I used was wider than the original so I trimmed the edges to meet the pads.
-
-
-
Leave the PCB aside for now, with the soldering iron melt some solder on the + and - tabs, in the areas/sides that will connect to the "B+" and "B-" PCB pads ("Tin" the areas of the tabs to be soldered).
-
Leave the battery aside, inspect the PCB and clean any solder flecks or splashes away. Flow some solder on the "B+" and "B-" PCB pads.
-
Place the PCB on the battery top. Align the B+ pads to the plus tab and the B- pads to the minus tab.
-
Press the minus tab down on the PCB "B-" pads with the hot iron and when the solder melts then flow some more solder into the joint. Hold the tab in place with the tip of the tweezers or other tool and remove the iron. Let the solder joint cool without moving it.
-
Press the plus tab down on the PCB "B+" pads with the hot iron and flow some more solder into the joint. Hold the tab in place with the tip of the tweezers or other tool and remove the iron. Let the solder joint cool without moving it.
-
After the solder joints have cooled lay down one more layer of Kapton covering over the exposed PCB, exposed nickel and battery ends.
-
-
-
When I opened my Pono a small felt pad fell out. I deduced it should rest on the end cap of the large surface mount MLCC capacitor to cushion the battery. I think if you rest the felt pad as shown in the red circle then close the Pono shell the pad will be held in place.
-
Line up the (triangle shaped) black end plates in the slots and press home the shell with a satisfying snap.
-
-
-
In photo 1, you can see I have connected the USB charger and the protection board temperature is elevated at 31 degrees C after 1 or 2 minutes of charging. Ambient temperature is 24 degrees C.
-
In photo 2 the minus terminal of the battery is is 25 degrees C and rising. Eventually the whole battery reached ~30 C.
-
In photo 3 you see the business of charging heats up U50 quite a lot. The maximum temperature I found was 66 degrees C, the related components were also warm. I think this is normal and working as designed. After an hour of charging the battery voltage climbed, charge current fell and the temperature of U50 dropped to 40 C.
-


It was fun writing this, I needed to fix my Ponoplayer. Please be careful.
It was fun writing this, I needed to fix my Ponoplayer. Please be careful.
Cancel: I did not complete this guide.
2 other people completed this guide.

3 Comments
Unrelated to me, there is a company who sells direct replacement Pono batteries.
I just purchased the replacement battery from Surf Cables (found it independent from this website). It claims to come with the connector already attached ($22). If it works as advertised, this should change this repair from “difficult” to “very easy”. Crossing my fingers….
To follow up on this earlier post, I've now updated my metal Pono. The case opens exactly as shown in the instructions, but it's GLUED shut, and it requires a LOT of persistence to gently pry it open. But, once opened, replacing the battery with the Surf Cables Pono battery took merely seconds. To pry open the case, I used the tools iFixit sent for the battery replacement in my 2017 MacBook Pro (mainly the plastic cards and opening picks - and a lot of patience). But - I'm happy to report my Pono is back up and running! Thanks iFixit!
dot1000 -