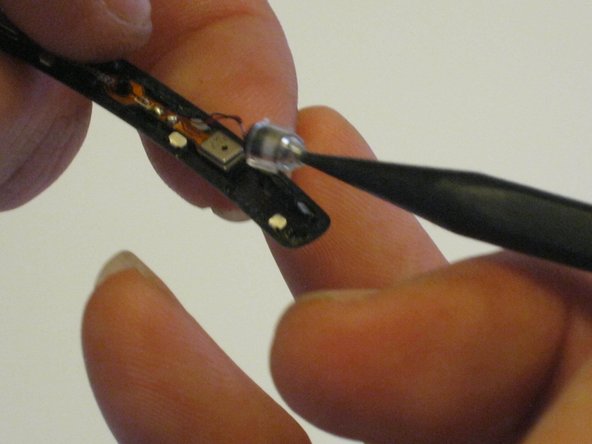
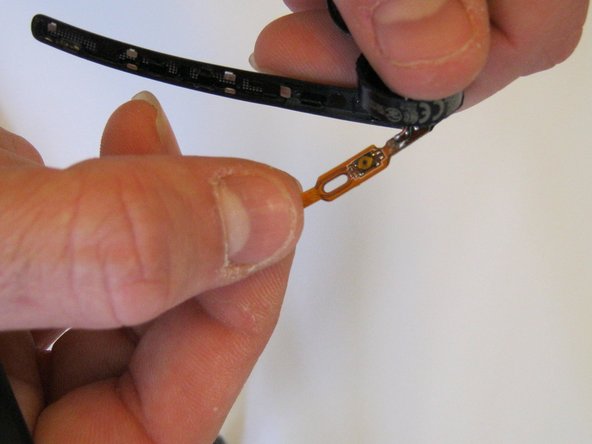
Plantronics Voyager Legend Microphone Replacement

What you need

  1. Plantronics Voyager Legend Microphone Replacement, Microphone: step 1, image 1 of 3 Plantronics Voyager Legend Microphone Replacement, Microphone: step 1, image 2 of 3 Plantronics Voyager Legend Microphone Replacement, Microphone: step 1, image 3 of 3
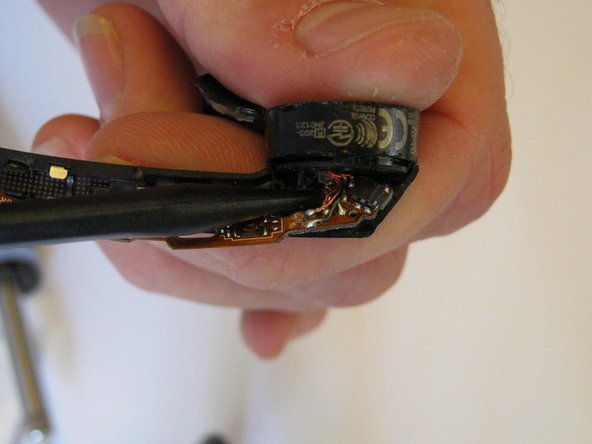
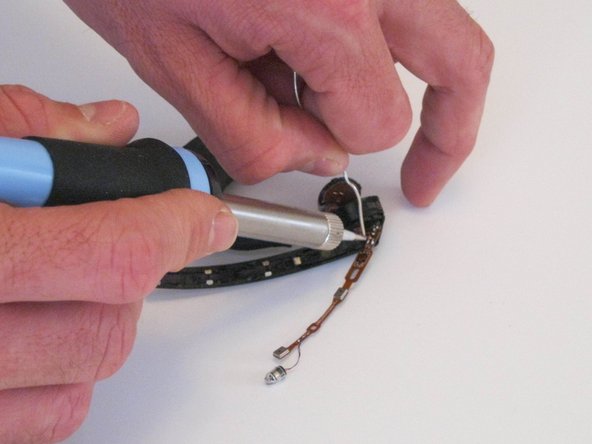
    • Loosen snaps that hold the assembly together.

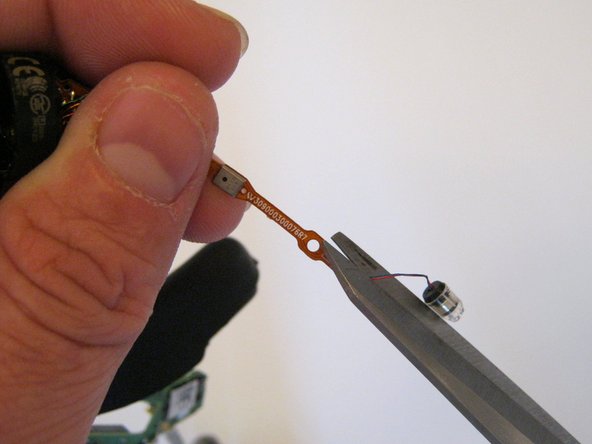
    • Use the pointed end of a small, metal spudger to begin separation of the snaps, at the end of the unit.

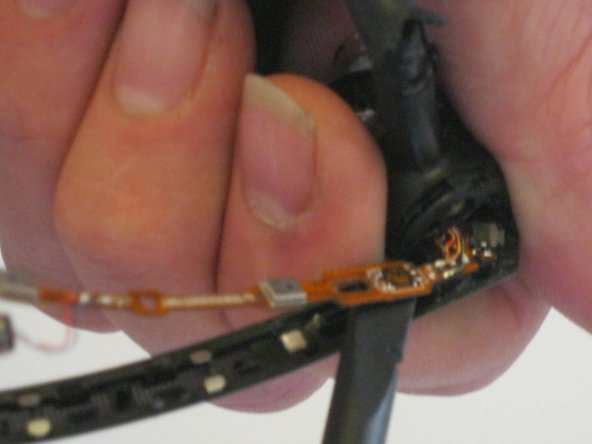
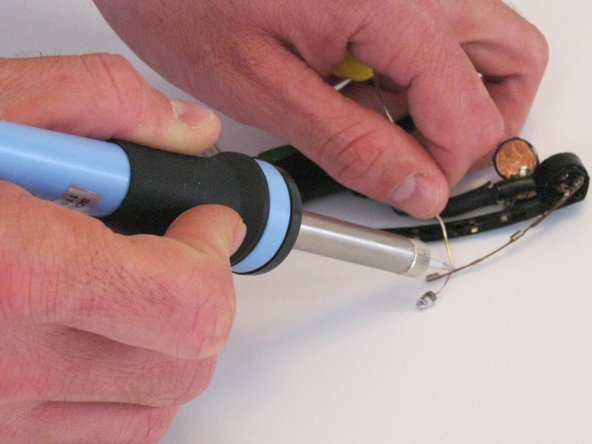
    • After initial separation, use the flat end of a plastic spudger to continue loosening the snaps, by following along the circumference of the microphone unit.

  2. Plantronics Voyager Legend Microphone Replacement: step 2, image 1 of 1
    • Reveal the metal, protective plate by completely removing the top piece of the plastic housing.

    • Use precision tweezers to remove the metal protective plate. This is done by lifting the plate out of place.

  3. Plantronics Voyager Legend Microphone Replacement: step 3, image 1 of 1
    • Locate the volume button at the rear of the microphone assembly, near the earpiece assembly.

    • Use precision tweezers to lift the volume button out of place and remove it.

    • Pay attention to the orientation of the volume button, taking notice of the hooks that hold it in place.

  4. Plantronics Voyager Legend Microphone Replacement: step 4, image 1 of 3 Plantronics Voyager Legend Microphone Replacement: step 4, image 2 of 3 Plantronics Voyager Legend Microphone Replacement: step 4, image 3 of 3
    • Remove the voice-tube.

    • Insert the pointed end of a plastic ppudger to lift the voice-tube out of position.

    • Disconnect the leads that attach to the voice-tube.

    • If the voice-tube is the only component that needs replacement, stop here and follow the steps in reverse order for reassembly.

  5. Plantronics Voyager Legend Microphone Replacement: step 5, image 1 of 2 Plantronics Voyager Legend Microphone Replacement: step 5, image 2 of 2
    • Remove the circuit board.

    • Use the pointed-end of a plastic spudger to begin lifting the circuit board out of place. Begin at the end nearest the voice-tube location.

    • Use the flat-end of a plastic spudger to continue lifting the circuit board out of position.

    • Notice the guiding pegs that hold the circuit board in place.

  6. Plantronics Voyager Legend Microphone Replacement: step 6, image 1 of 3 Plantronics Voyager Legend Microphone Replacement: step 6, image 2 of 3 Plantronics Voyager Legend Microphone Replacement: step 6, image 3 of 3
    • Access the leads that connect the circuitry.

    • Use the spudger to make sure the circuit board is completely free.

    • Expose the leads so they can be disconnected.

  7. Plantronics Voyager Legend Microphone Replacement: step 7, image 1 of 3 Plantronics Voyager Legend Microphone Replacement: step 7, image 2 of 3 Plantronics Voyager Legend Microphone Replacement: step 7, image 3 of 3
    • Install a new circuit board.

    • Disconnect the leads using a pair of wire cutters. Scissors will work if no wire cutters are available.

    • Solder the leads into the correct location on the new circuit board.

    • Refer to the iFixit soldering guide for assistance with soldering.

Conclusion

To reassemble your device, follow these instructions in reverse order.

19 other people completed this guide.

Lewis Certain

Member since: 09/10/15

2,287 Reputation

3 Guides authored

13 Comments

Where do I locate the parts for the Plantronics Bluetooth hardware?

scottstephany - Reply

You can not get the parts.. At least not on Ebay, Amazon and just about any other place that I searched.. Maybe Alibaba if you want to take the chance of having your credit card or any other form of payment jacked.. This fix is a joke due to the size of the components and wires that need to be soldered.. If only the "Voice tube" or cone shaped thing inside of the plastic tube is bad they its ok.. I will mention though that this type wire is coated which is why you can have the two "bare" wires touching and not have a short.. You must but this off in order to be able to solder first.. Burn too much and you will have crispy wires not worth crap.. I know this because I have pick up more than a few sets up beats head phones on Ebay for 20-30 and fixed.. You can pick this headset up on Ebay on the dirt cheap now that the new one is out, its not worth the hassle to fix or attempt to fix and it is misleading in the sense that it makes it seam like a no big deal kind of thing..

Jdubtastic - Reply

I used this repair guide to take it apart and clean the mike and board and now people can hear me a lot better.

tz - Reply

How did you clean it

Gary Gobin -

I used this guide to clean my plantronics headset and it is working great … many thanks for sharing …

DB

Darab Badiee - Reply

Add Comment

View Statistics:

Past 24 Hours: 10

Past 7 Days: 41

Past 30 Days: 176

All Time: 44,211