
Philips Wake-Up HF3520/01 Disassembly

What you need

  1. Philips Wake-Up HF3520/01 Disassembly, Start: step 1, image 1 of 2 Philips Wake-Up HF3520/01 Disassembly, Start: step 1, image 2 of 2
    • There is a screw under the shiny UL sticker. Remove sticker and screw to remove this bottom panel. There are two tabs holding the panel into clock/light, so you might have to wiggle panel forward and out to remove it.

    • The bottom panel does not help gaining access to more screws. See next step

  2. Philips Wake-Up HF3520/01 Disassembly, Prying open: step 2, image 1 of 2 Philips Wake-Up HF3520/01 Disassembly, Prying open: step 2, image 2 of 2
    • Flipping the light upside down, pry upward the small plastic strip with hooks that has to be removed.

  3. Philips Wake-Up HF3520/01 Disassembly, Button ring: step 3, image 1 of 3 Philips Wake-Up HF3520/01 Disassembly, Button ring: step 3, image 2 of 3 Philips Wake-Up HF3520/01 Disassembly, Button ring: step 3, image 3 of 3
    • Next unscrew the two philips head screws to remove the button ring.

  4. Philips Wake-Up HF3520/01 Disassembly, Front screen shield: step 4, image 1 of 1
    • Now the screws holding the front screen shield need to be removed and the shield can be pulled away to the front.

    • Screw organization note for later: these screws have pointed ends

    • CAREFUL NOT TO DAMAGE THE INTERNAL SCREEN

    • Unscrew the four screws holding the inner screen assembly in place.

  5. Philips Wake-Up HF3520/01 Disassembly, Inner screen assembly: step 5, image 1 of 2 Philips Wake-Up HF3520/01 Disassembly, Inner screen assembly: step 5, image 2 of 2
    • The inner screen assembly can be pulled out slightly to reveal tabs on each side that hold the assembly in.

    • Pry the back tabs inwards to release.

  6. Philips Wake-Up HF3520/01 Disassembly, The guts: step 6, image 1 of 3 Philips Wake-Up HF3520/01 Disassembly, The guts: step 6, image 2 of 3 Philips Wake-Up HF3520/01 Disassembly, The guts: step 6, image 3 of 3
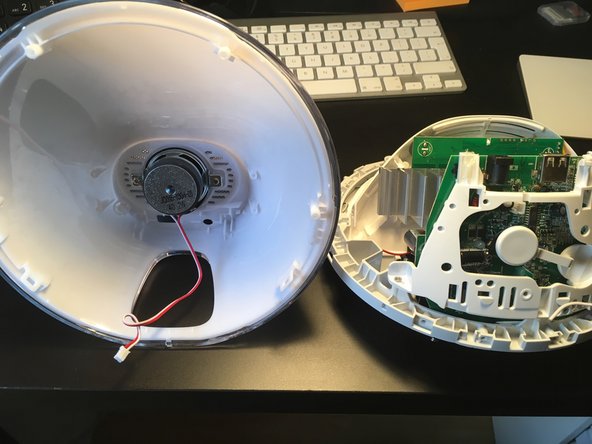
    • The screen is connected to the plastic domed back with holes. There are two screws at the back of the base of this domed panel. Remove screws to remove screen.

    • Set screen panel aside for safe keeping.

    • More to see and modify...

Max

Member since: 11/13/12

1,295 Reputation

1 Guide authored

View Statistics:

Past 24 Hours: 6

Past 7 Days: 52

Past 30 Days: 272

All Time: 17,099