Introduction
In this long guide you will completely disassemble your FZ1000, excluding the lens which is manufactured by Leica, not Panasonic. You will need to unscrew many screws, detach numerous electronic ZIF connector ribbons, and pry open a few components in order to disassemble your camera. Be extra cautious when moving any electronic ribbons, since they tear very easily. See this technique on disconnecting ZIF connectors to better learn how to detach a ZIF connector ribbon.
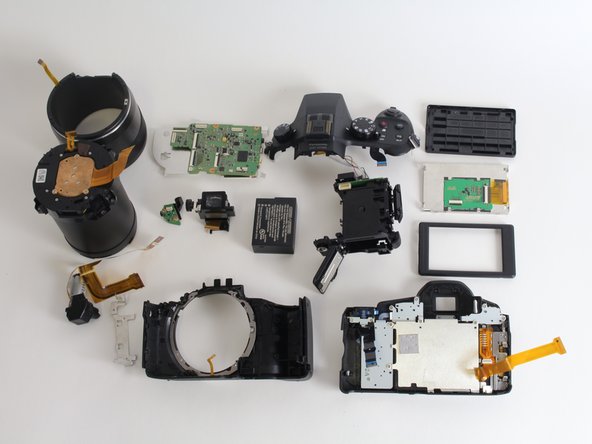
In several steps of this guide, the state of the camera in the accompanying visual or visuals will not correspond to the state of your camera. The visuals differ from your camera in the following ways:
- Electronic ribbons will appear torn and taped. Your camera's electronic ribbons should not be torn.
- Black tape will appear crinkled due to prior removal. Your camera's black tape should not appear to have been previously removed.
- The MIC jack plug will appear snapped. Your plug should not be broken.
What you need
-
-
Slide the switch on the bottom of your camera from the right (LOCK) to the left (OPEN).
-
-
-
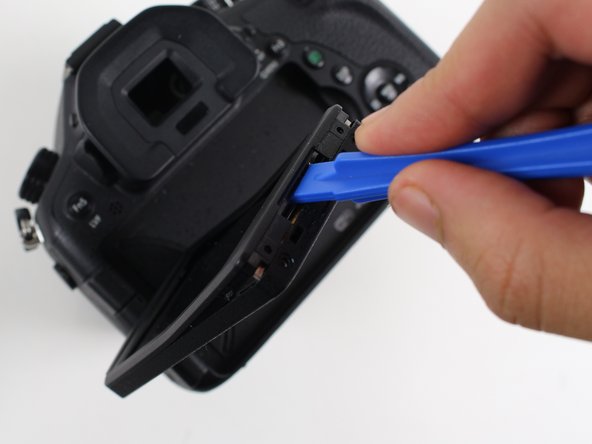
Swing out the screen on the back of your camera by 90 degrees.
-
Remove the two 2.2 mm Phillips #00 screws on the outside edge of the screen.
-
-
-
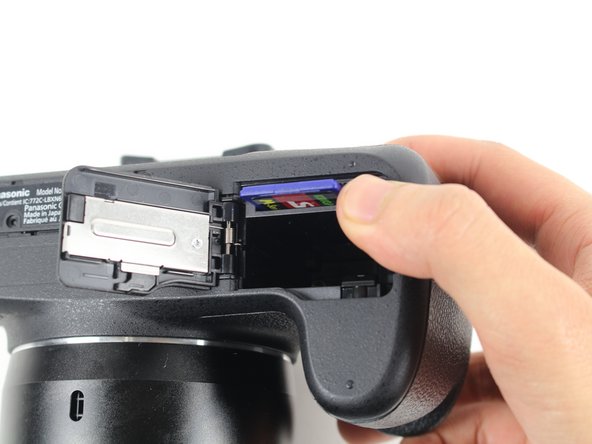
Push in on the SD card inside the battery housing.
-
Pull out the SD card.
-
Close the battery housing door.
-
-
-
Remove the two 5.2 mm Phillips #00 screws that are 1) below the label and 2) above the tripod mount hole on the bottom of the camera.
-
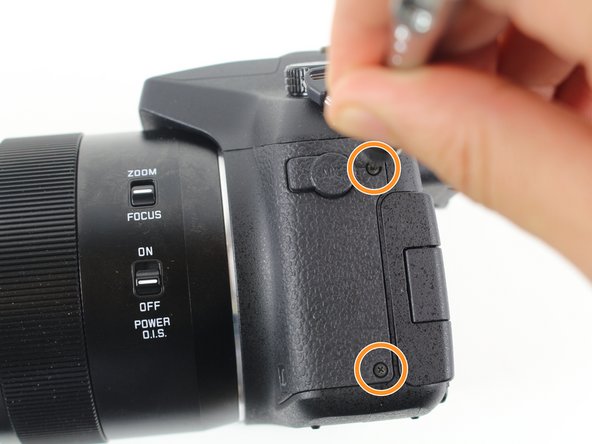
Remove the two 5.5 mm Phillips #00 screws on the side of the camera with the MIC jack.
-
Remove the two 7.0 mm Phillips #00 screws that are 1) above and 2) below the HDMI panel.
-
-
-
-
Remove the two 7.0 mm Phillips #00 screws on the underside of the viewfinder.
-
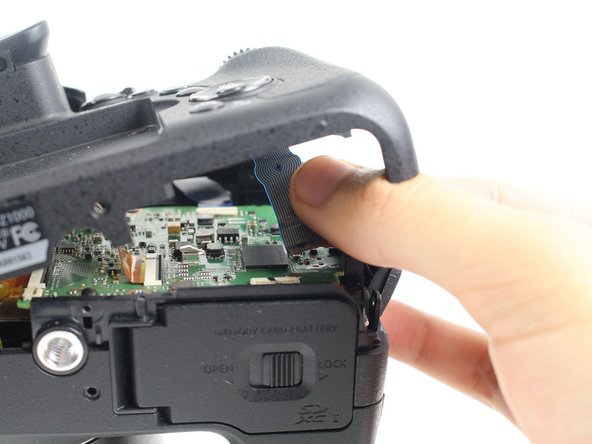
Pull out the viewfinder.
-
-
-
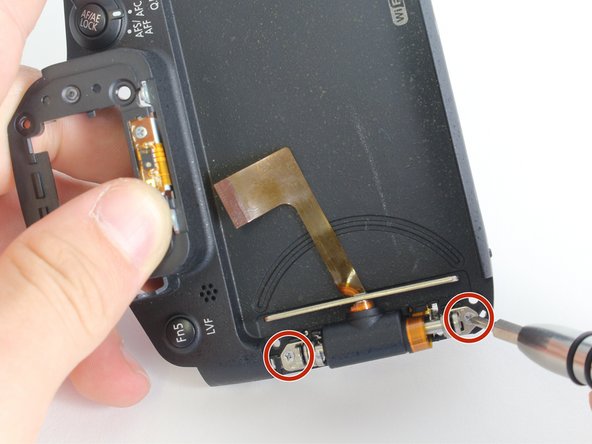
Carefully unhook the aperture motor from its two pegs and slowly move it towards the opposite side of the lens.
-
You may need to remove the Phillips screw that holds a trapezoid-shaped piece of the electronic ribbon.
-
While holding on to the aperture motor, very carefully use tweezers to unclip the electronic ribbon on the side of the lens.
-
-
-
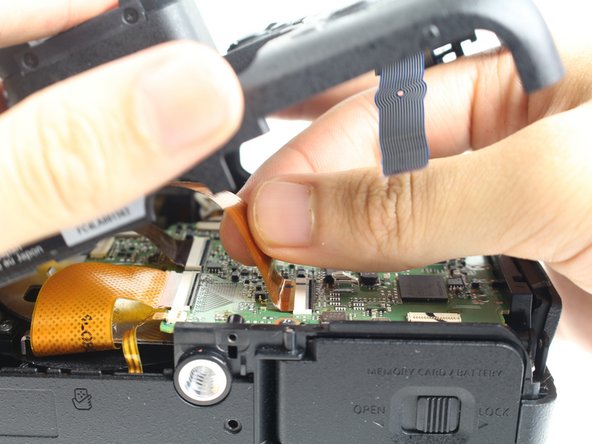
Using tweezers, very carefully pull to disconnect the three ZIF connector ribbons beside the MIC jack.
-


To reassemble your device, follow these instructions in reverse order.
To reassemble your device, follow these instructions in reverse order.
Cancel: I did not complete this guide.
18 other people completed this guide.

Team

Cal Poly, Team 70-5, Forte Winter 2016 Member of Cal Poly, Team 70-5, Forte Winter 2016
CPSU-FORTE-W16S70G5
4 Members
15 Guides authored
24 Comments
I need the ribbon cable that connects the hot shoe to the motherboard
Is there no capacitor for the flash to be concerned about in this camera?
My screen is full of vertical lines and pinkish screen what would the problem with the camera be? It started when I was in very humid place.I bought the camera from Amazon .com but it does not have a variant because it is an international model.
Do you know where to get it repaired?
My FZ1000 had the problem that the zoom lever was not returning to its middle position.
It is caused by a broken torsion spring inside the button. I replaced it by some spring I made myself starting from a spring of a pen :-)
For this repair it is not needed to remove the display from its housing, steps 19-25 can be skipped as well.