
Olympus Stylus Tough-8010 Side Panel Replacement

What you need

  1. Olympus Stylus Tough-8010 Side Panel Replacement, Side Panel: step 1, image 1 of 3 Olympus Stylus Tough-8010 Side Panel Replacement, Side Panel: step 1, image 2 of 3 Olympus Stylus Tough-8010 Side Panel Replacement, Side Panel: step 1, image 3 of 3
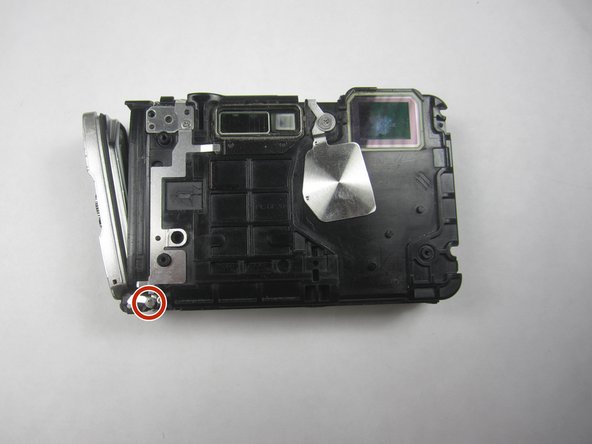
    • Remove the three screws (3.2mm) from the front panel using a T-6 screwdriver.

    • Take off the smaller front panel cover.

    • Carefully remove the larger front cover.

  2. Olympus Stylus Tough-8010 Side Panel Replacement: step 2, image 1 of 3 Olympus Stylus Tough-8010 Side Panel Replacement: step 2, image 2 of 3 Olympus Stylus Tough-8010 Side Panel Replacement: step 2, image 3 of 3
    • Remove the top two screws (4.1mm) using a #000 Phillips head screwdriver.

    • Remove the two screws (7.9mm) near the control pad. Set metal connector aside.

    • Remove the side panel casing.

  3. Olympus Stylus Tough-8010 Side Panel Replacement: step 3, image 1 of 3 Olympus Stylus Tough-8010 Side Panel Replacement: step 3, image 2 of 3 Olympus Stylus Tough-8010 Side Panel Replacement: step 3, image 3 of 3
    • Using a #000 Philips head screwdriver, remove the two screws (4.1mm) on the right side of the camera.

    • Remove the two screws (4.1mm) from the bottom of the camera.

    • Remove the single screw (3.2mm) from the front of the camera.

  4. Olympus Stylus Tough-8010 Side Panel Replacement: step 4, image 1 of 2 Olympus Stylus Tough-8010 Side Panel Replacement: step 4, image 2 of 2
    • Carefully remove the front panel piece.

    • Remove the screw (7.9mm) from the bottom left hand corner using a #000 Phillips head screwdriver.

  5. Olympus Stylus Tough-8010 Side Panel Replacement: step 5, image 1 of 3 Olympus Stylus Tough-8010 Side Panel Replacement: step 5, image 2 of 3 Olympus Stylus Tough-8010 Side Panel Replacement: step 5, image 3 of 3
    • Slightly bend the metal that is covering the side panel axle.

    • Using a paperclip, completely push out the metal bar that holds the side panel to the camera.

    • Remove the side panel door.

Conclusion

To reassemble your device, follow these instructions in reverse order.

James G Payne

Member since: 03/23/15

225 Reputation

2 Guides authored

Team

Baylor, Team 7-15, Williams Spring 2015 Member of Baylor, Team 7-15, Williams Spring 2015

BU-WILLIAMS-S15S7G15

3 Members

12 Guides authored

0 Comments

Add Comment

View Statistics:

Past 24 Hours: 0

Past 7 Days: 0

Past 30 Days: 3

All Time: 338