
Nostalgia Electrics RHP-310 Wiring Repair

What you need

  1. Nostalgia Electrics RHP-310 Wiring Repair, Power Switch: step 1, image 1 of 1
    • Unplug the popper.

    • Lift the lid up to remove it.

  2. Nostalgia Electrics RHP-310 Wiring Repair: step 2, image 1 of 1
    • Lay the popper on its side.

    • Remove the five 12mm Philips #2 screws around the perimeter of the base with the Phillips #2 screwdriver.

    • Remove the two 15mm Philips #2 screws in the center of the base with the Phillips #2 screwdriver.

    • Put the removed screws in a safe place, they will be needed later to reattach the housing to the base.

  3. Nostalgia Electrics RHP-310 Wiring Repair: step 3, image 1 of 1
    • Flip the base over to view the interior of the base panel.

    • Unscrew the two 10 mm Philips #2 screws from the base panel.

    • Remove the base and set it aside.

  4. Nostalgia Electrics RHP-310 Wiring Repair: step 4, image 1 of 2 Nostalgia Electrics RHP-310 Wiring Repair: step 4, image 2 of 2
    • Locate the power switch connected to the side of the housing.

    • Pinch the sides of the power switch.

    • Push the power button up and out of the housing.

  5. Nostalgia Electrics RHP-310 Wiring Repair: step 5, image 1 of 1
    • Remove the wires connected to the power switch that should be detached from the housing.

    • Gently pry the wires loose from the power switch with the plastic opening tool.

    • The wires should easily pop out from the power switch.

  6. Nostalgia Electrics RHP-310 Wiring Repair: step 6, image 1 of 1
    • Remove the power switch from the housing unit.

    • You can now replace the power switch, if necessary.

  7. Nostalgia Electrics RHP-310 Wiring Repair, Replacing Housing: step 7, image 1 of 2 Nostalgia Electrics RHP-310 Wiring Repair, Replacing Housing: step 7, image 2 of 2
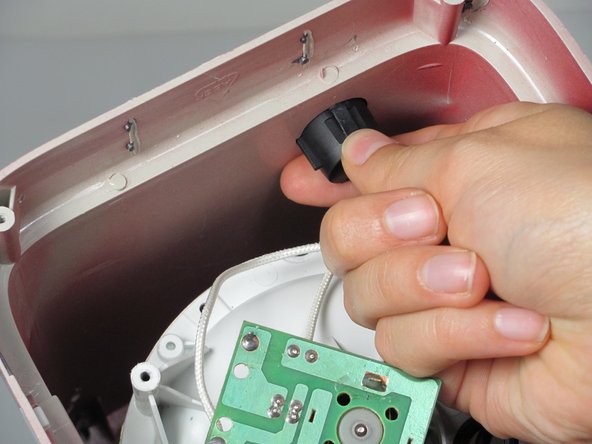
    • Gently remove the heating component from the popper.

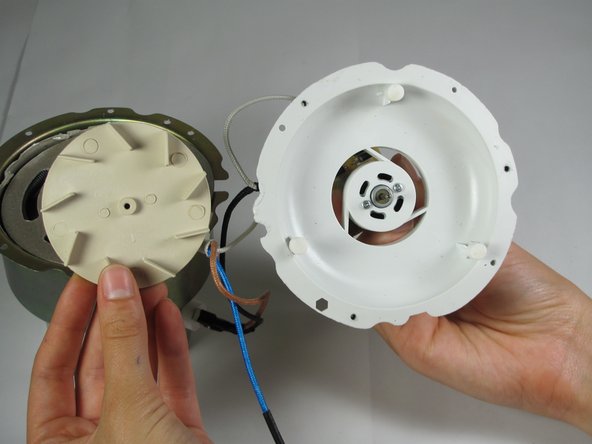
    • Unscrew the four screws (11mm Philips #2 screws) that connect the white top to the housing.

    • Save the screws from this step. You will need them to connect the new housing to the white top.

  8. Nostalgia Electrics RHP-310 Wiring Repair: step 8, image 1 of 1
    • Remove the white top from the housing.

  9. Nostalgia Electrics RHP-310 Wiring Repair, Replacing Fan: step 9, image 1 of 1
    • Unscrew the three 10 mm Philips #2 screws that hold the heating component together.

    • Keep the screws in a safe place. You will need them to put the heating component back together.

  10. Nostalgia Electrics RHP-310 Wiring Repair: step 10, image 1 of 1
    • Pull the heating component apart.

  11. Nostalgia Electrics RHP-310 Wiring Repair: step 11, image 1 of 2 Nostalgia Electrics RHP-310 Wiring Repair: step 11, image 2 of 2
    • Locate the fan.

    • Pull the fan off the motor.

    • Do not pull too hard or you will break the motor.

  12. Nostalgia Electrics RHP-310 Wiring Repair: step 12, image 1 of 1
    • You can now replace the fan. If there is debris, clean it out.

  13. Nostalgia Electrics RHP-310 Wiring Repair, Nostalgia Electrics RHP-310 Wiring Repair: step 13, image 1 of 1
    • Take the heating coil out of complete heating component.

  14. Nostalgia Electrics RHP-310 Wiring Repair: step 14, image 1 of 1
    • Visually check the wires for frayed wires.

    • Make sure that the wires are completely connected to a port.

  15. Nostalgia Electrics RHP-310 Wiring Repair: step 15, image 1 of 1
    • If you see a wire that is not connected, solder it back into place.

    • These websites might be helpful in soldering: Wikipedia Theoatc

    • Also, use a digital multi-meter to check to make sure there is a current through the wire. If the meter does not read, you might need to replace all the wires.

    • This website may be helpful in with wiring: How Stuff Works

  16. Nostalgia Electrics RHP-310 Wiring Repair: step 16, image 1 of 1
    • This website will help with reconnecting wires:eHow

Conclusion

To reassemble your device, follow these instructions in reverse order.

Dana Clarke

Member since: 09/26/12

50 Reputation

6 Guides authored

Team

Cal Poly, Team 16-57, Forte Fall 2012 Member of Cal Poly, Team 16-57, Forte Fall 2012

CPSU-FORTE-F12S16G57

5 Members

6 Guides authored

0 Comments

Add Comment

View Statistics:

Past 24 Hours: 0

Past 7 Days: 0

Past 30 Days: 4

All Time: 880