Introduction
The autofocus motor in this lens is known to fail by either becoming sluggish, screechy or stopping altogether, this can be due to wear or contamination.
Luckily, the motor can be serviced without removing any glass lens elements so there is no risk to the optical alignment. Regardless, care should be taken not to introduce dust into the lens body.
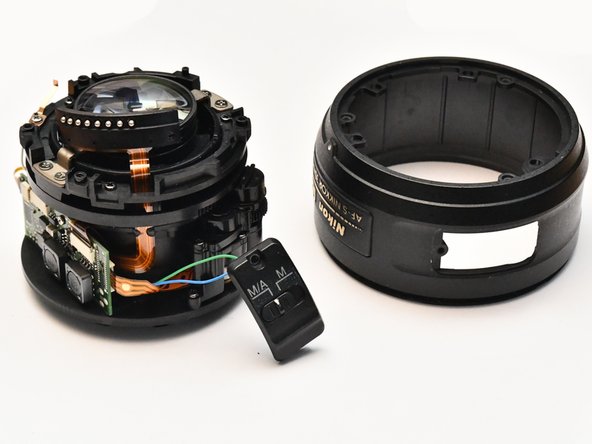
The AF/MF switch is connected with two thin wires which are very fragile and so extreme care should be taken unless the repairer is confident in their soldering technique.
Use the correct size screwdriver for each screw or damage is likely. The screwdrivers must have thin necks to reach around nearby housings.
What you need
-
-
Wipe the lens body down with a microfiber cloth to remove skin oils which could later be carried to the internal parts.
-
Remove the lens hood and both lens caps to allow full access.
-
-
-
Using a pry tool or small flat head screwdriver, lift up plastic cover on the front of the lens. Pry from the notch on the outside, far away from the glass.
-
This cover is attached with double-sided tape which can usually be re-used, otherwise replaced with any off the shelf thin double sided tape.
-
-
-
Remove the 3 PH00 screws and lift off the manual focus ring and filter thread parts. The colour of the screws may vary between batches.
-
No need to worry about the mechanical alignment of these parts when reassembling. Just make sure the white dot on the filter thread part is at the top (badge side) so your lens hood sits correctly.
-
-
-
Turn the lens over
-
Remove all 6 PH000 screws around the black centre part.
-
The small fat headed one goes in the small hole on the opposite side of the ring to the electrical contacts.
-
The three larger ones go in the larger holes.
-
The remaining two small ones hold the electrical contacts in place and should be installed last when reassembling, ensuring the black plastic sits flush.
-
-
-
-
Remove the 4 PH00 screws on the face of the lens mount.
-
Lift away the lens mount without tugging on the electrical contacts which are still attached with a flat flex cable inside the lens. You may have to tuck this out of the way but do not apply any significant force. When reinstalling this mount, ensure the sealing gasket is even on the perimeter and hasn't been pushed out of place.
-
Under the lens mount there will be two silver spacer disks. These should be removed and placed in order with the rest of the disassembled components.
-
In my copy of the lens, the thinnest spacer is closer to the front of the lens.
-
Do not remove the lens body yet, even though it is now loose.
-
-
-
With the whole gear assembly now freed, remove the three PH00 screws securing the motor in place. Do not touch the castellated piezo-electric material as it being clean is crucial to the operation of the ultrasonic motor.
-
-
-
At this point, you can either clean the motor with isopropyl alcohol and a paintbrush or replace it entirely.
-
A few people have reported online that they have had success cleaning their motors, but this is not always the case. Replacements can be found on AliExpress or sometimes eBay.
-
Use clean gloves when handling the motor or ideally don't touch the critical sections at all. Nikon's service manuals for similar AF-S lenses also discourage touching the motor.
-
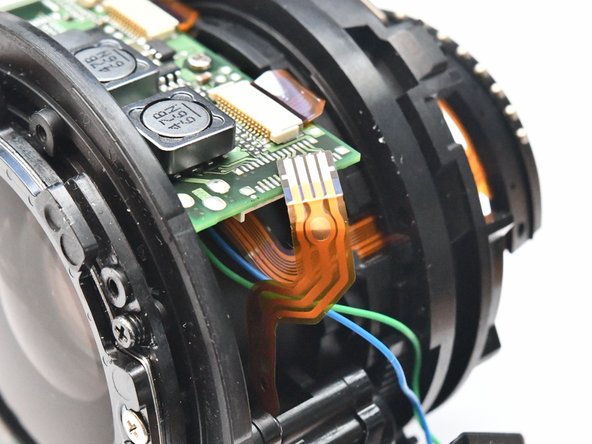
Wipe the end of the flat flex cable with isopropyl alcohol before reinserting it into the connector.
-
Personally, the author had success after cleaning their motor. The issue they faced was that the lens would focus when facing down but not upward. After cleaning it works fast and reliably, but with a squeak.
-


To reassemble your device, follow these instructions in reverse order. Ensure the encoder and motor wires are connected. Do not over tighten screws, especially on the lens mount.
To reassemble your device, follow these instructions in reverse order. Ensure the encoder and motor wires are connected. Do not over tighten screws, especially on the lens mount.
Cancel: I did not complete this guide.
7 other people completed this guide.
5 Comments
My AF motor was making a loud noise for a long time, but was focusing properly. But later it got stuck. Then i happened upon this guide. Cleaning the motor with iso propyl alcohol worked for me (I even took apart the motor. It was not turning at all) Thank you so much for the guide!
The screws are not PH (Phillips), but JIS (Japan Industry Standard). The difference may be enough to strip the screws. JIS screwdrivers are easily obtainable online, e.g. the brand Vessel.
Hi, nice explanation on how to replace/repair the motor. I tried cleaning my 35mm f1.8G DX lens and removed the rear lens group but unfortunately I did not take note of where the focus ring was and the orientation of the rear lens group when I removed it. Does anyone know how to re-instate this group. There are two guides that go into slots of this group but I'm not sure how to put it back. Right now it makes a clunk when I turn the lens upside down. Thank you.
Great guide
Trully useful thanks
Hello, if it still squeaks, I would think about lubrication. Maybe lithium grease?